Guide
1. Getting Started
When will I get charged?
Setting Up Your Account:
In order to save recipes, create meal plans, and generate shopping lists, you will need an account.
If you do not have an account your recipes will be saved to the community list and will not be available for meal planning or shopping list generation, but will be available for purchase one recipe at a time.
- Open the app, tap the Sign Up link at the top of the app.
- Enter your email, create a password, and click Sign Up.
- You will be automatically logged in with your new credentials.
2. Adding Recipes
From the home page, you can use one of the following methods to add recipes:
- Photo Input: Upload an image of a recipe card or meal and r2k will digitize and save it as a Recipe Card forever. You will be able to change the recipe card image by editing the recipe and the original photo will be saved with the recipe forever, so you can always keep a copy of mom's handwritten recipe for reference.
- URL Input: Paste a recipe URL, and the app will automatically create a recipe card. This can be from a website, or social media post. You can copy urls at the top of the web browser of find a share button on the page that has a copy link option. See a list of recipe websites that are supported at the bottom of this page.
- Text Input: Copy and paste the recipe text into the app. You can also type instructions for a specific recipe. The app will create and format your request it into a recipe card.
- Community Recipes: Each of the community recipes can be added to your account's recipe list by simply click on the My Recipes bookmark icon.
- Saved Recipe: The new recipe will be saved to your account's recipe list, if your are logged in. If you are not logged in the recipe will be saved to the community recipe list.
- Chrome Extension: We offer a chrome extension that will allow you to import any website's recipe with a single click. You can download the extension from the Chrome Web Store.
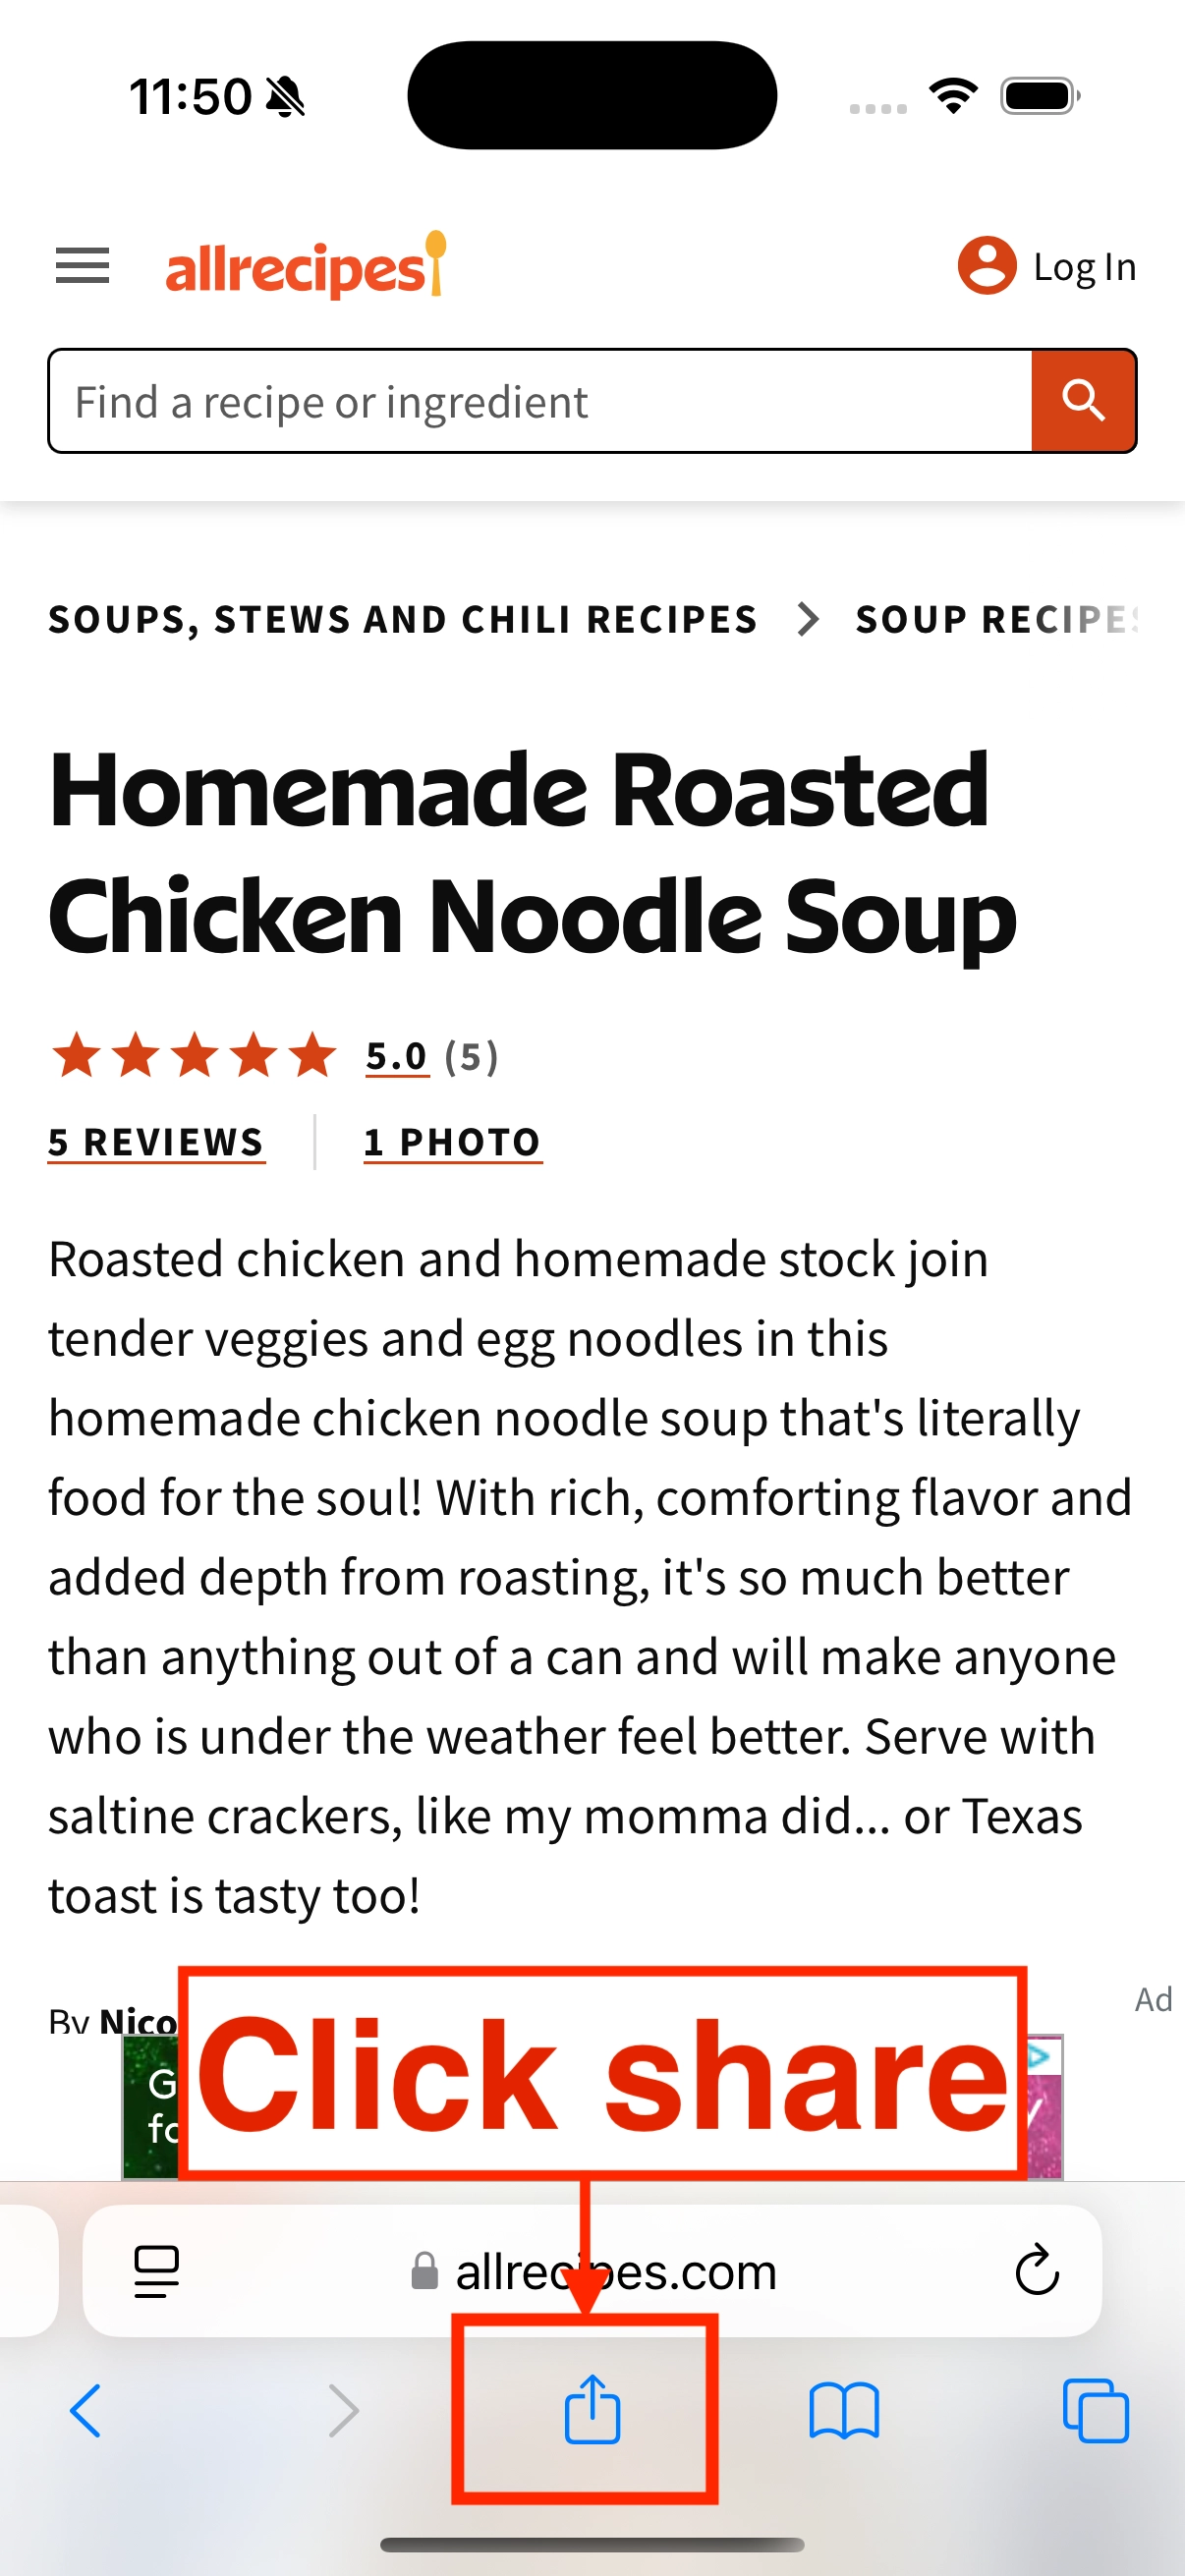
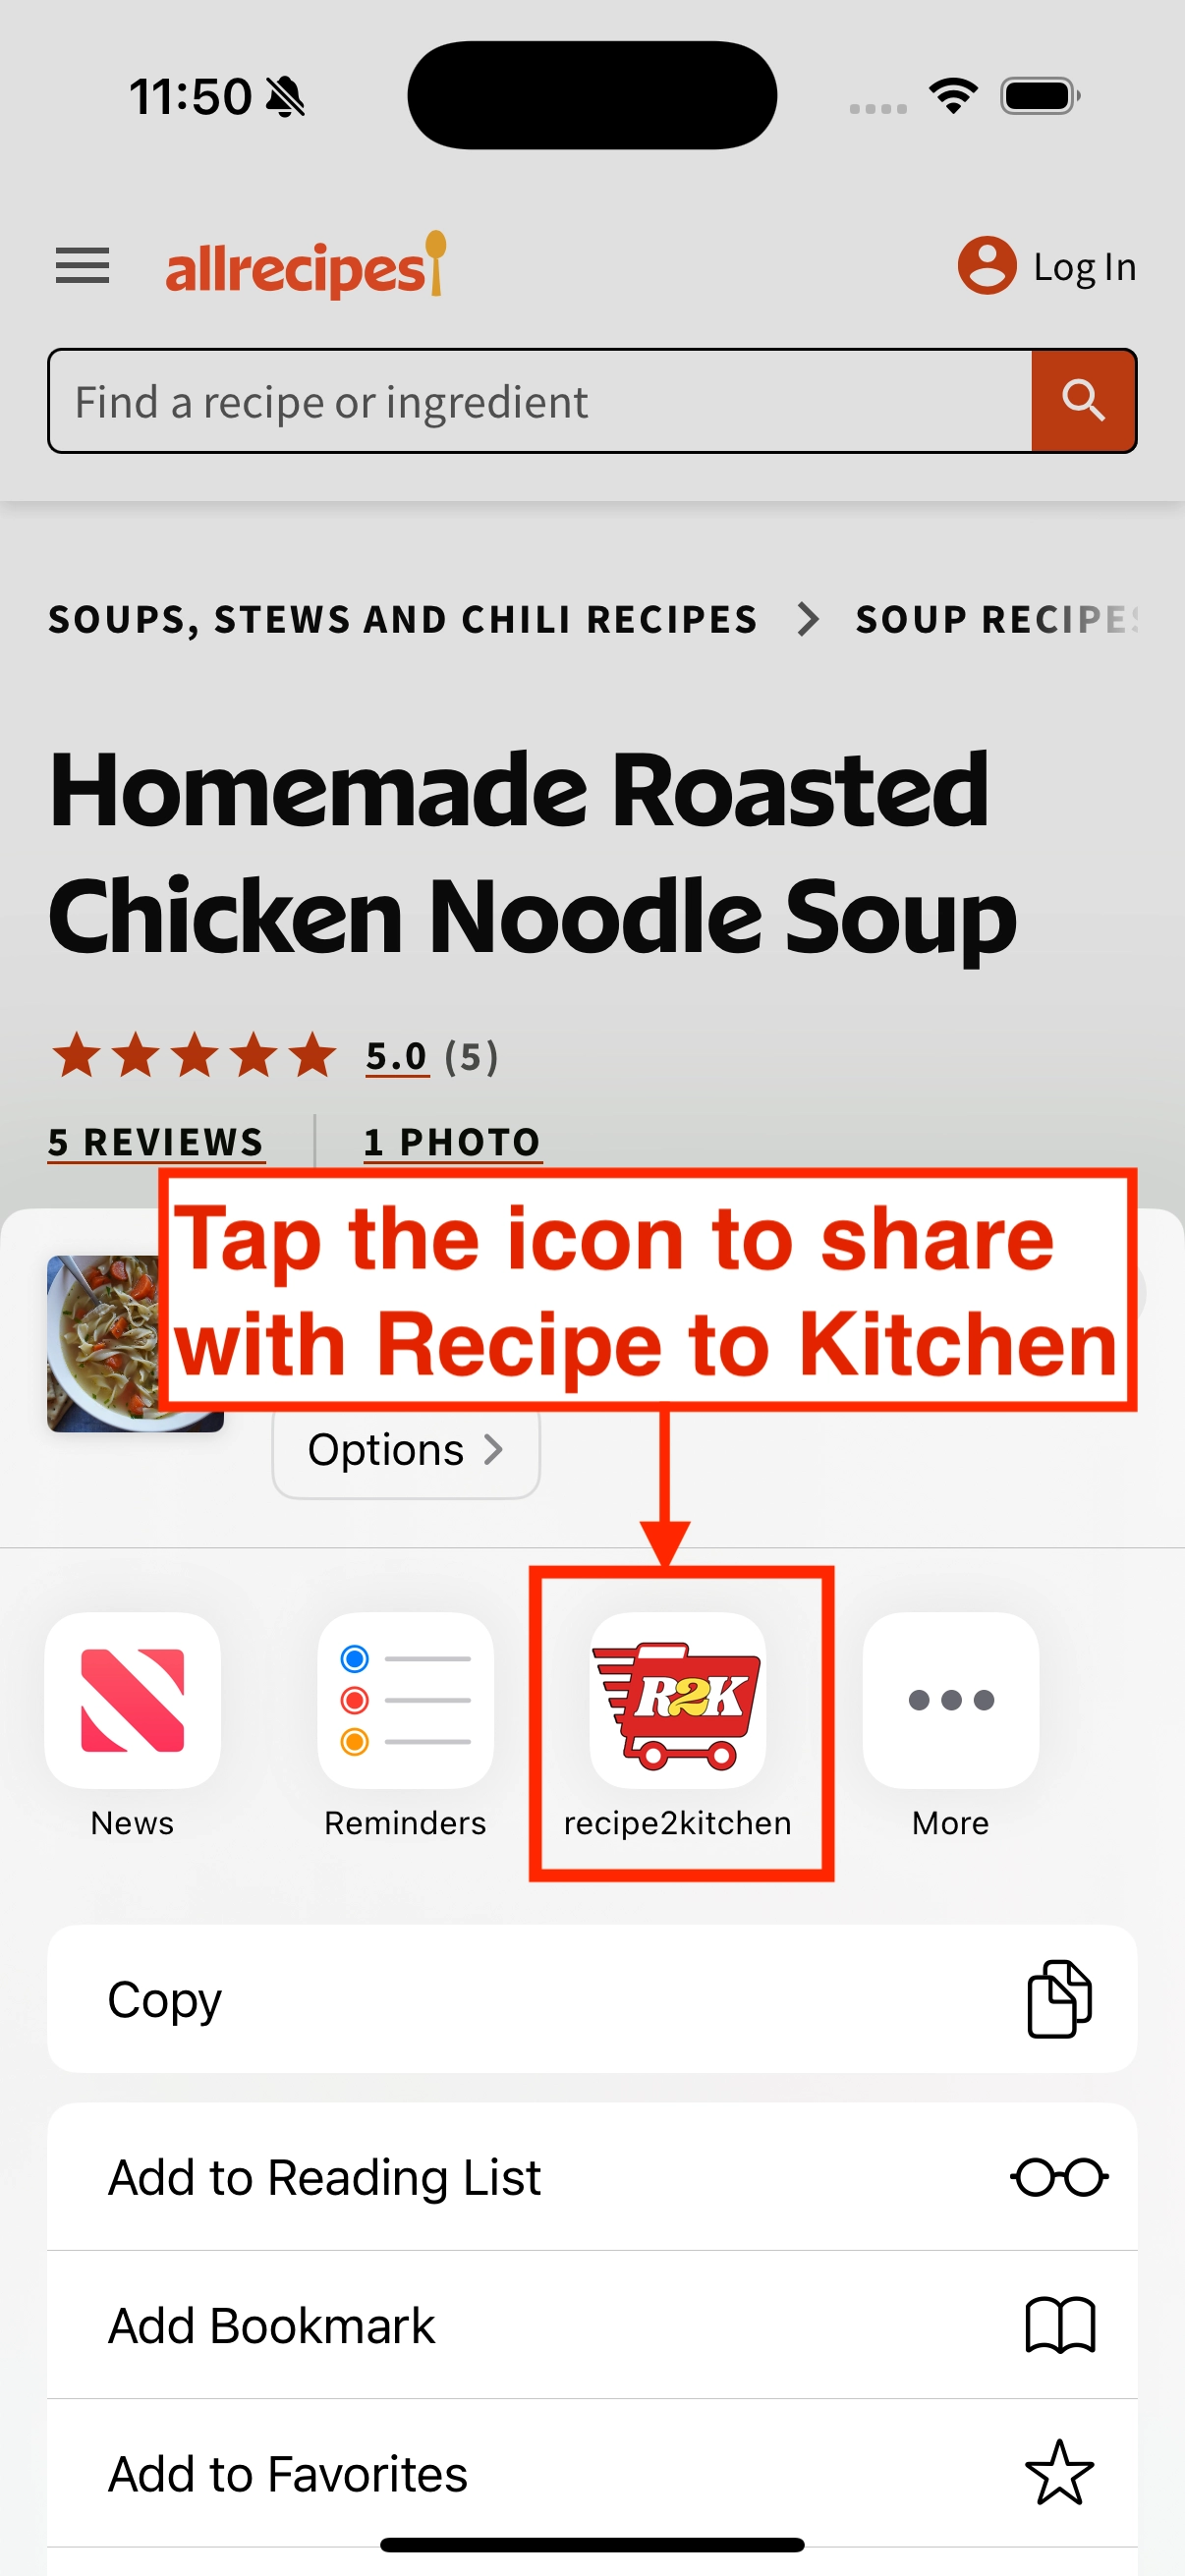
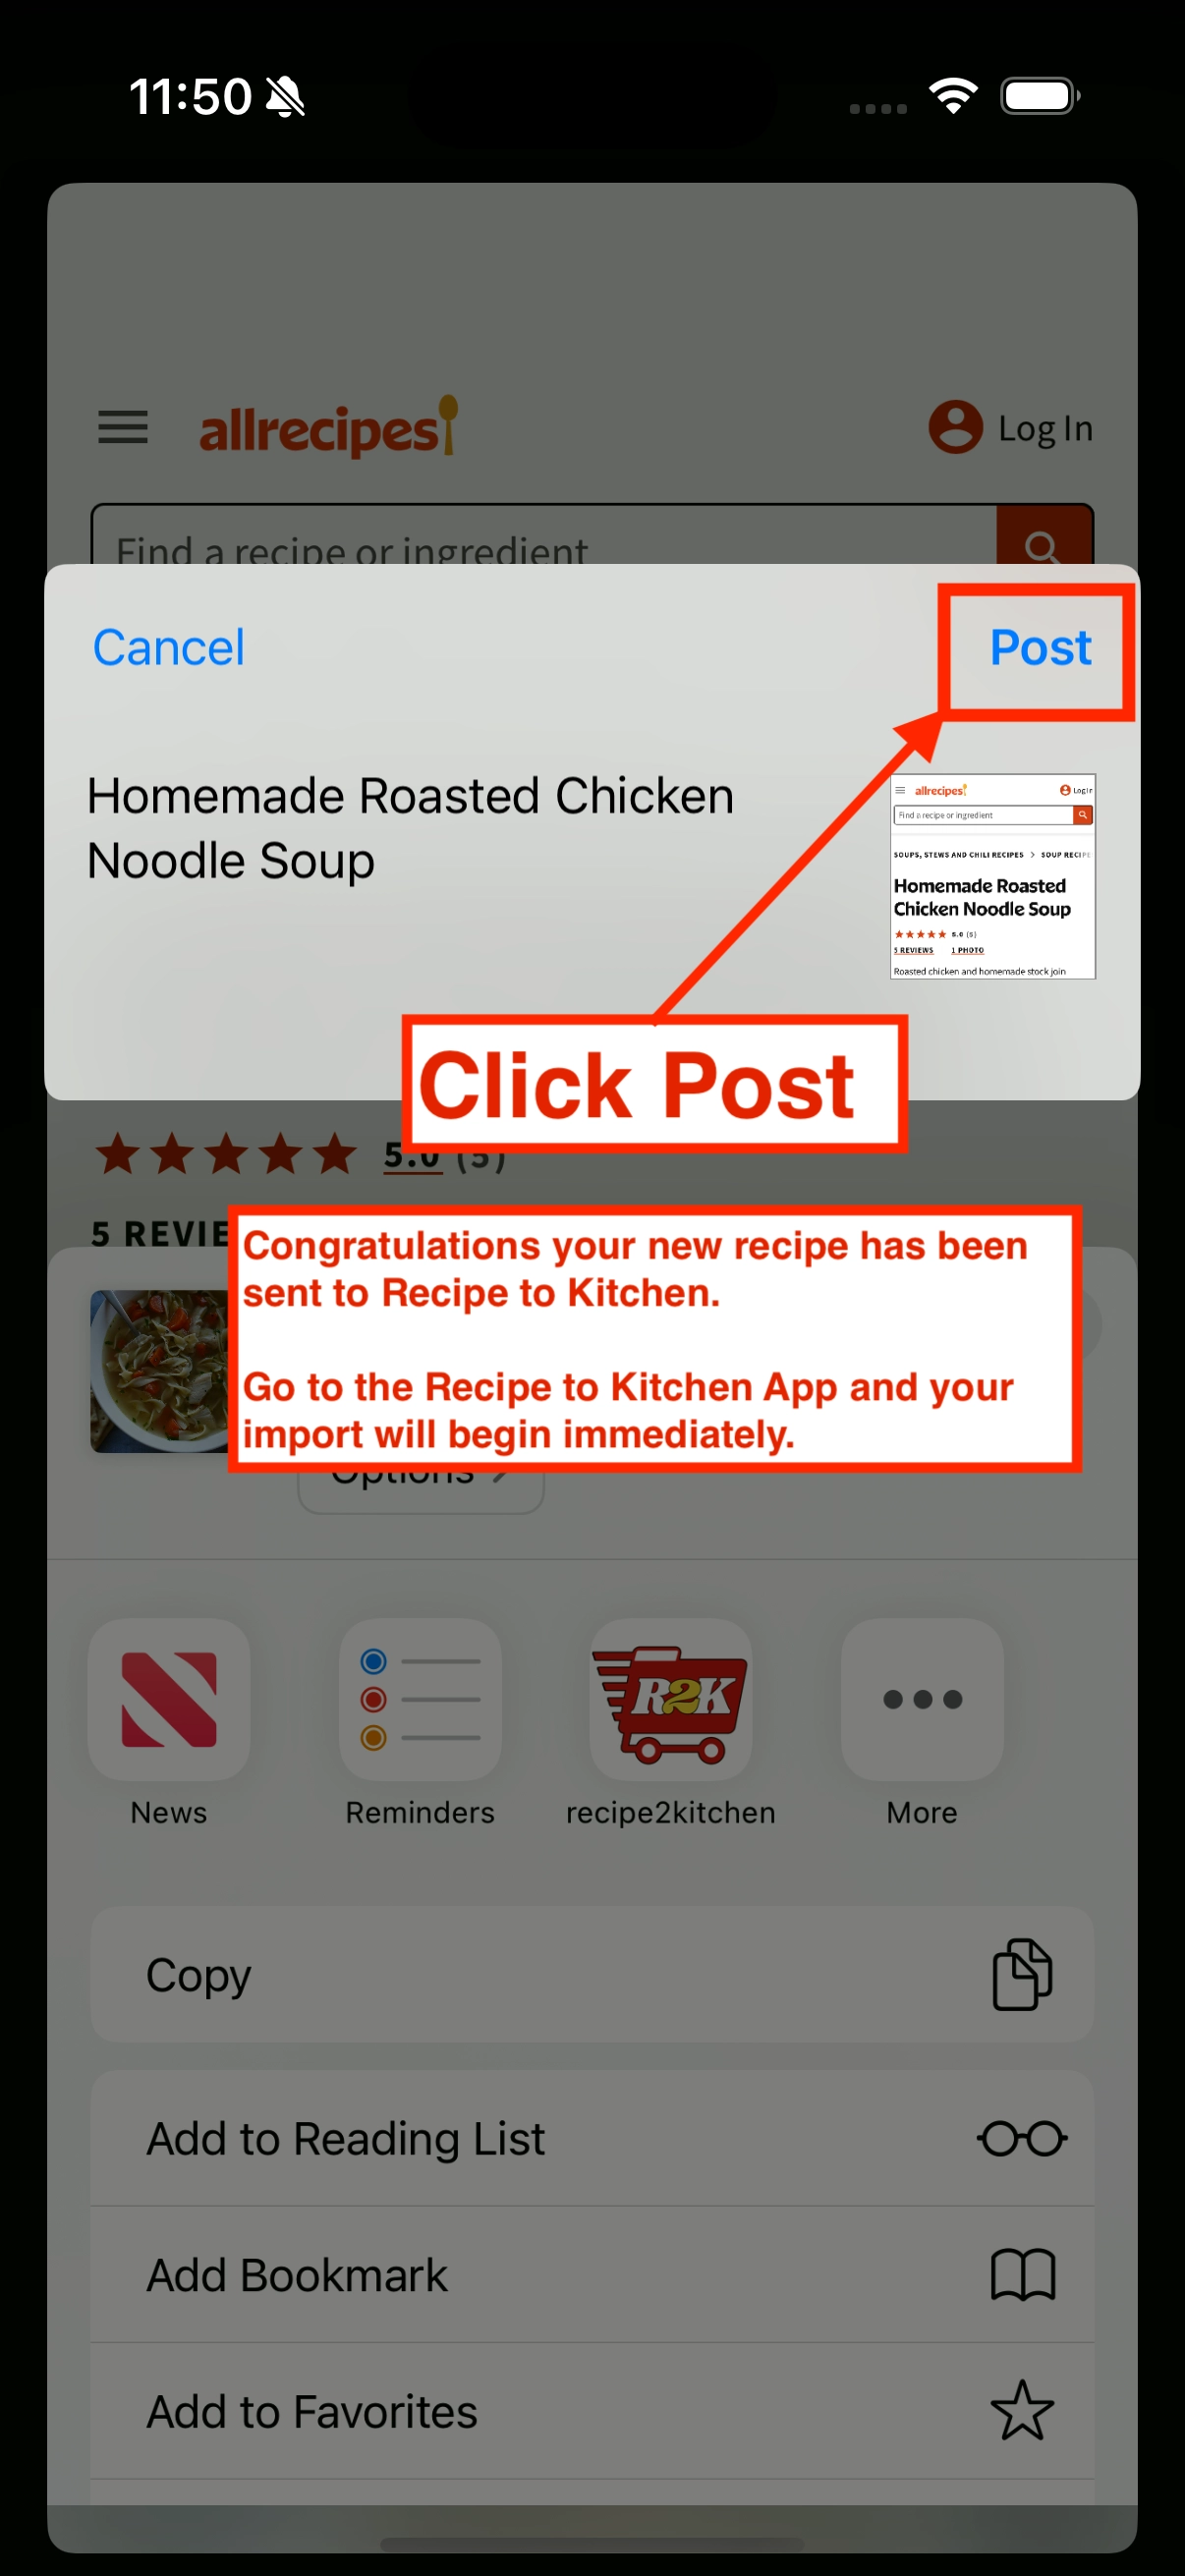
- Safari Share Sheet: On the Safari browser on the iPhone and iPad, you can use the share sheet to save recipes to your account.
3. Organizing Recipes
Recipes are organized in a list view. You can sort alphabetically, filter recipes by favorites, or filter using text. Each recipe has a notes field which can be accessed by filter and therefore can be used to organize recipes by custom categories such as John's Favorites, or Mom's Recipes.
4. Meal Planning
Recipes can be added to a meal plan one time, daily, or weekly. The Meal Planner includes nutritional information total for each day.
5. Shopping List
Multiple recipes can be added to one shopping list. Shopping list can be used for in-store shopping with a convenient checklist UI or just to review what you want to purchase from Instacart or your favorite Kroger store before adding to your online cart.
Items can be edited, deleted, or added to the shopping list. Adding items can be done with our smart add feature. Just paste a list of items and the app will automatically add them to the shopping list in the appropriate categories.
You can also take a photo of a list and the app will digitize the list and add it to the shopping list.
Take a photo of some fruits and vegetables, the package from an item you are deleting, or even a grocery store receipt and the app will automatically add the items to the shopping list.
6. Interactive Features
Sharing Recipes: You can share any recipe, with the community, with another member, by email, by text, or by social media.
Ratings & Comments: Community recipes can be rated and commented on by account holders.
7. Supported Recipe Websites
The following websites are supported for URL input. If you have a favorite website that is not listed, please let us know and we will add it to the list.
- AllRecipes
- America's Test Kitchen
- BBC Good Food
- Bigger Bolder Baking
- Budget Bytes
- Cookie + Kate
- David Lebovitz
- delicious. Magazine
- Delish
- Epicurious
- Food and Wine
- Food Network
- Fork Knife Swoon
- The Forked Spoon
- Gluten Free & More
- Jo Cooks
- Just One Cookbook
- Kitchen Stories
- Love and Lemons
- Mashed
- Minimalist Baker
- The Modern Proper
- Naturally Ella
- NYT Cooking
- Pinch of Yum
- The Pioneer Woman
- RecipeTin Eats
- Sally's Baking Addiction
- Saveur
- Serious Eats
- Simply Delicious
- Simply Recipes
- Simply Recipes
- Smitten Kitchen
- Southern Living
- Spend With Pennies
- The Spruce Eats
- The Spruce Eats
- Sugar Spun Run
- Taste.com.au
- Taste of Home
- Tasting Table
- Tasty
- The Woks of Life