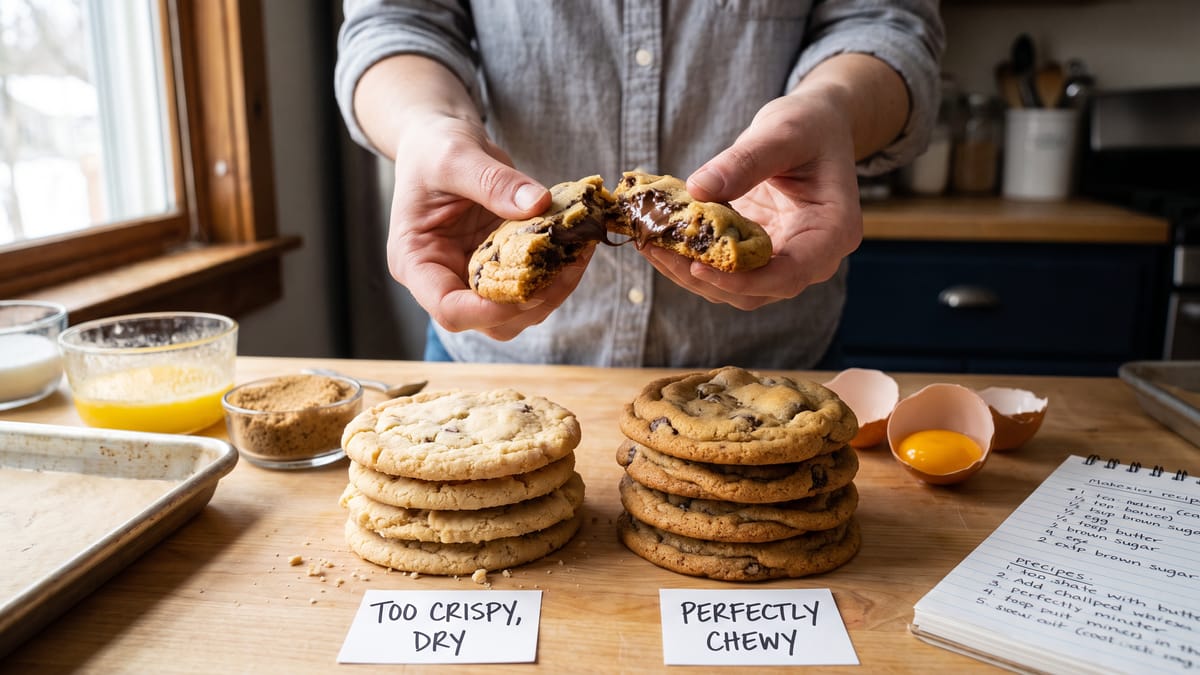
Why Your Chocolate Chip Cookies Aren’t Chewy Enough—and How to Fix Them
Ah, the humble chocolate chip cookie. A golden-brown disc of pure comfort, a symphony of sweet and salty, a textural marvel. Yet, for many home bakers, the quest for the perfectly chewy chocolate chip cookie remains an elusive culinary Everest. We’ve all been there, haven’t we? That moment of hopeful anticipation as we pull a fresh batch from the oven, only to bite into a cookie that crumbles like a sandcastle or snaps like a twig. It’s a disheartening experience, a betrayal of the promise held within those melty chocolate morsels.
But fear not, fellow cookie enthusiasts! The journey to chewy cookie nirvana is not fraught with insurmountable obstacles. It’s a path paved with understanding, a sprinkle of science, and a dash of technique. We're here to demystify the art of the chewy chocolate chip cookie, dissecting the common culprits behind cookie crispness and arming you with the knowledge to bake batches that boast that irresistible bend and delightful give. Let's embark on this delicious expedition together, transforming your cookie woes into chewy triumphs.
The Foundation of Chewiness: Understanding Your Ingredients
Before we even think about mixing, it’s crucial to understand the role each ingredient plays in the final texture of our beloved cookies. Think of it like building a house; a strong foundation is paramount.
Flour: The Glutenous Backbone
Flour is more than just a dry filler; it’s the structural engineer of our cookies. The type of flour we choose significantly impacts chewiness. All-purpose flour, the workhorse of many kitchens, contains a moderate amount of protein, which develops into gluten when hydrated. Gluten is what gives baked goods their structure and, crucially, their chew.
If your cookies are consistently too cakey or crumbly, you might be using too much flour, or perhaps a flour with too low a protein content. Cake flour, for instance, has a lower protein content and will yield a more tender, less chewy cookie. Bread flour, on the other hand, with its higher protein content, can lead to a chewier, almost bread-like texture. For the ideal chewy chocolate chip cookie, a good quality all-purpose flour is usually the sweet spot. We want enough gluten development for chew, but not so much that our cookies become tough.
Sugar: More Than Just Sweetness
Sugar is a fascinating ingredient, playing a dual role in both flavor and texture. In the realm of chewiness, it’s a true game-changer. We typically encounter two main types of sugar in cookie recipes: granulated sugar and brown sugar.
Granulated sugar, or white sugar, contributes to crispness and spread. It caramelizes beautifully, giving cookies those desirable golden edges. However, too much granulated sugar can lead to a very crisp, almost brittle cookie.
Brown sugar, on the other hand, is our secret weapon for chewiness. It’s essentially granulated sugar with molasses added back in. That molasses is key; it’s hygroscopic, meaning it attracts and retains moisture. This moisture retention is what keeps our cookies soft and chewy long after they’ve cooled. A higher ratio of brown sugar to granulated sugar in your recipe is a direct path to chewier cookies. Don't be afraid to experiment with increasing the brown sugar and slightly decreasing the granulated sugar if your recipe leans heavily on the latter.
Fats: The Tenderizers and Flavor Carriers
Butter, glorious butter! It’s responsible for so much of the rich flavor and tender texture we crave in cookies. But even within the realm of butter, there are nuances.
Unsalted butter is generally preferred for baking because it gives us control over the salt content. The temperature of your butter also matters immensely. Room temperature butter, softened but not melted, is crucial for proper creaming with sugar, which incorporates air and creates a light, tender crumb.
Melted butter, while convenient, can lead to a denser, chewier cookie, but it also encourages more spread and can make them flatter. Sometimes, a combination of melted and softened butter is used to achieve a specific texture profile. If your cookies are consistently too dry or crumbly, ensure you’re using enough fat and that it’s at the correct temperature for the recipe. Some recipes even call for a touch of vegetable oil or shortening; these fats can also contribute to a softer, chewier texture by interfering with gluten development.
Eggs: The Binders and Moisture Providers
Eggs are the unsung heroes of many baked goods, acting as binders, leaveners, and moisture providers. In cookies, the ratio of egg yolks to whites can influence chewiness.
Egg whites primarily contribute to structure and can make cookies a bit crispier. Egg yolks, rich in fat and lecithin, add richness, tenderness, and contribute significantly to chewiness. If your cookies lack that desirable bend, consider adding an extra egg yolk to your recipe. It's a small tweak that can yield surprisingly dramatic results. Also, ensure your eggs are at room temperature; they emulsify better with other ingredients, creating a more cohesive dough.
Leavening Agents: The Rise and Fall
Baking soda and baking powder are responsible for the lift and texture in our cookies. They react with acids and heat to produce carbon dioxide gas, creating those lovely air pockets.
Baking soda, when activated by an acid (like brown sugar or buttermilk), helps cookies spread and promotes browning, often contributing to a chewier texture. Baking powder, a complete leavener, provides more lift and can sometimes lead to a cakier cookie if used in excess. A balance of the two, or sometimes just baking soda, is common in chewy chocolate chip cookie recipes. Too much leavener can result in a cakey texture that lacks the desired chew.
The Art of Mixing: Don’t Overdo It
We’ve gathered our ingredients, understood their roles, and now it’s time to bring them together. The mixing process is where many a chewy cookie dream can go awry.
Creaming Butter and Sugar: The Foundation of Air
The initial step of creaming softened butter with sugar is more important than you might think. This process incorporates air into the butter, creating tiny pockets that will expand during baking, contributing to the cookie’s texture. Cream until the mixture is light, fluffy, and pale in color, but don't go overboard. Over-creaming can incorporate too much air, leading to a cakier cookie.
Adding Eggs: One at a Time
When adding eggs, incorporate them one at a time, mixing well after each addition. This ensures they are fully emulsified into the butter-sugar mixture, creating a stable base for the dough. Scrape down the sides of the bowl frequently to ensure everything is evenly combined.
The Flour: Mix Just Until Combined
This is perhaps the most critical step for achieving chewiness. Once you add the dry ingredients to the wet, mix only until just combined. Overmixing flour develops gluten excessively, leading to tough, dry, and less chewy cookies. As soon as you see no more streaks of dry flour, stop mixing. A few lumps are perfectly fine; in fact, they’re often preferred.
The Magic of Chilling: A Step You Shouldn’t Skip
We know, we know. The urge to bake those cookies immediately is almost irresistible. But trust us on this one: chilling your cookie dough is a game-changer for chewiness and flavor.
Hydration and Flavor Development
Chilling allows the flour to fully hydrate, meaning it absorbs more moisture from the other ingredients. This leads to a more tender and chewier cookie. Furthermore, chilling allows the flavors to meld and deepen, resulting in a more complex and delicious cookie. The molasses in brown sugar, the vanilla, and the chocolate all have time to get acquainted and become best friends.
Preventing Spread
Cold dough spreads less in the oven. This means your cookies will be thicker and have a softer, chewier center. If your dough is too warm, the butter will melt too quickly, causing the cookies to spread out thinly and become crisp. Aim for at least 30 minutes of chilling, but ideally, several hours or even overnight. You can even freeze dough balls for future baking adventures.
Baking Wisdom: Temperature, Time, and Technique
We’ve meticulously prepared our dough, chilled it to perfection, and now it’s time for the grand finale: baking. This stage is where many subtle adjustments can make all the difference.
Oven Temperature: The Unsung Hero
An accurately calibrated oven is your best friend in baking. If your oven runs hot or cold, it can drastically affect your cookies. Too hot, and they might brown too quickly on the outside while remaining raw in the center, or become overly crisp. Too cool, and they might spread excessively and be pale and underbaked. Invest in an oven thermometer to ensure your oven is consistently at the right temperature. Most chewy chocolate chip cookie recipes call for a temperature between 350°F (175°C) and 375°F (190°C).
Baking Time: The Visual Cues
Baking time is more of an art than a science, as every oven is different. We’re looking for visual cues here. Chewy cookies are often pulled from the oven when their edges are set and golden brown, but their centers still look slightly underbaked and puffy. They will continue to cook on the hot baking sheet after they’re removed from the oven, a process known as carryover cooking. If you wait until the centers are fully set in the oven, you’ll likely end up with a crispier cookie.
The Pan and Parchment Paper
Use light-colored baking sheets; dark pans absorb more heat and can cause the bottoms of your cookies to burn. Always line your baking sheets with parchment paper or a silicone baking mat. This prevents sticking, promotes even baking, and makes for easier cleanup. It also helps regulate the heat transfer, contributing to a more even bake.
Don't Overcrowd the Pan
Give your cookies space to spread! Overcrowding a baking sheet can lead to uneven baking and can trap steam, affecting the texture. Bake in batches if necessary, ensuring there’s ample space around each cookie dough ball.
Cooling: Patience, Young Padawan
The cooling process is just as important as the baking process. Resist the urge to dive in immediately, no matter how tempting that warm, chocolatey aroma is.
On the Baking Sheet
Allow your cookies to cool on the baking sheet for about 5 to 10 minutes after removing them from the oven. This allows them to set up properly and finish baking gently. If you try to move them too soon, they might fall apart.
On a Wire Rack
After their initial rest on the baking sheet, transfer the cookies to a wire rack to cool completely. Air circulation around all sides prevents them from becoming soggy on the bottom and ensures an even cool-down, preserving that coveted chewiness.
Troubleshooting: Common Pitfalls and Quick Fixes
Even with the best intentions, things can go awry. Here are some common problems and their solutions.
Cookies are Too Cakey
This often points to too much flour, too much leavening (especially baking powder), or over-creaming the butter and sugar, which incorporates too much air. Try reducing the flour slightly, checking your leavening amounts, and being mindful of creaming time. Adding an extra egg yolk can also help.
Cookies are Too Crispy or Hard
This could be due to too much granulated sugar, not enough brown sugar, overbaking, or too little fat. Ensure your butter is at the correct temperature, increase the brown sugar to granulated sugar ratio, pull them from the oven when they look slightly underdone, and consider adding an extra tablespoon of butter.
Cookies Spread Too Much
Warm dough, too much butter, or too little flour can cause excessive spreading. Make sure your dough is well-chilled, measure your ingredients accurately, and consider reducing the butter slightly if it’s a consistent issue.
Cookies Don't Spread Enough
This can happen if your dough is too cold (though rare), too much flour, or not enough fat. Ensure your dough isn’t frozen solid before baking, check your flour measurement, and ensure you’re using the correct amount of butter.
Advanced Techniques for Next-Level Chewiness
For those who want to truly master the chewy cookie, here are a few extra tricks.
Brown Butter Magic
Browning your butter before adding it to the recipe adds a nutty, complex flavor that elevates your cookies to another level. It also slightly reduces the water content in the butter, which can contribute to a chewier texture. Just be sure to cool it slightly before incorporating it into the sugar.
Bread Flour Boost
For an extra chewy cookie, you can substitute a small portion of your all-purpose flour with bread flour. Start with replacing about ¼ cup of all-purpose flour with bread flour and see how you like the texture. Remember, bread flour has a higher protein content, so it will develop more gluten.
The Power of Salt
Don't underestimate the role of salt! It balances the sweetness and enhances all the other flavors. A good pinch of flaky sea salt sprinkled on top of your cookies just after they come out of the oven can add a delightful textural contrast and a burst of flavor that complements the sweetness of the chocolate and the chewiness of the cookie.
Putting It All Together
Achieving the perfect chewy chocolate chip cookie is a delightful journey of experimentation and understanding. It’s about respecting your ingredients, mastering your mixing technique, embracing the power of chilling, and becoming attuned to the subtle cues your oven provides. Remember, baking is a science with an artful touch. Don’t be afraid to deviate slightly from a recipe once you understand the underlying principles. Adjust the sugar ratios, experiment with egg yolks, or try browning your butter. Each batch is a learning opportunity, a step closer to your ultimate chewy cookie perfection. So preheat that oven, gather your ingredients, and embark on your next baking adventure with confidence. Your perfectly chewy, utterly irresistible chocolate chip cookies await!