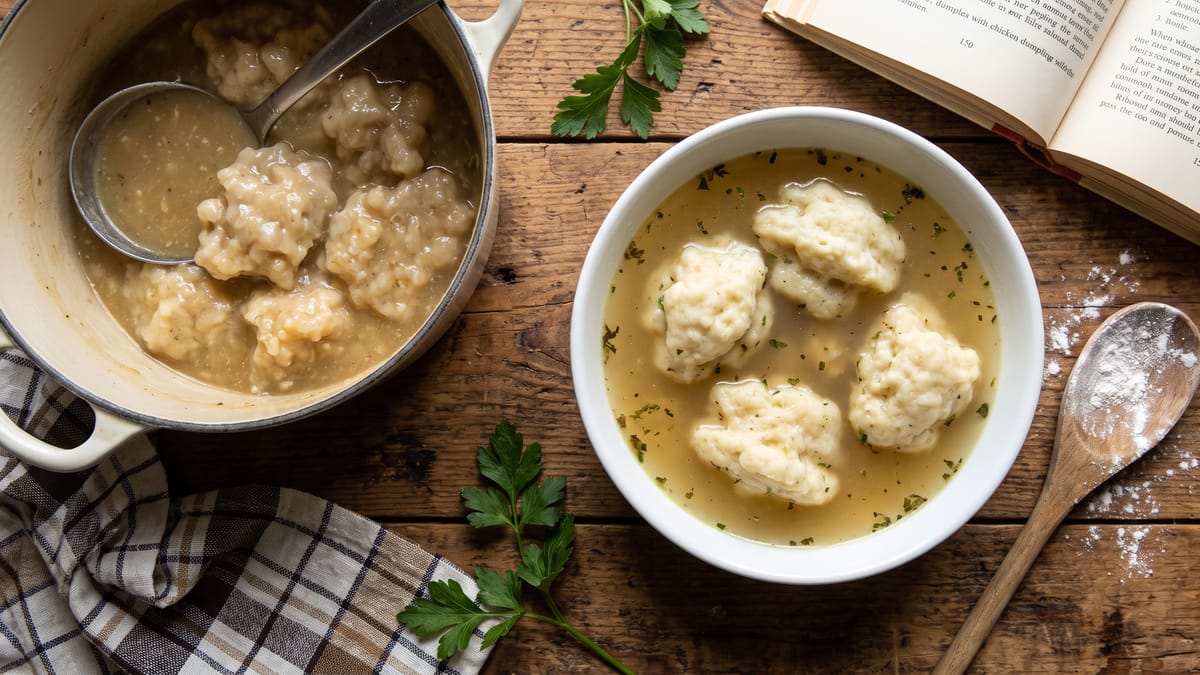
Why Your Chicken and Dumpling Soup Turns Out Gummy, And How to Get Fluffy Dumplings Every Time
Chicken and dumpling soup. The very phrase conjures images of cozy kitchens, steaming bowls, and the ultimate comfort food. It’s a dish that warms us from the inside out, a culinary hug on a chilly evening. When done right, it's a symphony of tender chicken, a rich, savory broth, and those ethereal, cloud-like dumplings that practically melt in your mouth. But how often have we embarked on this comforting quest, only to be met with disappointment? That dreaded moment when our once-promising dumplings transform into dense, gummy, unappetizing blobs. It's a common kitchen woe, a culinary conundrum that has left many a home cook scratching their heads.
We've all been there, peering into the pot with hopeful anticipation, only to scoop out a dumpling that feels more like a lead weight than a fluffy cloud. The good news is that achieving those perfect, pillowy dumplings, nestled in a deeply flavorful broth with perfectly cooked chicken, is entirely within reach. It's not about magic or secret family recipes passed down through generations. Instead, it's about understanding a few fundamental principles, mastering some simple techniques, and, crucially, avoiding a handful of common pitfalls. We're here to demystify the art of chicken and dumplings, guiding you through every step, from selecting your chicken to that final, glorious spoonful. Get ready to banish gummy dumplings from your kitchen forever and embrace a world of light, tender, and utterly delicious comfort.
The Foundation: Crafting a Broth That Sings
Before we even think about dumplings, we must lay the groundwork with an exceptional broth. A truly great chicken and dumpling soup isn't just about the chicken and dumplings; it's about the liquid embrace that binds them. A thin, watery broth simply won't do. We're aiming for something rich, savory, and deeply satisfying, a broth that feels like a warm hug. The beauty is that you don't need to spend an entire day simmering bones to achieve this.
Our journey to a spectacular broth begins with the chicken itself. For maximum flavor, we often opt for bone-in, skin-on chicken pieces, such as thighs and drumsticks. The bones contribute collagen and flavor, while the skin renders fat that enriches the broth. You could also use a whole cut-up chicken if you prefer. Start by browning your chicken pieces in a large pot or Dutch oven over medium-high heat. This crucial step, often overlooked, develops a layer of deep, complex flavor through the Maillard reaction. Don't crowd the pan; work in batches if necessary to ensure proper browning, not steaming. Once browned, remove the chicken and set it aside.
Next, we build layers of aromatic flavor. In the same pot, with a little of that rendered chicken fat, sauté your mirepoix: diced onions, carrots, and celery. Cook them until they soften and the onions become translucent, scraping up any browned bits from the bottom of the pot. This deglazing action incorporates those delicious fond particles into your broth. Add a few cloves of minced garlic and cook for another minute until fragrant.
Now, it's time to introduce the liquid. We typically use a combination of good quality chicken stock or broth and water. If using store-bought stock, opt for a low-sodium version so you can control the seasoning yourself. Return the browned chicken pieces to the pot. Add bay leaves, a few sprigs of fresh thyme or rosemary, and a generous pinch of salt and freshly ground black pepper. Bring the liquid to a gentle simmer, then reduce the heat to low, cover, and let it cook.
The key here is a gentle simmer, not a rolling boil. A gentle simmer extracts flavor gradually without making the broth cloudy or causing the chicken to become stringy. We're aiming for the chicken to be tender and easily shreddable. This usually takes about 30 to 45 minutes for bone-in pieces. Once the chicken is cooked through, reaching an internal temperature of 165°F (74°C) for food safety, carefully remove it from the pot and let it cool slightly.
While the chicken cools, we address the broth. Skimming any excess fat and foam from the surface of the simmering broth is important. This step contributes to a clearer, cleaner-tasting broth and also helps ensure a better texture for your dumplings later. Once the chicken is cool enough to handle, remove the skin and bones, then shred the meat into bite-sized pieces. We'll set this aside to add back to the soup later.
Now, you have a deeply flavorful broth, ready for its next act. We often strain the broth to remove the cooked vegetables and aromatics, resulting in a cleaner, more refined soup. You can discard the spent vegetables or, if you prefer a heartier, chunkier soup, simply leave them in. If you're going for a smooth broth, straining is highly recommended. At this point, taste and adjust the seasoning of your broth. It should be robust and well-balanced, as it will be the primary flavor vehicle for your dumplings. Remember, a thin broth generates more steam, which is critical for fluffy dumplings. Therefore, avoid thickening the broth with a roux, cornstarch, or cream before cooking the dumplings; this reduces the steam needed for their proper texture.
The Fowl Play: Achieving Perfectly Tender Chicken
While the broth forms the soul of our soup, the chicken provides its comforting heart. Overcooked chicken can be dry and stringy, while undercooked chicken is a food safety concern. The goal is tender, juicy pieces that complement the fluffy dumplings and rich broth.
As we discussed, starting with bone-in, skin-on chicken pieces often yields the most flavorful results. The bones contribute to the broth's depth, and the fat from the skin adds richness. Browning the chicken before simmering is a non-negotiable step for flavor development. Sear the chicken pieces until they're golden brown on all sides. This creates a beautiful crust and enhances flavor through the Maillard reaction.
Once browned, the chicken is simmered gently in the broth. The key word here is "gently." A rolling boil can toughen the chicken and make it stringy. We want a serene, barely bubbling simmer, allowing the chicken to cook slowly and evenly. For bone-in pieces, this typically takes about 30 to 45 minutes. We always check the internal temperature with a meat thermometer to ensure it reaches 165°F (74°C) for food safety, as per USDA guidelines. This temperature ensures the chicken is fully cooked and safe to eat.
Once cooked, remove the chicken from the pot. Allowing it to cool slightly before shredding is important. This prevents you from burning your fingers and allows the juices to redistribute, resulting in more tender meat. We then discard the skin and bones, shred the meat into bite-sized pieces, and set it aside. The chicken will be added back to the soup towards the end of the cooking process, ensuring it remains tender and doesn't become overcooked while the dumplings do their thing. This careful timing guarantees that every element of your soup is cooked to perfection, contributing to a harmonious and delicious final dish.
The Dumpling Dilemma: Why They Go Gummy and How to Fix It
Now, for the main event: the dumplings. This is where many home cooks encounter their biggest challenge, often resulting in those dreaded gummy, dense, and unappetizing dough balls. But fear not, we're going to unlock the secrets to achieving light, fluffy, and utterly delightful dumplings every single time.
The primary culprit behind gummy dumplings is almost always overmixing the dough. When you overmix flour and liquid, you develop the gluten in the flour. Gluten is what gives bread its chewiness and structure, but for dumplings, we want the opposite. We want a tender, delicate texture. Think of it like making biscuits or pie crust; a light touch is paramount. We mix just until the ingredients are combined, and no dry streaks of flour remain. A few lumps are perfectly acceptable, even desirable.
Another critical factor is the temperature of your ingredients. We insist on using cold butter and cold liquid, typically milk or buttermilk. Just like in pastry making, cold fats create steam pockets as they cook, which contributes to a light, flaky texture. Warm ingredients, on the other hand, can lead to a denser dumpling.
Let's walk through the ideal dumpling technique.
1. The Right Ingredients and Ratios: We start with all-purpose flour. For a proper dough hydration, a flour-to-liquid ratio of approximately 100g flour to 60–65ml water (or milk) is a good guideline. Too much liquid leads to overhydration and gumminess. We often add a leavening agent, such as baking powder, to give the dumplings a lift. A touch of salt and sometimes a pinch of sugar balances the flavors. For the fat, cold butter cut into small pieces is our preference, but some recipes use shortening.
2. Minimal Mixing is Key: In a large bowl, whisk together the dry ingredients: flour, baking powder, salt, and any sugar. Then, cut in the cold butter using a pastry blender, your fingertips, or two knives, until the mixture resembles coarse crumbs with some pea-sized pieces of butter remaining. This is important; don't overwork it. Next, gradually add the cold milk or buttermilk, a little at a time, mixing gently with a fork or your hands until just combined. The dough should be shaggy and soft, not smooth and elastic. If it's too sticky, add a tiny bit more flour; if too dry, a tiny bit more liquid. But remember, minimal intervention is the golden rule.
3. The Rest Period: Once your dough is mixed, cover the bowl with plastic wrap and let it rest. This step is often skipped but is incredibly important. A rest period of 5 to 45 minutes allows the gluten to relax, which results in a more tender dumpling. It also gives the flour time to fully hydrate, preventing a mealy texture.
4. The Simmer, Not the Boil: This is perhaps the most crucial cooking technique. Dumplings should always be cooked at a gentle simmer, not a rolling boil. A rolling boil will cause the dumplings to break apart, become dense, or turn gummy. We need the broth to be maintained at a temperature of 185–195°F (85–90°C) for proper dumpling cooking. This gentle heat allows the dumplings to cook through evenly without becoming tough.
5. Steam is Your Friend: Fluffy dumplings rely heavily on steam. A tight-fitting lid is absolutely essential. The steam trapped within the pot cooks the tops of the dumplings, making them light and airy. If you lift the lid during cooking, that precious steam escapes, leading to dumplings that are cooked on the bottom but doughy and undercooked on top. Resist the urge to peek!
6. Timing is Everything: Add the dumplings to the simmering broth only after the other ingredients, like the chicken and any vegetables, are nearly done. Adding them too early can lead to overcooked chicken or overly reduced broth, which limits the steam needed for the dumplings. Drop spoonfuls of the dough into the gently simmering broth. Don't crowd the pot; give them space to expand. Once all the dumplings are in, immediately cover the pot with that tight-fitting lid and let them cook, undisturbed, for 10 to 18 minutes. The exact time will depend on the size of your dumplings.
7. Thin Broth for Steam: Remember our earlier point about broth thickness? A thin broth generates more steam. If your broth is too thick (due to roux, cornstarch, or cream), it will inhibit steam production and lead to doughy dumplings. Ensure your broth is light enough to allow sufficient steam to build up under the lid.
By following these guidelines, you'll be well on your way to achieving those coveted light, fluffy dumplings that are the hallmark of a truly great chicken and dumpling soup.
Bringing It All Together: Assembling Your Masterpiece
With our rich broth perfected, our chicken tenderly shredded, and our dumpling technique honed, it's time to bring all the elements together into a cohesive and utterly satisfying soup. This final assembly phase is where all our careful preparation culminates in that comforting bowl.
First, ensure your broth is back to a gentle simmer, maintaining that crucial 185–195°F (85–90°C) temperature. If you strained your broth earlier, now is the time to add back any fresh vegetables you might want, such as peas, corn, or finely diced carrots and celery for a fresh texture. Let these cook for a few minutes until just tender-crisp.
Next, return your shredded chicken to the pot. This warms the chicken through without overcooking it. Taste the broth once more and adjust any seasonings. This is your last chance to tweak the salt, pepper, or other herbs before the dumplings go in.
Now for the star of the show: the dumplings. Drop spoonfuls of your prepared dumpling dough directly into the gently simmering broth. We aim for uniform sizes, but a little rustic charm is part of the appeal. Ensure there's enough space between each dumpling; they will expand as they cook. Don't overcrowd the pot; if necessary, cook them in batches, removing the first batch to a warm platter before adding the second.
Immediately after dropping in the dumplings, secure that tight-fitting lid onto the pot. This is absolutely critical for trapping the steam that will cook the tops of your dumplings, making them light and airy. Resist the urge to peek! We know it's tempting, but lifting the lid releases the steam, leading to unevenly cooked, doughy dumplings. Let them cook, undisturbed, for the recommended 10 to 18 minutes. The cooking time will vary slightly depending on the size of your dumplings.
Once the cooking time is up, remove the pot from the heat. Carefully lift the lid, and you should be greeted by beautifully puffed, fluffy dumplings. You can gently test one to ensure it's cooked through; it should be light and tender, not dense or gummy.
Finally, stir in any fresh herbs you desire, such as chopped fresh parsley or dill, for a burst of freshness and color. A splash of cream or a knob of butter can be stirred in at this stage if you desire a richer, slightly creamier finish, but remember not to add these before cooking the dumplings as they can inhibit steam. Ladle generously into bowls and serve immediately, perhaps with a sprinkle of extra fresh herbs or a grind of black pepper.
To Sum Things Up
The journey to perfect chicken and dumpling soup, with its tender chicken, rich broth, and those ethereal, cloud-like dumplings, is a rewarding one. It’s a dish that truly embodies comfort and culinary satisfaction. We’ve discovered that the secret lies not in complex techniques, but in understanding a few fundamental principles and avoiding common pitfalls.
Gummy dumplings, the bane of many a home cook, are primarily the result of overmixing the dough, which develops gluten and creates a tough texture. They also suffer from being boiled vigorously rather than gently simmered, or from a lack of steam due to a lifted lid or overly thick broth. The solution, as we've learned, involves a light touch with the dough, using cold ingredients to promote steam pockets, and allowing a brief rest period for the gluten to relax.
For that truly fluffy dumpling, we must maintain our broth at a gentle simmer, specifically between 185–195°F (85–90°C), and ensure the pot is tightly covered to trap essential steam. Dropping the dumplings into the broth only when the chicken and vegetables are nearly done prevents overcooking and ensures the broth isn't too reduced, allowing ample steam to form. And, of course, giving those drop dumplings their full 10 to 18 minutes of undisturbed, covered cooking time is paramount.
We also emphasized the importance of a well-crafted broth, built on browned chicken and aromatic vegetables, gently simmered and skimmed for clarity and depth. And for the chicken itself, a gentle simmer to 165°F (74°C) ensures it remains tender and juicy, shredding easily into the finished soup.
By embracing these techniques, from the initial browning of the chicken to the final, gentle simmer of the dumplings, we can transform a potentially disappointing meal into a consistent triumph. So, next time you crave that ultimate comfort food, approach it with confidence. You now possess the knowledge and the tools to banish gummy dumplings forever, inviting a world of light, fluffy, and utterly delicious chicken and dumpling soup into your kitchen. Happy cooking, and may your bowls always be full of comfort and perfectly pillowy dumplings!
Sources
- • 12 Mistakes To Avoid Making With Chicken & Dumplings
- • Mastering Chicken and Dumpling Recipes Across Cultures
- • For Delicious Texture In Chicken And Dumplings Soup ...
- • Old-Fashioned Chicken and Dumpling Soup
- • Simple Chicken And Dumpling Soup | Cozy Pot Supper
- • Homemade Chicken and Dumpling Soup Recipe: Cloud-Like Bites in Rich Broth