Why Pressure Cooker Recipes Lie About Time and How to Plan Accordingly
Why Pressure Cooker Recipes Lie About Time and How to Plan Accordingly
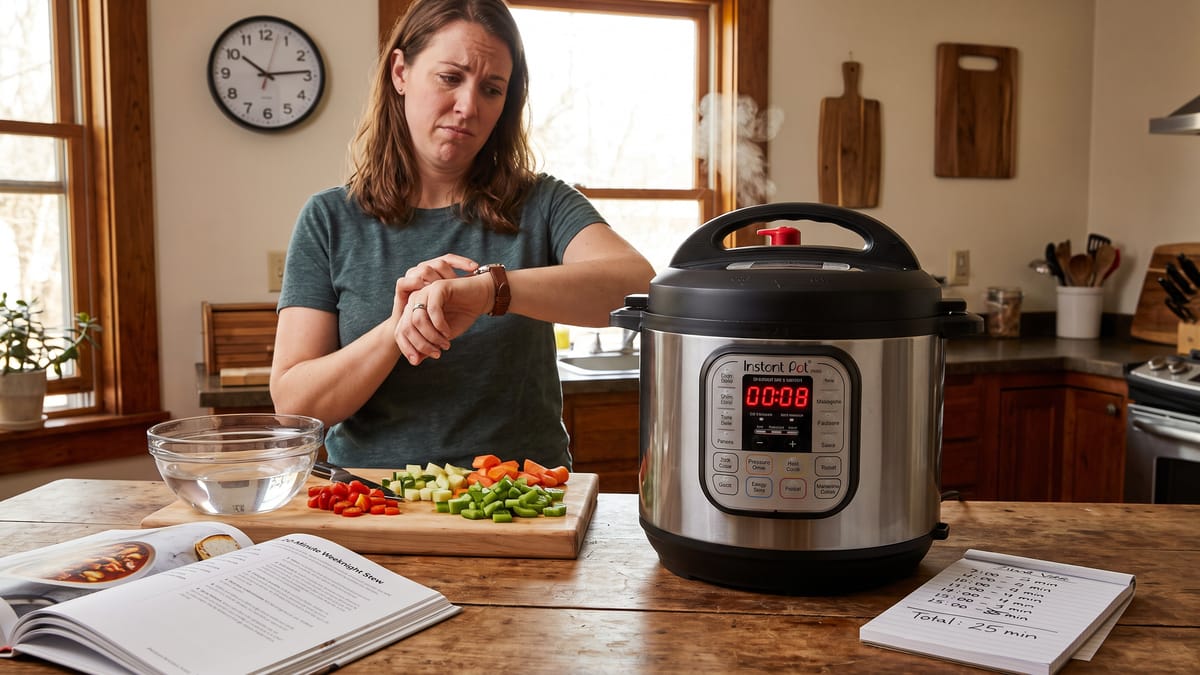
Ah, the siren song of the pressure cooker recipe. "Fifteen-minute chili!" it proclaims. "Ten-minute pot roast!" our eyes widen. We imagine ourselves effortlessly whisking a culinary masterpiece onto the dinner table in mere moments, leaving us with ample time for evening leisure. The reality, however, often paints a somewhat different picture. We stand over our humming appliance, tapping our foot, wondering why our "15-minute" meal is still stubbornly building pressure a quarter of an hour later. If you have ever felt a twinge of frustration, or perhaps even a sense of betrayal, when your pressure cooker recipe's advertised cook time stretched far beyond your expectations, rest assured, you are not alone. This common culinary conundrum is not a flaw in your cooking prowess, nor is it a defect in your appliance. It is, rather, a fundamental misunderstanding, often perpetuated by recipe writers, about the true, start-to-finish duration of pressure cooking.
We are here to demystify this phenomenon, to pull back the curtain on the hidden phases of pressure cooking, and to equip you with the knowledge to accurately plan your meals. Our aim is to transform your pressure cooking experience from one of hopeful anticipation followed by mild disappointment, to one of confident execution and perfectly timed dishes. Let us embark on a journey to understand why pressure cooker recipes often present a somewhat abbreviated version of reality and, more importantly, how we, as home cooks, can master the art of accurate meal timing.
The Three Acts of Pressure Cooking: Beyond the Spotlight
To truly grasp why pressure cooker recipes can feel misleading, we must first understand that pressure cooking is not a monolithic event. It is a process composed of three distinct and sequential phases, each contributing significantly to the total time spent from the moment you seal the lid to the instant you are ready to serve. Think of it like a play with three acts: the build-up, the main performance, and the grand finale. Most recipes, regrettably, only highlight the second act, leaving the audience, us, to wonder about the beginning and end.
The first act is the come-to-pressure phase, also known as pressurization. This is the period when your pressure cooker, whether electric or stovetop, works diligently to heat its contents and generate enough steam to reach its target operating pressure. During this time, the lid is sealed, and you will hear a gentle hiss as steam begins to escape from the vent, indicating that pressure is building. Once the desired pressure is achieved, the cooker will either seal itself, indicated by a floating valve, or maintain a steady steam release, depending on the model. It is only after this phase that the actual timed cooking begins.
The second act is the timed cook at pressure. This is the star of the show, the duration that nearly every pressure cooker recipe proudly displays. It is the period during which the food is subjected to the elevated temperatures and pressures that accelerate the cooking process so dramatically. Inside the sealed environment, steam temperatures reach approximately 250°F (121°C), significantly hotter than water's boiling point of 212°F (100°C) at sea level. This intense heat penetrates ingredients rapidly, breaking down tough fibers and melding flavors with remarkable speed. This is where the magic happens, where conventional cooking times are reduced by roughly 70%.
Finally, we arrive at the third act, depressurization or release. Once the timed cooking is complete, the pressure must be safely released before the lid can be opened. This can be achieved through one of two primary methods: natural release or quick release. Each method has its own implications for both total cooking time and the final texture of your food. Understanding these three phases is the bedrock upon which we will build our strategy for accurate pressure cooking time management.
The Unseen Minutes: Why Pressurization Takes Its Sweet Time
The come-to-pressure phase is arguably the most overlooked component of pressure cooking, yet it is a critical determinant of your overall meal preparation time. We often assume this happens instantaneously, but in reality, it is a process that can easily add 10 to 25 minutes to your cooking schedule. Several factors conspire to influence how long your pressure cooker takes to reach its operating pressure.
Firstly, the liquid volume within the pot is a major player. The more liquid you have, the more energy and time it will take for your cooker to heat it to the point where it generates sufficient steam to build pressure. A recipe calling for a modest cup of broth will pressurize much faster than one demanding several quarts for a large batch of soup or stock.
Next, the starting temperature of your ingredients plays a significant role. If you are adding cold ingredients straight from the refrigerator, or especially frozen ingredients, your pressure cooker will expend considerable energy and time simply bringing them up to temperature before it can even begin to build pressure. Starting with frozen ingredients adds time to both the come-to-pressure phase and the cook phase itself, a crucial point to remember for those quick weeknight meals.
The pot size and wattage of your appliance also factor in. A larger pressure cooker, with its greater volume, will generally take longer to pressurize than a smaller one, assuming similar fill levels. Electric pressure cookers, while incredibly convenient, often operate at a slightly lower sustained pressure during cooking, typically around 11.6 psi, compared to stovetop models that usually maintain 15 psi. While electric models might briefly reach 15 psi during warm-up, their lower operating pressure means they might require slightly longer cook times for a given recipe compared to their stovetop counterparts.
Consider a scenario: you are making a hearty stew. You have loaded your 8-quart electric pressure cooker with cold chunks of beef, several cups of vegetables, and a generous amount of broth. It is not unreasonable to expect this concoction to take upwards of 20 minutes, possibly even 25, just to reach pressure. This is time that is rarely, if ever, factored into the "15-minute stew" recipe you are following. Understanding these variables empowers us to make more realistic estimations for this initial, often underestimated, phase.
The Gentle Fade vs. The Quick Escape: Depressurization's Impact
Once the timed cooking is complete, the pressure within the cooker must be released before the lid can be opened. This depressurization phase is another significant contributor to the overall time, and the method you choose has a direct impact on both duration and outcome. We have two main options: natural pressure release and quick pressure release.
Natural pressure release is exactly what it sounds like. After the cooking time is up, you simply turn off the heat (or the cooker automatically switches to a "keep warm" setting) and allow the pressure to dissipate on its own, gradually. This process can add anywhere from 10 to 25 minutes to your total cooking time, sometimes even longer for very full pots. During natural release, the food continues to cook gently as the temperature and pressure slowly decrease. This method is particularly beneficial for dishes like roasts, stews, and dried beans, where a gradual decrease in pressure helps prevent the food from drying out, splitting, or becoming overly agitated. For instance, quick release can cause rapid boiling that dries out meat and splits bean skins. The gentler, slower decline in temperature during natural release allows the internal structure of the food to relax and reabsorb moisture, often resulting in more tender and flavorful results. This is why many recipes for meats, legumes, and even some grains recommend natural release.
Quick pressure release, on the other hand, involves manually venting the steam from the pressure cooker immediately after the cooking time is complete. This is typically done by turning a valve or pushing a button, which rapidly releases the steam. This method is considerably faster, usually taking only 2 to 5 minutes. Quick release is often preferred for delicate vegetables, seafood, or anything you want to stop cooking immediately to prevent overcooking. It is also useful when you need to add ingredients partway through the cooking process or when you are simply in a hurry. However, the rapid venting of steam can sometimes lead to a vigorous boiling inside the pot, which, as mentioned, can be detrimental to certain foods.
Consider a recipe for chicken breasts. If it calls for a 6-minute high-pressure cook time and then recommends natural release, you could easily be looking at an additional 15 minutes or more for the pressure to fully dissipate. If it suggests quick release, you are adding a mere 2 to 5 minutes. The difference is substantial when you are trying to get dinner on the table. A recipe stating '15 minutes' high-pressure cook time can require 35+ minutes total from lid-close to serving when including pressurization and natural release. This disparity highlights why understanding and planning for the release method is just as important as knowing the cook time itself.
The Recipe Writer's Dilemma: Transparency vs. Perceived Efficiency
So, why do most pressure cooker recipes omit these crucial pressurization and depressurization times? Why do they present only the "active" cooking time, leaving us to piece together the rest? We can speculate on a few reasons, some perhaps more charitable than others.
One primary motivation is likely marketing and perceived efficiency. The allure of pressure cooking lies in its promise of speed. "Dinner in 15 minutes!" sounds far more appealing and marketable than "Dinner in 40 minutes, including preheating and release!" Recipe writers, and the publishers they work for, want to emphasize the dramatic reduction in active cooking time that pressure cooking offers. If they included the full, start-to-finish duration, it might dilute the perceived benefit and make pressure cooking seem less revolutionary. The truth is, pressure cooking does reduce conventional cooking times by approximately 70%, but total preparation time must include pressurization and depressurization.
Another factor could be the variability of these phases. As we have discussed, pressurization time is highly dependent on factors like liquid volume, ingredient temperature, and pot size. Depressurization time varies based on the chosen method and the amount of food in the pot. It would be challenging for a recipe writer to give a universally accurate estimate for these phases without making the recipe overly complex with numerous caveats and ranges. To simplify, they might opt to focus solely on the fixed, timed cooking phase.
There is also the possibility that some recipe writers, particularly those less experienced with the nuances of pressure cooking, might genuinely underestimate or overlook the impact of these additional phases. They might test a recipe and focus primarily on the timer for the pressurized cook, forgetting to account for the lead-up and cool-down periods in their published instructions.
However, the case for transparent timing is compelling and, we believe, ultimately more helpful to the home cook. When recipes are upfront about the total expected duration, including all phases, it allows us to plan our meals more effectively, manage our expectations, and avoid unnecessary stress. Imagine a recipe that states: "Total Time: 45 minutes (includes 15 mins to build pressure, 15 mins cook time, 15 mins natural release)." This level of detail empowers us to decide if we have enough time before we even start, rather than discovering midway through that our "quick" meal is taking longer than anticipated. Transparent timing fosters trust between the recipe creator and the cook.
The Verdict: How to Adjust Your Planning
Based on our exploration of the three phases of pressure cooking and the factors influencing their duration, we can arrive at a clear verdict for how home cooks should adjust their planning. Pressure cooker recipes list only the time at full pressure, omitting the 10–25 minutes to build pressure and 2–25 minutes to release it. Total real-world time is typically 20–50 minutes longer than the advertised cook time, depending on pot size, fill level, ingredient temperature, and release method.
To account for these often-omitted steps, we should consistently add time to the recipe's stated cook time. We recommend adding a minimum of 10 to 15 minutes for the pressurization phase. This range accounts for average liquid volumes and ingredient temperatures. If you are cooking a very full pot of cold or frozen ingredients, err on the side of the higher end of this estimate, or even add a few more minutes.
For the depressurization phase, the adjustment depends on the recommended release method:
- • For natural release, add 10 to 20 minutes to your total planning time. This is a conservative estimate, as some very large batches can take even longer, but it provides a good working average. Remember, food continues cooking during natural release.
- • For quick release, add a modest 2 to 5 minutes. This accounts for the time it takes to manually vent the steam.
Practical Tips for Masterful Timing
Now that we understand the nuances, let us equip ourselves with some actionable strategies to become master pressure cooker timers.
Know your cooker: Every pressure cooker has its own personality. An older stovetop model might build pressure differently than a brand-new electric multi-cooker. Pay attention to how long your specific appliance takes to pressurize with varying amounts of liquid and food. Observing these patterns will help you refine your personal timing estimates.
Pre-heat liquids: If a recipe allows, heating the liquid ingredients before adding them to the pressure cooker can significantly reduce the come-to-pressure time. For example, if you are making a soup, you could heat the broth on the stovetop in a separate pot before transferring it to the pressure cooker.
Consider ingredient temperature: Whenever possible, bring refrigerated ingredients closer to room temperature before adding them to the cooker. This is especially true for large cuts of meat. While not always feasible, it will shave precious minutes off the pressurization phase. For frozen ingredients, always remember they will add time to both pressurization and the cook phase.
Mind the fill level: A pressure cooker should never be filled more than two-thirds full for most foods, and no more than halfway for foods that expand, like grains or beans. Overfilling not only increases pressurization time but can also be unsafe and lead to issues with pressure regulation. The quantity of food and liquid is the biggest factor affecting come-to-pressure time; a full pot of cold ingredients takes significantly longer to pressurize than a small batch.
Altitude adjustments: If you live at a higher altitude, above 2,000 feet, you will need to increase your cooking times. The general rule of thumb is to increase pressure cooking time by roughly 5% for every additional 1,000 feet of elevation. This is because water boils at a lower temperature at higher altitudes, requiring more time to reach the same effective cooking temperature within the pressure cooker.
Embrace the thermometer: For meat and poultry, doneness should always be verified with a food thermometer to USDA safe minimum internal temperatures rather than relying solely on cook time. While pressure cooking is efficient, ensuring food safety is paramount. The internal temperature is the ultimate indicator of doneness, regardless of how long the recipe says it should cook.
Plan for the release method: Before you even start cooking, identify the recommended release method in the recipe. If it is natural release, mentally add those extra 10-20 minutes to your total. If it is quick release, you know you will be done much sooner. Sometimes, a recipe will give you a choice, allowing you to prioritize speed (quick release) or tenderness (natural release) based on your needs.
All in All: Mastering Your Pressure Cooker's True Tempo
The journey to becoming a confident pressure cooker chef involves more than just following a recipe's stated cook time. It requires an understanding of the entire process, from the initial hum of pressurization to the final hiss of release. By recognizing that pressure cooker recipes often present only a fraction of the total time, and by proactively accounting for the unseen minutes of preheating, pressure buildup, and depressurization, we can transform our kitchen experiences.
We have learned that the "lie" is not malicious, but rather a simplification that, while perhaps well-intentioned, can lead to frustration for the unprepared cook. Armed with the knowledge that we should add 10–15 minutes for pressurization and 10–20 minutes for natural release (or 2–5 minutes for quick release) to the recipe’s stated cook time, we are now equipped to plan our meals with precision. No longer will we be caught off guard by a meal that takes longer than advertised. Instead, we will approach our pressure cookers with a newfound respect for their full operational cycle, confidently timing our dishes and delivering delicious, perfectly cooked meals to our tables, right when we expect them. Happy cooking, and may your pressure cooker always sing a true, timely song!
Sources
- • Your Pressure Cooker Cook Time Is a Half-Truth: The Hidden Minutes Nobody Mentions
- • PRESSURE COOKING
- • August 2019 – Luctor et Emergo
- • The Misconceptions about Electric Pressure Cookers1
- • Instant Pot Cooking Times: How Pressure Timing Really Works
- • How To Use An Electric Pressure Cooker - Epicurious