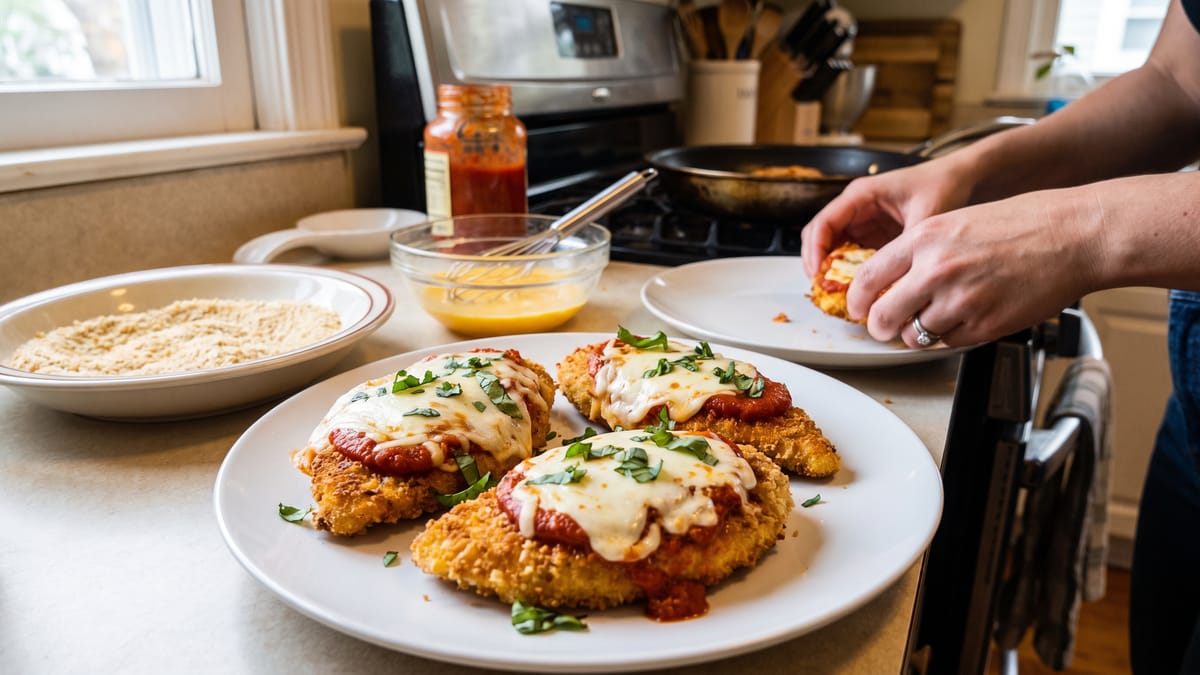
This Crispy Chicken Parmesan Recipe Is Easier Than You Think
This Crispy Chicken Parmesan Recipe Is Easier Than You Think
Chicken Parmesan, a culinary titan of Italian-American cuisine, often conjures images of bustling restaurant kitchens, skilled chefs, and a labyrinthine process. Many home cooks shy away from attempting this dish, convinced it's an endeavor best left to the professionals. They envision a messy breading station, oil splattering everywhere, and a final product that, despite their best efforts, falls short of that coveted restaurant-quality crispness and succulence. We're here to dismantle those misconceptions, to gently guide you through a process that is not only achievable but genuinely enjoyable. Prepare to discover that crafting a truly exceptional Chicken Parmesan, one that boasts a golden-brown, shatteringly crisp crust, tender, juicy chicken, and a harmonious meld of tangy marinara and melted cheese, is far less daunting than you might imagine. In fact, with a few clever techniques and a touch of patience, you'll be serving up a dish that will impress even the most discerning palates, transforming your kitchen into a haven of delectable aromas and satisfied smiles.
Demystifying the Chicken Parmesan Mystique
Before we dive into the nitty-gritty of the recipe itself, let's address the elephant in the room: the perceived difficulty. Why do so many of us believe Chicken Parmesan is an insurmountable culinary mountain? Perhaps it's the multi-step nature of the dish, involving breading, frying, and baking. Or maybe it's the fear of overcooking the chicken, resulting in a dry, unappetizing slab. We've all been there, standing in front of a recipe, feeling a tremor of apprehension. But the truth is, each step, when broken down, is remarkably straightforward. The key lies in preparation, organization, and understanding the purpose behind each action. We'll walk you through each phase, offering insights and shortcuts that will streamline the process and boost your confidence. Forget the fear, embrace the flavor, and let's embark on this delicious journey together.
The Foundation: Choosing and Preparing Your Chicken
The journey to an extraordinary Chicken Parmesan begins, quite naturally, with the chicken itself. While breast meat is the traditional choice, we're not averse to a good chicken thigh, particularly for those who appreciate a richer, slightly more forgiving cut. For breasts, aim for boneless, skinless varieties, ideally those that are relatively uniform in thickness. This uniformity is crucial for even cooking, preventing some parts from drying out while others remain undercooked.
Once you have your chicken, the next critical step is to pounding. This isn't an act of aggression, but rather a gentle persuasion. Place each chicken breast between two sheets of plastic wrap or inside a large freezer bag. Using a meat mallet, the flat side of a heavy pan, or even a rolling pin, gently pound the chicken until it's about a quarter to a half-inch thick. The goal here is not to flatten it to a papery thinness, but to create an even surface that will cook uniformly and tenderize the meat. This also allows for more surface area for that glorious breading, a detail we'll appreciate later. Remember, consistency is our friend here.
The Breading Bonanza: A Three-Stage Symphony
Ah, the breading. This is where the magic truly begins, transforming a humble piece of chicken into a canvas for a crispy, flavorful crust. We're employing the classic three-stage breading method, a technique that ensures maximum adherence and an unparalleled crunch.
First, set up your dredging station. You'll need three shallow dishes or pie plates.
In the first dish, we'll have our seasoned flour. Combine all-purpose flour with a generous pinch of salt, freshly ground black pepper, garlic powder, and onion powder. These aromatics aren't just for flavor; they also contribute to the browning process.
The second dish will house our egg wash. Whisk a couple of large eggs with a splash of milk or water. The milk adds a touch of richness and helps the egg coat the chicken more evenly. Ensure the eggs are thoroughly beaten, creating a uniform, slightly frothy mixture.
Finally, the third dish is for our breadcrumbs. While plain breadcrumbs will work, we highly recommend using panko breadcrumbs. Panko, a Japanese style of breadcrumb, is coarser and flakier than its traditional Italian counterpart, resulting in a significantly crispier texture. For an extra layer of flavor, mix your panko with grated Parmesan cheese, dried oregano, dried basil, and a touch of red pepper flakes if you enjoy a subtle kick. This seasoned breadcrumb mixture will be the crowning glory of our chicken.
Now for the coating process: take one pounded chicken breast, pat it dry with paper towels, and dredge it thoroughly in the seasoned flour, ensuring it's completely coated. Shake off any excess. Next, transfer it to the egg wash, turning to coat both sides. Let any excess egg drip off. Finally, place the chicken in the seasoned panko breadcrumbs, pressing firmly to ensure the crumbs adhere well to every surface. Don't be shy here; really press those crumbs in. Repeat this process for all your chicken breasts. Once breaded, place them on a wire rack set over a baking sheet. This allows for air circulation and prevents the bottom from getting soggy. Pop them in the refrigerator for at least 15-20 minutes. This chilling period is a crucial, often overlooked step that helps the breading set, preventing it from falling off during frying.
The Sizzle and Sear: Achieving Golden Perfection
With our beautifully breaded chicken chilling, it's time to prepare for the sizzle. The frying step is where we achieve that glorious golden-brown crust and begin the cooking process.
Choose a heavy-bottomed skillet, preferably cast iron or stainless steel, that's large enough to accommodate one or two chicken breasts without crowding. Crowding the pan will lower the oil temperature, leading to greasy, rather than crispy, chicken. Pour in about a quarter to a half-inch of a neutral oil with a high smoke point, such as canola, vegetable, or grapeseed oil. Avoid olive oil for frying, as its smoke point is too low, and it can impart an unpleasant burnt flavor.
Heat the oil over medium-high heat until it shimmers and a small sprinkle of breadcrumbs sizzles immediately upon contact. A good indicator is when you see wisps of smoke, but not heavy smoke. Carefully place one or two breaded chicken breasts into the hot oil. Be mindful of splatters. Fry for about 3-4 minutes per side, or until the chicken is beautifully golden brown and crisp. The exact timing will depend on the thickness of your chicken and the heat of your oil. We're not aiming to cook the chicken all the way through at this stage, merely to develop that magnificent crust.
Once golden, carefully remove the chicken from the skillet and place it back on the wire rack set over the baking sheet. Resist the urge to stack them; we want to preserve that crispness. If necessary, add more oil to the pan between batches, allowing it to heat up again before adding the next round of chicken.
The Heart of the Matter: Marinara and Mozzarella
While our chicken rests, it's time to assemble the other crucial components: the marinara and the mozzarella. For the marinara, you have options. A high-quality store-bought marinara sauce is perfectly acceptable and a fantastic time-saver. Look for one with minimal added sugar and a robust tomato flavor. If you're feeling ambitious, a simple homemade marinara, simmered with garlic, onion, and fresh basil, will elevate the dish to another level. Whichever you choose, ensure it's warmed through before assembly.
For the cheese, we recommend a combination of low-moisture, part-skim mozzarella and freshly grated Parmesan or Pecorino Romano. The low-moisture mozzarella melts beautifully without releasing too much water, which can make your chicken soggy. Freshly grated Parmesan adds a pungent, salty depth that complements the other flavors. Shredding your own cheese from a block will always yield superior results compared to pre-shredded varieties, which often contain anti-caking agents that can hinder melting.
The Grand Finale: Baking to Perfection
Now, we bring all the elements together for the final, transformative bake. Preheat your oven to a moderate temperature, around 375°F (190°C).
Spoon a thin layer of warmed marinara sauce onto the bottom of a baking dish large enough to hold your chicken breasts in a single layer. This prevents the chicken from sticking and adds another layer of flavor from the get-go.
Carefully arrange the fried chicken breasts over the marinara. Spoon a generous amount of marinara sauce over each piece of chicken, ensuring it's well-coated but not submerged. Then, layer with the shredded mozzarella and a sprinkle of Parmesan cheese. Don't be shy with the cheese; this is Chicken Parmesan, after all!
Transfer the baking dish to the preheated oven and bake for 15-20 minutes, or until the cheese is melted, bubbly, and lightly golden, and the chicken is cooked through. You can check for doneness by inserting an instant-read thermometer into the thickest part of the chicken; it should register 165°F (74°C). If you desire a more deeply browned, almost charred cheese topping, you can switch on the broiler for the last minute or two, but watch it very closely to prevent burning.
Serving Suggestions and Culinary Companions
Once out of the oven, allow the Chicken Parmesan to rest for a few minutes before serving. This allows the juices to redistribute, ensuring a more tender and flavorful bite.
Chicken Parmesan is a remarkably versatile dish that pairs beautifully with a variety of sides. Here are a few suggestions to complete your meal:
A simple spaghetti or linguine tossed with extra marinara sauce is a classic pairing that never disappoints. The pasta provides a comforting base to soak up all those delicious flavors.
For a lighter option, consider a crisp green salad with a bright vinaigrette. The acidity of the dressing will cut through the richness of the chicken and cheese.
Steamed or roasted vegetables, such as asparagus, broccoli, or green beans, offer a healthy and colorful accompaniment. A squeeze of lemon over your vegetables will add a zesty counterpoint.
Garlic bread or crusty Italian bread is essential for mopping up any leftover sauce. There's truly nothing quite like tearing into a warm piece of bread that has absorbed the savory essence of the dish.
Troubleshooting and Tips for Success
Even with the best intentions, sometimes things don't go exactly as planned. Here are a few common issues and how to address them, along with some additional tips to ensure your Chicken Parmesan is a resounding triumph every time.
Soggy Breading: This is perhaps the most common complaint. To prevent it, ensure your chicken is patted very dry before breading. Don't overcrowd the frying pan, as this lowers the oil temperature and prevents crisping. The chilling step after breading is also crucial for adherence. Finally, serving immediately after baking helps, as prolonged sitting in sauce can soften the crust.
Dry Chicken: Pounding the chicken to an even thickness is key to preventing dry spots. Also, avoid over-frying. We're just looking for golden brown at that stage. The final bake is where it cooks through. Using a meat thermometer is your best friend here, ensuring it reaches 165°F without going beyond.
Breading Falling Off: Again, patting the chicken dry, pressing the breadcrumbs firmly, and chilling the breaded chicken are your best defenses against this.
Oil Splatter: Always place chicken gently away from you into hot oil. A splatter screen can be a lifesaver, but always be cautious with hot oil.
Make Ahead Magic: While best served fresh, you can bread and fry the chicken ahead of time. Let it cool completely, then store it in an airtight container in the refrigerator for up to a day. Reheat in the oven before adding sauce and cheese, or proceed with the baking step as usual. You can also prepare your marinara sauce in advance.
Flavor Boosters: Don't hesitate to experiment with your breadcrumb mixture. A pinch of smoked paprika, a touch of finely chopped fresh herbs like parsley or chives, or even a sprinkle of lemon zest can add intriguing layers of flavor.
Cheese Choices: While mozzarella and Parmesan are traditional, feel free to explore other meltable cheeses. Provolone adds a sharper, nuttier note, while a touch of Fontina can bring a creamy richness.
To Wrap Things Up
There you have it, a comprehensive guide to crafting a Chicken Parmesan that will not only impress your family and friends but will also fill you with a profound sense of culinary accomplishment. We've peeled back the layers of perceived complexity, revealing a process that is, at its heart, a series of manageable, enjoyable steps. From the gentle art of pounding chicken to the triumphant sizzle of the pan and the final, glorious melt of cheese in the oven, each stage contributes to a symphony of textures and flavors. Remember, cooking is an act of love, an exploration of taste, and a journey of continuous learning. Don't be afraid to experiment, to adapt, and to make this recipe truly your own. So, gather your ingredients, take a deep breath, and prepare to create a Chicken Parmesan that is not just crispy, not just flavorful, but a testament to your newfound culinary confidence. Enjoy the process, savor the aroma, and delight in the knowledge that you've just created a restaurant-quality meal right in your very own kitchen. Happy cooking!