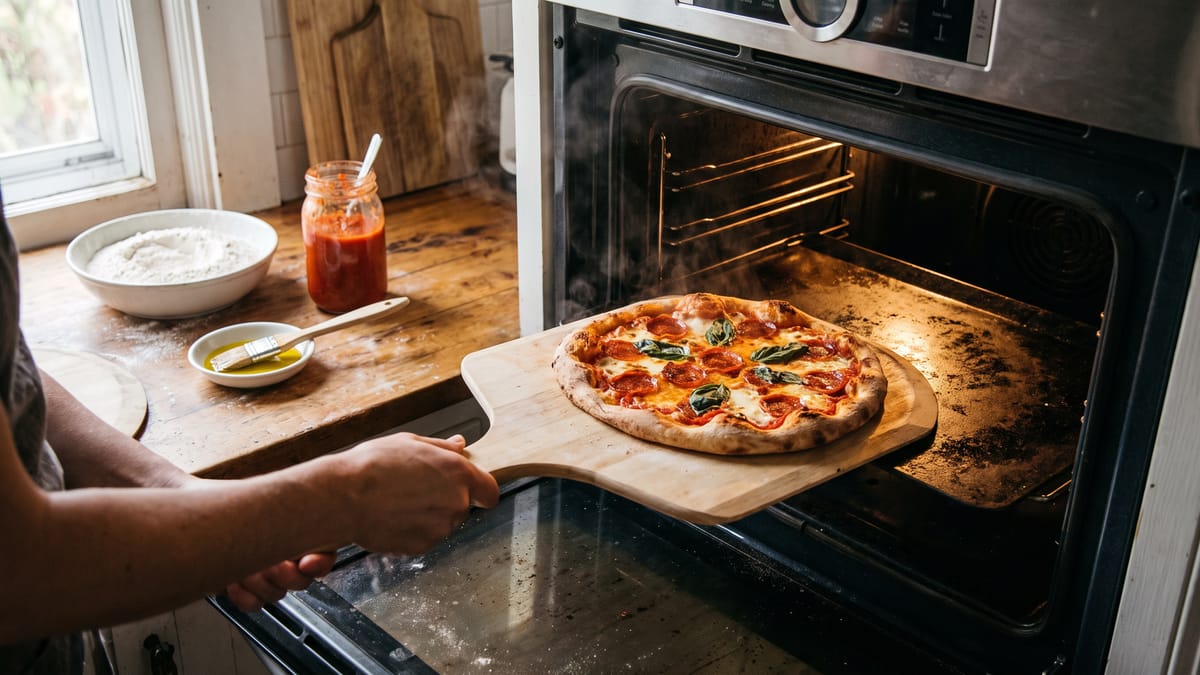
The Simple Trick That Makes Homemade Pizza Taste More Like Your Favorite Pizzeria
Have you ever bitten into a slice of homemade pizza, fresh from your oven, only to feel a pang of something missing? It is delicious, undoubtedly, but it is not quite the same as that transcendent experience at your favorite local pizzeria. That perfect crisp-chewy crust, the bubbling, slightly charred edges, the way the cheese melts into a golden, gooey dream, it is an art form, a symphony of textures and flavors that often eludes us in our home kitchens. We knead the dough, we source the finest ingredients, we follow recipes meticulously, yet that elusive "pizzeria quality" often remains just out of reach. We wonder, what is their secret? Is it a special oven, a proprietary blend of flour, some ancient, guarded technique passed down through generations? The truth, as we have discovered through countless experiments and a deep dive into the arcane world of pizza making, is both simpler and more profound than we might imagine. There is indeed a trick, a foundational principle that, once embraced, elevates our homemade pies from good to truly glorious.
The Quest for Pizzeria Perfection
For years, we, like many home cooks, chased the dream of replicating that quintessential pizzeria taste. We invested in pizza stones, experimented with various flours from high-gluten bread flour to delicate 00 flour, and even dabbled in long, cold fermentation processes for our dough. Each attempt brought us closer, certainly, but there was always a subtle gap, a textural nuance that felt just a little off. Our crusts, while flavorful, often lacked that characteristic airy interior coupled with a satisfyingly crisp exterior. The cheese would melt beautifully, but the overall mouthfeel was never quite as dynamic, as captivating, as that of a professionally crafted pie. We meticulously observed pizzaiolos at work, noting their swift, practiced movements, the blistering heat of their ovens, and the sheer volume of pizzas they produced. It seemed an insurmountable challenge, a culinary Everest that only specialized equipment and years of apprenticeship could conquer.
Unveiling the Central Secret: Heat, and Lots of It
After much deliberation, countless trials, and a fair share of burnt crusts, we arrived at a singular, undeniable conclusion: the most significant differentiator between our home-baked pizza and that of a professional pizzeria is heat. Not just any heat, mind you, but intense, sustained, and incredibly high heat. Commercial pizza ovens operate at temperatures far exceeding what a standard home oven can typically achieve, often soaring past 800°F (425°C) and sometimes even touching 1000°F (538°C). This extreme heat is not merely a matter of cooking speed; it fundamentally transforms the dough and toppings in ways that lower temperatures simply cannot. It is the catalyst for the magical alchemy that turns simple ingredients into an extraordinary culinary experience. Our conventional ovens, usually maxing out around 500-550°F (260-288°C), just cannot compete on this front, and that is where the "simple trick" comes into play.
The Simple Trick: Preheating Your Pizza Stone (or Steel) for an Extended Period
Here it is, the revelation that will change your homemade pizza game forever: we must preheat our pizza stone or steel for a significantly longer duration than we think is necessary, at the highest possible temperature our oven can reach. This is the cornerstone, the fundamental principle that unlocks pizzeria-quality crusts in a home setting. It sounds deceptively simple, perhaps even obvious, but the sheer impact of this extended preheating period is truly transformative. Most recipes will instruct us to preheat our oven and stone for 30 minutes to an hour. We are here to tell you, that is often not enough. We need to push it further, much further.
Why Extended Preheating is a Game Changer
Let us delve into the science behind this seemingly minor adjustment. When we place our pizza dough onto a screaming hot surface, several critical reactions occur almost instantaneously:
- • The Oven Spring Phenomenon: The sudden, intense heat causes the water in the dough to rapidly convert into steam. This steam expands, creating countless air pockets within the crust, leading to that coveted airy, open crumb structure. It is what gives the crust its volume and chewiness. Without sufficient initial heat, the dough merely bakes slowly, resulting in a denser, flatter crust.
- • Rapid Crust Browning and Charring: The Maillard reaction and caramelization, responsible for the delicious browning and complex flavors of the crust, are accelerated at high temperatures. This creates those beautiful, slightly charred "leopard spots" on the bottom and edges of the crust, a hallmark of authentic Neapolitan-style pizza. These spots are not just aesthetic; they contribute a subtle bitterness and depth of flavor that is utterly essential.
- • Crispy Exterior, Chewy Interior: The intense heat instantly sets the exterior of the dough, creating a crisp shell, while the interior continues to cook and steam, resulting in a wonderfully chewy texture. This contrast is what makes a great pizza crust so satisfying.
- • Efficient Moisture Management: High heat cooks the pizza so quickly that the toppings have less time to release their moisture into the crust, preventing sogginess. The crust cooks through before it becomes saturated, maintaining its structural integrity and crispness.
How to Implement the Trick: A Step-by-Step Guide
Now that we understand the "why," let us break down the "how" into actionable steps.
Choosing Your Heat Conductor: Stone Versus Steel
Before we even begin preheating, we need to consider our baking surface.
- • Pizza Stone: A classic choice, pizza stones are made from ceramic or cordierite and absorb and retain heat effectively. They are excellent for achieving a crisp bottom crust. However, they can be prone to cracking if subjected to rapid temperature changes or mishandling.
- • Pizza Steel: Our preferred choice, pizza steels are made from solid steel and are significantly more conductive than stones. They absorb and transfer heat much more efficiently and retain it for longer. This translates to an even more intense initial heat transfer to your dough, resulting in a superior crust. They are also virtually indestructible. If you are serious about your pizza, a good pizza steel is a worthwhile investment.
The Extended Preheating Protocol
- 1. Position Your Rack: We want our pizza to be as close to the top heating element as safely possible, without touching it. For most ovens, this means the second-to-top rack position. This ensures radiant heat from above contributes to the cooking process, browning the top of our pizza.
- 2. Place Your Stone/Steel: Put your pizza stone or steel on the designated rack before you turn on the oven. We want it to heat up gradually with the oven to prevent thermal shock, especially with a stone.
- 3. Crank Up the Heat: Set your oven to its absolute highest temperature setting. For many home ovens, this will be 500°F (260°C) or 550°F (288°C). Do not be shy; we are aiming for maximum heat saturation.
- 4. The Waiting Game: At Least One Hour, Preferably More: This is the crucial step. Once your oven reaches its set temperature, let it continue to preheat for at least one full hour. We often extend this to 90 minutes, sometimes even two hours, especially if we are planning to bake multiple pizzas. The goal is not just for the oven's air to reach temperature, but for the dense mass of your stone or steel to become thoroughly saturated with heat, radiating an intense, consistent warmth. Think of it like charging a battery; we want it fully charged with thermal energy.
- 5. Prepare Your Pizza While Preheating: While your oven and stone are getting infernally hot, prepare your pizza. Stretch your dough, apply your sauce, cheese, and toppings. Work efficiently but carefully.
Launching Your Pizza: The Moment of Truth
Launching the pizza onto the screaming hot stone or steel requires a bit of practice, but it is essential for success.
- • Flour Your Peel Generously: Dust your pizza peel (wood or metal) with a generous amount of semolina flour or all-purpose flour. Semolina works particularly well as its coarser texture acts like tiny ball bearings, helping the pizza slide smoothly.
- • Assemble Quickly: Once the peel is floured, immediately transfer your stretched dough onto it. Then, quickly add your sauce, cheese, and toppings. The longer the dough sits on the peel, the greater the chance it will stick.
- • The Swift Slide: Open your hot oven, position the peel at the back of the stone/steel, and with a swift, confident forward-and-back motion, slide the pizza off the peel and onto the hot surface. Do not hesitate; a slow launch often leads to a mangled mess.
Baking Times and Visual Cues
Because of the intense heat, your pizza will cook very quickly, typically in 5 to 8 minutes. We need to be vigilant and trust our eyes.
- • Bubbling and Browning: Look for the crust to puff up, the edges to brown and blister, and the cheese to melt, bubble, and acquire some golden-brown spots.
- • Checking the Bottom: If you are comfortable, you can use your peel to gently lift a corner of the pizza and check the bottom crust. It should be deeply golden brown with those characteristic charred spots.
- • Rotate if Necessary: If your oven has hot spots, you might need to rotate the pizza halfway through baking to ensure even cooking.
Beyond the Trick: Other Pillars of Pizzeria-Quality Pizza
While extended preheating is the cornerstone, it is part of a larger edifice. To truly replicate that pizzeria experience, we also need to consider these crucial elements:
The Dough: The Foundation of Flavor
- • High-Quality Flour: We advocate for using good quality bread flour or "00" flour, which has a specific protein content ideal for pizza. Experiment to find what you like.
- • Hydration Matters: Dough hydration (the ratio of water to flour) significantly impacts texture. Higher hydration (around 65-75%) leads to a more open, airy crumb.
- • Long Fermentation: A long, cold fermentation in the refrigerator, typically 24-72 hours, allows yeast to develop complex flavors and makes the dough easier to digest and stretch. This is where patience truly pays off.
- • Proper Kneading: Develop the gluten structure sufficiently through proper kneading, either by hand or with a stand mixer. This gives the dough its elasticity and chew.
- • Room Temperature Dough: Always let your dough come to room temperature for at least an hour before stretching. Cold dough is stiff and difficult to work with.
The Sauce: Simplicity is Key
- • San Marzano Tomatoes: For a classic Neapolitan-style pizza, crushed San Marzano tomatoes are unparalleled. Their balance of sweetness and acidity is perfect.
- • Minimal Seasoning: A great pizza sauce is often incredibly simple: crushed tomatoes, a pinch of salt, a drizzle of olive oil, and perhaps a fresh basil leaf or two. Avoid cooking the sauce; let the oven do the work.
- • Less is More: Do not overload your pizza with sauce. A thin, even layer is all you need.
The Cheese: The Melty Heart
- • Low-Moisture Mozzarella: For classic American-style pizza, low-moisture, part-skim mozzarella is ideal. It melts beautifully without releasing too much water, which can make your crust soggy. Shred it yourself for better results than pre-shredded varieties, which often contain anti-caking agents.
- • Fresh Mozzarella (for Neapolitan-style): If you are aiming for a Neapolitan-style pie, fresh mozzarella (fior di latte) is the way to go. Tear it into small pieces and gently blot it with a paper towel to remove excess moisture.
- • Parmesan or Pecorino: A sprinkle of grated hard cheese like Parmesan or Pecorino Romano adds a wonderful salty, umami kick.
Toppings: Quality and Restraint
- • High-Quality Ingredients: Use the freshest, best-quality toppings you can find. They are the stars of the show.
- • Do Not Overload: This is a common mistake. Too many toppings create a dense, heavy pizza that struggles to cook evenly and can make the crust soggy. A few well-chosen toppings are far superior to a mountain of mediocre ones.
- • Pre-Cook Wet Toppings: If using vegetables like mushrooms or onions that release a lot of water, consider sautéing them lightly beforehand to remove some of that moisture. Meats like sausage or bacon should also be pre-cooked.
Putting It All Together: The Symphony of Pizza Making
Making truly exceptional homemade pizza is a journey, not a destination. It is about understanding the interplay of heat, ingredients, and technique. The extended preheating of your pizza stone or steel is the single most impactful adjustment we can make in our home kitchens to bridge the gap between good homemade pizza and great pizzeria-quality pizza. It creates an environment that mimics the intense heat of a commercial oven, allowing the dough to perform its magic, creating that coveted crisp-chewy crust with delightful charring.
Once you master this simple trick, you will find that your pizzas achieve a depth of flavor and a textural complexity that was previously unattainable. The crust will be airy yet substantial, the cheese perfectly melted and bubbly, and the toppings will shine. It is a revelation, a culinary breakthrough that transforms the humble act of making pizza at home into a truly joyful and immensely satisfying experience. So, crank up that oven, give your stone or steel ample time to heat, and prepare to be astonished by the pizzeria-quality pies emerging from your very own kitchen. We promise, your taste buds, and your family, will thank you for it.