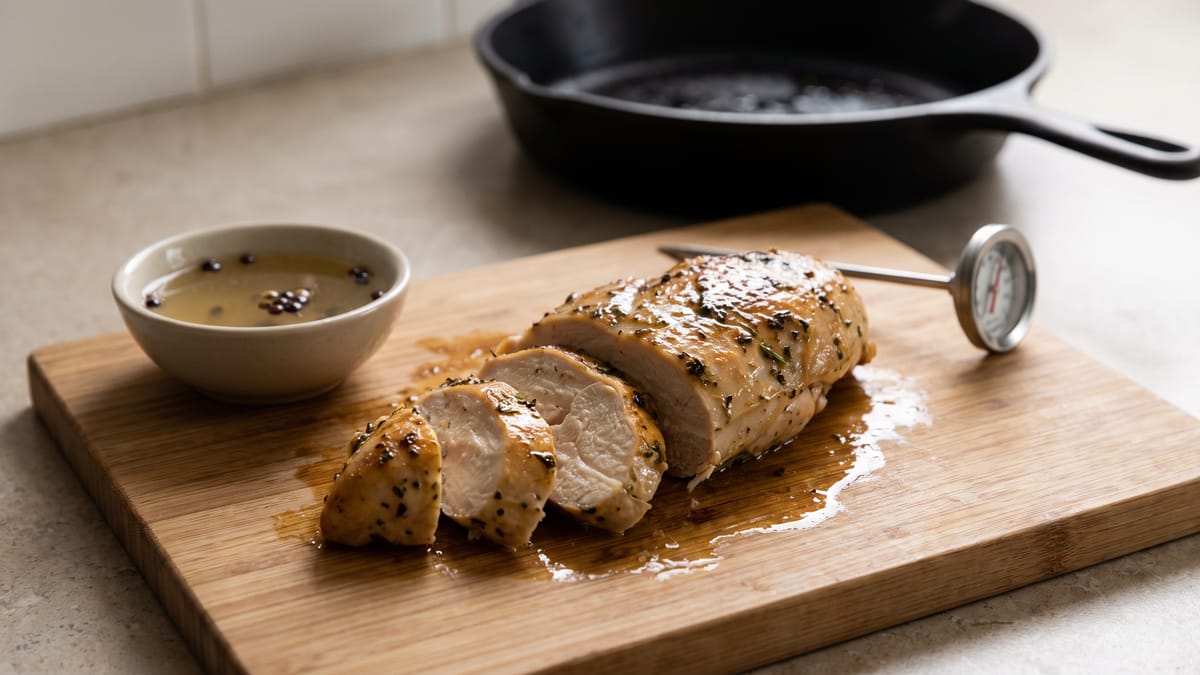
The Secret to Juicy Chicken Breasts That Never Turn Out Dry
We've all been there. The promise of a quick, healthy, and versatile meal often begins with a package of boneless, skinless chicken breasts. They're a culinary chameleon, ready to embrace almost any flavor profile, from zesty lemon-herb to smoky barbecue. Yet, for many home cooks, this seemingly straightforward protein presents a persistent paradox. We envision a succulent, tender morsel, brimming with savory juices, only to be met with a chalky, arid disappointment that requires a gallon of sauce to render palatable. It's a common culinary conundrum, a kitchen quest that has frustrated countless aspiring chefs and seasoned veterans alike. We yearn for that perfectly cooked chicken breast, one that yields to the fork with graceful ease and bursts with moisture in every bite. But how do we bridge the chasm between expectation and reality? How do we banish the specter of dry, stringy chicken from our dinner tables forever?
Fear not, fellow food enthusiasts. Today, we embark on a journey to unravel this age-old mystery. We will delve into the science, the art, and the subtle nuances that transform an ordinary chicken breast into an extraordinary culinary experience. This isn't just about a single trick or a magic ingredient; it's a holistic approach, a symphony of techniques that, when harmonized, guarantee a consistently juicy outcome. We will explore the common pitfalls, dissect the reasons behind dryness, and equip you with an arsenal of knowledge to confidently conquer the chicken breast once and for all. Prepare to banish blandness and embrace succulence.
Understanding the Enemy: Why Chicken Breasts Dry Out
Before we can conquer the dryness, we must first understand its origins. Chicken breasts, particularly the boneless, skinless variety, are inherently lean. They contain very little fat compared to other cuts of poultry, such as thighs or drumsticks. Fat, as we know, contributes significantly to moisture and flavor. Without that protective layer of fat, chicken breasts are more susceptible to the ravages of heat.
The primary culprit behind dry chicken is overcooking. Protein, when subjected to excessive heat, undergoes a process called denaturation. Essentially, the protein strands tighten and squeeze out their internal moisture, much like wringing out a wet sponge. The longer they cook, and the higher the temperature, the more moisture is expelled. This is why a chicken breast that was perfectly plump and juicy just moments before can transform into a fibrous, desiccated husk with just a minute or two of extra cooking.
Another factor is the inconsistent thickness of most chicken breasts. They tend to be thicker at one end and taper down at the other. This uneven topography means that the thinner parts will cook much faster than the thicker parts, leading to some sections being perfectly cooked while others are woefully overdone. This inherent structural challenge requires a strategic approach to ensure uniform cooking.
The Foundation of Flavor: Brining and Marinating
Our first line of defense against dryness, and a potent enhancer of flavor, lies in the art of brining and marinating. These techniques, while often used interchangeably, serve distinct but complementary purposes.
Brining involves submerging the chicken in a solution of salt and water, often with added aromatics like herbs, spices, and citrus zest. The salt in the brine works its magic through osmosis. It helps the chicken absorb extra moisture, but more importantly, it denatures some of the muscle proteins. This structural change allows the muscle fibers to retain more moisture during cooking, making the chicken significantly juicier and more tender. Think of it as pre-hydrating your chicken and subtly altering its protein structure to be more forgiving. A typical brine might involve a ratio of 1 tablespoon of salt per cup of water, with the chicken brining for at least 30 minutes, and up to a few hours, depending on its thickness. For an extra layer of flavor, consider adding a touch of sugar, bay leaves, peppercorns, or even a splash of apple cider vinegar to your brine. The subtle sweetness of sugar can balance the saltiness and aid in browning.
Marinating, on the other hand, focuses primarily on infusing flavor and, in some cases, tenderizing. Marinades typically contain an acidic component, such as vinegar, lemon juice, or yogurt, which helps to break down tough muscle fibers. They also include oils, herbs, spices, and other flavor agents that penetrate the surface of the chicken, imparting a delicious aroma and taste. While marinades do contribute some moisture, their primary role is not to prevent dryness in the same way that brining does. However, a well-balanced marinade can certainly enhance the overall succulence and palatability of the cooked chicken. When using acidic marinades, be mindful of the marinating time. Too long, and the acid can start to "cook" the chicken, leading to a mealy texture. Generally, 30 minutes to 2 hours is sufficient for chicken breasts.
We often find ourselves combining these two powerful techniques. A brief brine followed by a flavorful marinade can yield truly spectacular results, ensuring both internal juiciness and external flavor.
The Art of Preparation: Pounding and Patting
Once our chicken breasts are properly seasoned and perhaps even brined or marinated, the next crucial step lies in their physical preparation. As we noted earlier, the uneven thickness of chicken breasts is a significant hurdle to uniform cooking. The solution is elegantly simple: pounding.
Using a meat mallet or a heavy-bottomed pan, gently pound the thicker parts of the chicken breast until the entire piece is of a relatively even thickness, usually around three-quarters of an inch. This not only promotes even cooking but also tenderizes the meat by breaking down some of those tough muscle fibers. Be careful not to over-pound; we're aiming for uniformity, not a paper-thin cutlet. This simple act dramatically reduces the likelihood of some parts drying out while others are still undercooked.
Equally important, and often overlooked, is the act of thoroughly patting the chicken dry with paper towels before cooking. Moisture on the surface of the chicken will create steam when it hits a hot pan, preventing proper browning and caramelization. We want a beautiful, golden-brown crust, not a pale, steamed exterior. A dry surface allows for the Maillard reaction, that magical chemical process responsible for those rich, complex flavors and appealing textures we crave.
The Heat is On: Cooking Techniques for Success
Now, we arrive at the heart of the matter: the actual cooking process. This is where many home cooks falter, often due to impatience or a misunderstanding of heat dynamics.
Pan-Searing: The Sizzle and the Finish
Pan-searing is arguably one of the most popular and effective methods for cooking juicy chicken breasts. The key here is a hot pan and a strategic approach. We want to create that beautiful crust while ensuring the interior cooks gently and evenly.
Start by heating a heavy-bottomed skillet, preferably cast iron or stainless steel, over medium-high heat. Add a tablespoon or two of a high smoke point oil, such as canola, grapeseed, or avocado oil. Once the oil shimmers and just begins to smoke, carefully add the patted-dry chicken breasts to the pan, ensuring not to overcrowd it. Cook in batches if necessary; overcrowding will drop the pan's temperature and lead to steaming instead of searing.
Sear the chicken for 3-5 minutes per side, or until a deep golden-brown crust forms. Resist the urge to constantly move or flip the chicken. Let it develop that beautiful crust. Once both sides are seared, we have a couple of options to finish cooking.
One effective method is to reduce the heat to medium-low, add a knob of butter, a few sprigs of fresh herbs like thyme or rosemary, and a smashed garlic clove to the pan. Baste the chicken with the melted butter and aromatics for another 5-7 minutes, or until it reaches the desired internal temperature. The gentle heat and continuous basting contribute to a supremely tender and flavorful result.
Alternatively, after searing, you can transfer the pan directly to a preheated oven (around 375°F or 190°C) to finish cooking. This is particularly useful for thicker chicken breasts, as it allows for a more even and gentle cooking from all sides, preventing the exterior from burning while the interior catches up. Finish in the oven for 8-12 minutes, depending on thickness.
Roasting: The Hands-Off Approach
Roasting chicken breasts in the oven offers a more hands-off approach and can be excellent for meal prepping or when cooking for a crowd. The principles remain similar: even thickness and precise temperature control.
Preheat your oven to a moderate temperature, usually 400°F (200°C). Lightly oil and season your pounded chicken breasts. Place them on a baking sheet, ideally one with a wire rack to allow for air circulation, which helps with even cooking and browning. Roast for 18-25 minutes, depending on thickness. Again, the visual cues are helpful, but the internal temperature is paramount.
For an extra layer of flavor and moisture, consider rubbing the chicken with a compound butter before roasting, or placing lemon slices and herbs directly on top.
Grilling: The Smoky Sensation
Grilling imparts a wonderful smoky flavor and beautiful char marks, but it can also be a notorious culprit for dry chicken if not executed properly. High, direct heat can quickly desiccate lean chicken breasts.
Start with a clean, well-oiled grill grate heated to medium-high. Place the seasoned, pounded chicken breasts directly over the heat. Grill for 3-4 minutes per side to get those coveted grill marks and a nice sear. Once seared, move the chicken to a cooler part of the grill, or reduce the heat to medium-low, and close the lid. This creates a more oven-like environment, allowing the chicken to cook through gently without burning the exterior. Continue grilling for another 5-8 minutes, flipping occasionally, until it reaches the correct internal temperature.
Basting with a flavorful sauce or marinade during the last few minutes of grilling can add moisture and a lovely glaze, but be careful with sugary sauces, as they can burn easily.
The Golden Rule: Temperature, Not Time
This is perhaps the single most important piece of advice we can offer: cook to temperature, not to time. Cooking times are merely guidelines; they can vary wildly based on the thickness of the chicken, the starting temperature of the meat, the accuracy of your oven, and even the type of pan you're using.
The only reliable way to ensure perfectly cooked, juicy chicken is to use an instant-read meat thermometer. Insert the thermometer into the thickest part of the chicken breast, avoiding any bones (though with boneless breasts, this isn't an issue). Chicken is safely cooked when it reaches an internal temperature of 165°F (74°C).
However, here's a crucial nuance: we want to remove the chicken from the heat before it reaches 165°F. Why? Because of carryover cooking. The residual heat in the chicken will continue to cook it for a few minutes after it's removed from the heat source. We aim to pull the chicken when it reaches around 160°F (71°C). During the resting period, its temperature will climb those last few degrees to a safe and perfectly juicy 165°F. This small adjustment makes an enormous difference.
The Unsung Hero: Resting Your Chicken
Once your chicken breasts have reached their ideal internal temperature, your work isn't quite done. The final, and often overlooked, step is perhaps as critical as any other: resting.
When meat cooks, the muscle fibers contract, forcing the juices towards the center. If you cut into the chicken immediately after cooking, all those precious juices will spill out onto your cutting board, leaving you with a dry, less flavorful piece of meat.
To prevent this culinary tragedy, transfer the cooked chicken breasts to a cutting board and loosely tent them with foil. Allow them to rest for at least 5-10 minutes. During this time, the muscle fibers relax, and the juices redistribute evenly throughout the meat. This ensures that every bite is as succulent and flavorful as possible. This is a non-negotiable step for truly juicy results.
Beyond the Basics: Advanced Tips and Tricks
For those who want to elevate their chicken breast game even further, here are a few additional considerations:
The Power of Marinade Tenderizers
Some marinades incorporate natural tenderizers beyond just acid. Papaya, pineapple, and kiwi contain enzymes that can break down protein fibers. While effective, use these with caution, as too much exposure can lead to a mushy texture. A short marinating time, perhaps 30 minutes, is usually sufficient.
The Sous Vide Advantage
For ultimate precision and unparalleled juiciness, consider the sous vide method. This technique involves vacuum-sealing chicken breasts and cooking them in a precisely temperature-controlled water bath. By cooking at a lower, consistent temperature (e.g., 145-150°F or 63-66°C for 1-2 hours), the chicken cooks perfectly from edge to edge without any risk of overcooking. A quick sear in a hot pan after the sous vide bath adds that desirable crust.
Compound Butters and Pan Sauces
Don't let the pan drippings go to waste! After cooking, deglaze the pan with a splash of wine, broth, or even water. Scrape up all those flavorful browned bits, add a knob of butter, and perhaps some fresh herbs. This quick pan sauce is a fantastic way to add an extra layer of moisture and flavor to your perfectly cooked chicken. Similarly, a dollop of compound butter, made by blending softened butter with herbs, garlic, and citrus zest, melting over the hot chicken as it rests, can be transformative.
To Wrap Things Up
The quest for consistently juicy chicken breasts is a culinary journey, not a single destination. It's an accumulation of small, intentional steps, each contributing to the ultimate goal of tender, flavorful perfection. We’ve explored the fundamental reasons behind dryness, from the lean nature of the meat to the perils of overcooking. We've armed ourselves with the power of brining and marinating, techniques that infuse moisture and flavor from within. We've embraced the practicality of pounding to ensure even cooking and learned the importance of a dry surface for that irresistible crust.
Most crucially, we've committed to cooking to temperature, not to time, understanding that an instant-read thermometer is our most trusted ally. And finally, we've honored the quiet, yet profound, act of resting, allowing the chicken to reabsorb its precious juices, ensuring every slice is a testament to our culinary care.
So, the next time you approach that package of boneless, skinless chicken breasts, remember these principles. Approach them with confidence, armed with knowledge, and a little patience. You'll soon discover that the secret to juicy chicken breasts isn't a secret at all, but rather a harmonious blend of thoughtful preparation, precise cooking, and a deep appreciation for the culinary process. Your taste buds, and your dinner guests, will thank you. Happy cooking!