The Secret to Juicy Burgers With Crispy, Caramelized Edges
The quest for the perfect burger is a culinary journey many of us embark on, often with mixed results. We dream of that ideal patty: incredibly juicy on the inside, bursting with flavor, yet sporting a crusty, deeply caramelized exterior that crunches delightfully with every bite. This isn't some mythical creature confined to high-end burger joints; it's an achievable reality right in our own kitchens. Today, we're unlocking the secrets to crafting such a masterpiece, moving beyond mere grilling to a meticulous art form that guarantees satisfaction. Forget dry, crumbly patties or flaccid, pale surfaces. We're about to elevate our burger game to an entirely new stratosphere, transforming humble ground meat into a symphony of textures and tastes.
The Foundation: Choosing Our Meat Wisely
Our burger's destiny begins long before it hits the heat, specifically with our selection of ground beef. This isn't a place for compromise; the quality of our meat directly dictates the juiciness and flavor profile of our final product. We're looking for a specific fat-to-lean ratio, typically 80/20. This means 80% lean meat and 20% fat. Why this particular ratio, you ask? The fat is our friend here. As it cooks, it renders, basting the meat from within, preventing dryness, and contributing immensely to that coveted juiciness. A leaner blend, say 90/10, might seem healthier, but it often leads to a drier, less flavorful burger. Conversely, a fattier blend, like 70/30, could result in an overly greasy patty that shrinks dramatically.
Beyond the ratio, consider the grind. A coarser grind often yields a more tender, less compacted patty. Many butchers offer custom grinds, and if we have access to one, it's worth exploring. Freshly ground beef, ideally from a reputable butcher, will always triumph over pre-packaged options that have been sitting on a supermarket shelf for days. The freshness impacts not only the flavor but also the texture. We want bright red meat with streaks of creamy white fat, indicating quality and proper handling.
The Art of Seasoning: More Than Just Salt and Pepper
Once we have our perfect meat, the next critical step is seasoning. This is where many home cooks falter, often under-seasoning or seasoning too early. The golden rule for burgers is simple: salt and pepper, and plenty of it. We're not just flavoring the surface; we're aiming to season the entire patty. Coarse salt, like kosher or sea salt, is ideal, as its larger crystals distribute more evenly and provide a pleasant textural crunch. Freshly ground black pepper adds a pungent warmth that complements the richness of the beef.
When do we season? Right before cooking. Seasoning too early, especially with salt, can draw moisture out of the meat, leading to a drier burger. We want to form our patties first, then season them generously on both sides just moments before they hit the heat. Some might argue for incorporating other flavors directly into the meat, like Worcestershire sauce, onion powder, or garlic powder. While these can certainly enhance the flavor, for a truly classic, beef-forward burger, we advocate for letting the meat shine, augmented only by salt and pepper. If we do decide to add other ingredients, we must be mindful not to overmix, as this can lead to a tough, dense patty.
The Patty Formation: Gentle Hands, Thoughtful Shape
Forming the patty seems straightforward, yet it holds a crucial key to achieving both juiciness and that beautiful, flat shape. The primary goal is to handle the meat as little as possible. Overworking the meat compresses the protein strands, making the final burger tough and dense. We want a light touch, forming the patties gently.
Aim for a patty that is slightly wider than our bun, as burgers tend to shrink during cooking. A good thickness is usually around three-quarters of an inch to an inch. Now, for the secret weapon: the dimple. Before cooking, gently press an indentation in the center of each patty with our thumb. This dimple helps prevent the burger from bulging into a dome shape as it cooks, ensuring a flat, even surface for our toppings and a consistent cooking experience. Without it, the edges cook faster and the center rises, creating an uneven patty that's harder to eat and less appealing visually.
The Mighty Maillard Reaction: Our Path to Crispy Edges
This is where the magic truly happens, the cornerstone of our quest for crispy, caramelized edges. The Maillard reaction is a chemical process that occurs when amino acids and reducing sugars in food react with heat, creating hundreds of new flavor compounds and a beautiful brown crust. It's responsible for the irresistible aroma of roasting coffee, the golden-brown crust on bread, and, crucially, the deeply savory, complex flavor of a perfectly seared burger.
To achieve an optimal Maillard reaction, we need a few things: high heat, a dry surface, and patience. The cooking surface must be screaming hot. A cast-iron skillet or a heavy-bottomed stainless steel pan is our best friend here. These materials retain heat exceptionally well, providing the consistent, intense temperature needed for a proper sear. We want to see wisps of smoke before our patties even touch the pan.
Before placing the patties, a thin layer of high-smoke-point oil, like canola, grapeseed, or avocado oil, is essential. This helps prevent sticking and promotes even browning. Once the oil shimmers, it's time to introduce our perfectly formed, seasoned patties.
The Searing Technique: Don't Touch That Burger!
This is perhaps the most difficult instruction for eager home cooks to follow: Resist the urge to move or press down on the burger! When the patty first hits the hot pan, it immediately begins to form a crust. If we move it too soon, we interrupt this process, tearing away that nascent crust and preventing the Maillard reaction from fully developing.
Place the patty in the hot pan and leave it undisturbed for a solid 3 to 4 minutes. We're looking for a deep, rich brown crust to form on the bottom. The edges will begin to look crispy and caramelized, a tell-tale sign that the Maillard reaction is in full swing. Only then, and not a moment sooner, do we flip it.
Once flipped, we repeat the process. Let the second side sear undisturbed for another 3 to 4 minutes. This two-sided searing technique ensures maximum crust development and locks in those precious juices. This is also the stage where we can add cheese, if desired, allowing it to melt beautifully over the hot patty during the final minutes of cooking.
The "Smash" Method: An Alternative Route to Crust
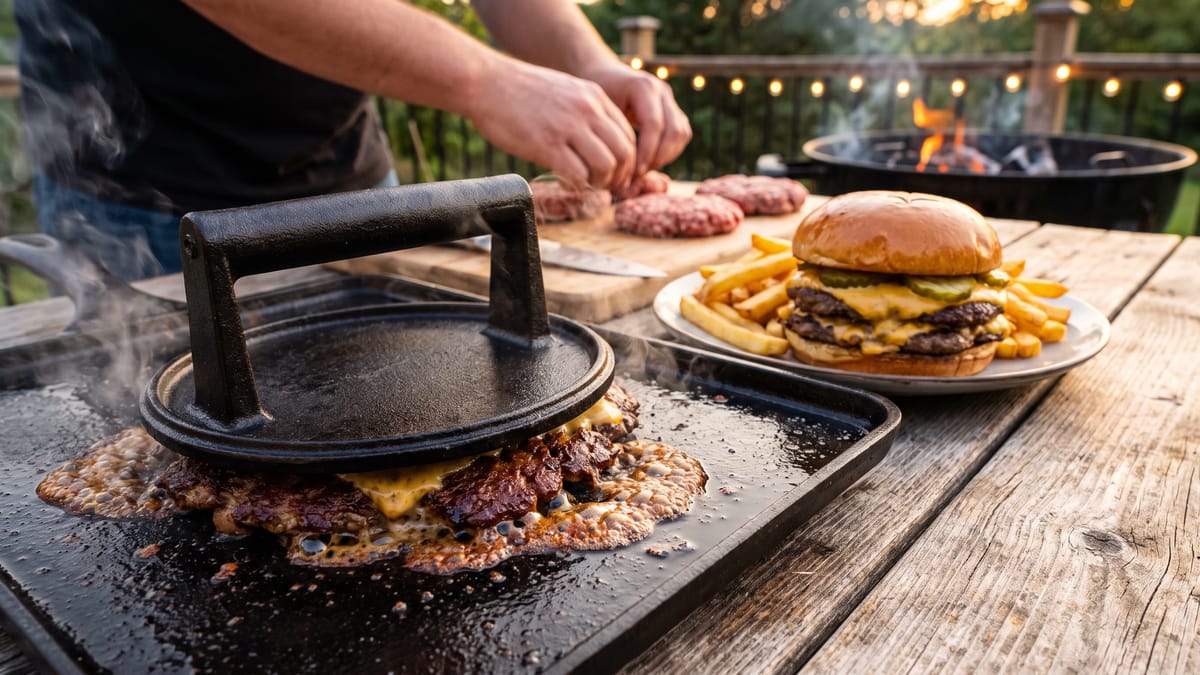
While the traditional searing method works wonders, the "smash burger" technique offers an even more aggressive path to those coveted crispy edges and a thinner, wider patty. This method involves pressing the patty firmly onto a scorching hot griddle or pan, creating a much larger surface area for the Maillard reaction to occur.
To execute a smash burger, form very loosely packed balls of ground beef, perhaps 3-4 ounces each. Place them on a super-hot, lightly oiled griddle or heavy-bottomed pan. Immediately, using a sturdy spatula and a piece of parchment paper to prevent sticking, press down firmly and evenly on each ball, flattening it into a thin disc, about a quarter-inch thick. The key is to smash it once and then leave it alone. Do not smash it again.
Allow the smashed patty to cook undisturbed for 2-3 minutes, until the edges are noticeably crispy and a deep brown crust has formed. The thinness of the patty means it cooks very quickly. Flip it, add cheese immediately if desired, and cook for another 1-2 minutes until the cheese is melted and the second side is also beautifully browned and crispy. The result is a burger with an incredible amount of crust per bite, intensely flavorful and often boasting lacey, crispy edges that extend beyond the patty itself.
Managing Internal Temperature: The Key to Juiciness
While we're obsessed with the exterior, we must not neglect the interior. A perfectly cooked burger is juicy throughout, not just a thin strip of pink in the middle. Overcooking is the enemy of juiciness. The best way to ensure proper doneness without sacrificing moisture is to use an instant-read thermometer.
For a medium-rare burger, we're aiming for an internal temperature of 130-135°F (54-57°C). For medium, 135-140°F (57-60°C). Anything beyond medium-well (150°F / 66°C) risks a dry, uninspiring burger. Remember, the temperature will continue to rise slightly after the burger is removed from the heat, so it's always better to pull it a few degrees shy of our target.
We insert the thermometer into the thickest part of the patty, avoiding the very center if it's still cold, and being careful not to push it all the way through to the pan. This precision ensures we hit that sweet spot of doneness and retain maximum juiciness.
The Importance of Resting: A Moment of Patience
Just like a steak, a burger benefits from a brief rest after cooking. This crucial step allows the juices, which have been driven to the center of the patty by the heat, to redistribute throughout the meat. If we cut into a burger immediately after cooking, those precious juices will spill out, leaving us with a drier patty.
Transfer the cooked burgers to a cutting board or plate and tent them loosely with foil for 3-5 minutes. This short pause makes a significant difference in the overall juiciness and tenderness of our burger. It's a small act of patience that yields immense rewards.
Beyond the Patty: The Supporting Cast
While our focus has been on the patty, let's not forget the crucial role of the supporting cast: the bun and the toppings. A perfect patty deserves a perfect stage.
The Bun: A Crucial Embrace
A flimsy, untoasted bun is a crime against a well-made burger. We need a bun that can stand up to the juicy patty and all its glorious toppings without disintegrating. Brioche buns, potato buns, or even a sturdy challah bun work wonderfully. The key is to toast them. Lightly butter or brush the cut sides with a little oil, then toast them on the same hot pan or griddle we used for the burgers, or under the broiler, until golden brown. This creates a barrier against moisture, preventing sogginess, and adds another layer of texture and flavor.
The Toppings: Personalizing Perfection
Here, our creativity can truly shine. Classic toppings like crisp lettuce, ripe tomato slices, thinly sliced red onion, and pickles are always a winning combination. But don't be afraid to experiment. Caramelized onions, sautéed mushrooms, a fried egg, crispy bacon, or even a dollop of our favorite aioli can elevate the burger experience. The important thing is to choose fresh, high-quality ingredients that complement, rather than overpower, the star of the show: our perfectly juicy, crispy-edged patty.
Putting It All Together
Crafting the perfect burger is a journey of precision and passion. It's about respecting the ingredients, understanding the science of cooking, and applying techniques with thoughtful intention. From selecting the right meat and seasoning it judiciously, to forming patties with care and mastering the art of the Maillard reaction, each step contributes to the ultimate goal. The searing, the patience, the gentle handling, and even the brief rest all play a vital role in delivering that irresistible combination of a juicy interior and a deeply caramelized, crispy exterior. We've explored the nuances of both traditional searing and the aggressive smash method, each offering a distinct path to burger nirvana. So, gather your ingredients, fire up your skillet, and embark on this delicious adventure. Your taste buds, and your guests, will thank you for it. The secret is out, and the perfect burger awaits.