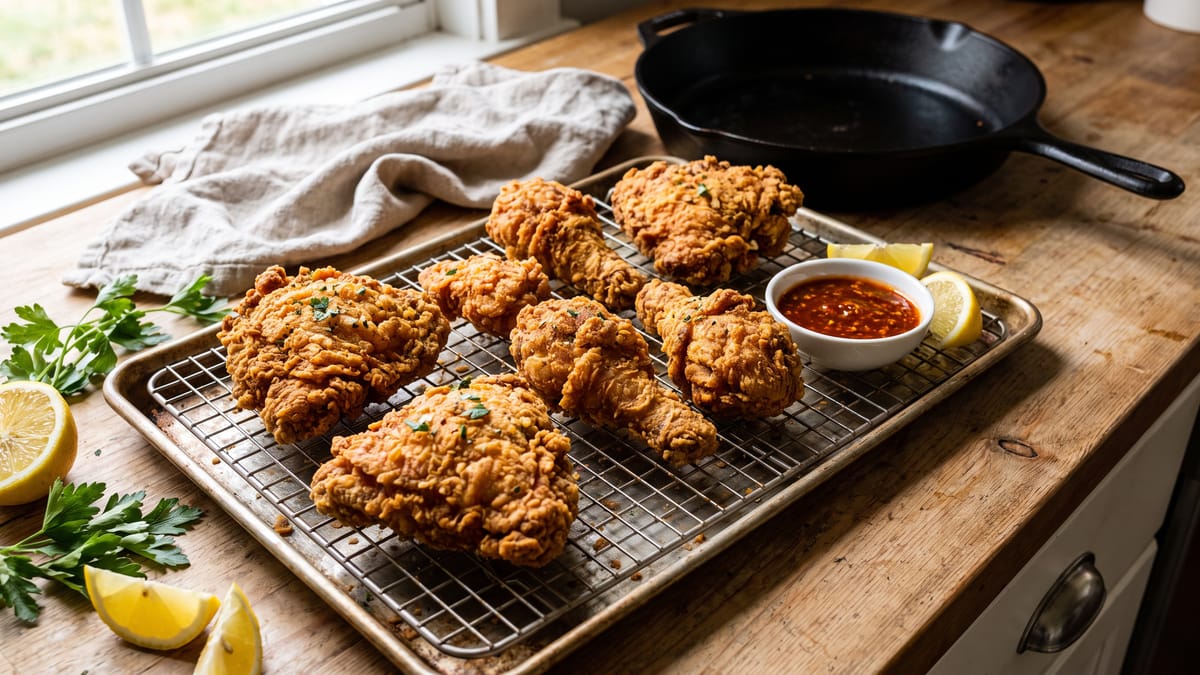
The Crispy Chicken Recipe That Tastes Like Takeout Without Deep Frying
The quest for crispy chicken, that elusive golden-brown perfection with a satisfying crunch, often leads us down a path fraught with bubbling oil and the lingering scent of deep-frying. We crave that takeout experience, the kind that makes you close your eyes in pure bliss, but without the mess, the health implications, or the sheer volume of oil required. For too long, the home cook has been told that true crispy chicken is an exclusive club, accessible only to those brave enough to wrangle a vat of hot fat. Well, dear reader, we are here to shatter that myth. We've spent countless hours in our kitchen, experimenting, tweaking, and yes, sometimes even failing spectacularly, all in pursuit of a crispy chicken recipe that delivers on all fronts: flavor, texture, and ease, all without a single drop of deep-frying.
This isn't just another baked chicken recipe. This is a culinary revelation, a method that leverages clever techniques and a little bit of scientific understanding to achieve a crust that snaps and crackles with every bite, mimicking the best fried chicken you've ever had. We're talking about a chicken that stays juicy and tender on the inside, encased in a shatteringly crisp exterior, all achieved in the humble confines of your oven or air fryer. Forget the guilt, forget the grease, and prepare to be amazed.
The Anatomy of Crispy: Understanding What Makes Chicken Really Crisp
Before we dive into the nitty-gritty of the recipe, let's take a moment to understand the science behind crispiness. It's not magic, though it often feels like it. The key to that delightful crunch lies in moisture management. When we deep-fry, the intense heat of the oil rapidly dehydrates the surface of the food, creating a crispy crust. Our challenge, then, is to replicate this dehydration effect without submerging our chicken in oil.
Several factors contribute to crispiness. First, we need a dry surface. Moisture is the enemy of crisp. Think about it: steamed chicken never gets crispy. Second, we need a coating that can effectively dry out and become brittle. Flour, cornstarch, and breadcrumbs are common choices, each offering slightly different textural profiles. Third, we need consistent, high heat to facilitate rapid dehydration and the Maillard reaction, which is that wonderful browning and flavor development we all adore. Finally, a little fat, even if it's just a thin layer, helps conduct heat and contributes to the golden hue and satisfying mouthfeel. By understanding these principles, we can strategically build a recipe that delivers on its crispy promise.
The Foundation: Choosing Your Chicken Wisely
The journey to crispy perfection begins with the right canvas: the chicken itself. While this method can be adapted for various cuts, we've found that boneless, skinless chicken thighs are the undisputed champions for this particular technique. Why thighs? They are inherently more forgiving than breasts, staying juicy even under higher heat. Their slightly higher fat content also contributes to flavor and helps prevent them from drying out. If you prefer chicken breasts, you can certainly use them, but we recommend pounding them to an even thickness to ensure even cooking and prevent them from becoming dry.
Regardless of your chosen cut, patting the chicken aggressively dry is paramount. We cannot stress this enough. Use paper towels, and don't be shy. Every speck of surface moisture needs to be banished. This crucial step is the first line of defense against a soggy exterior and the first step towards that coveted crunch.
The Secret Weapon: Our Game-Changing Coating
Here's where the magic truly begins. Our coating isn't just a simple dredge; it's a carefully crafted blend designed for maximum crispness and flavor. We're moving beyond plain flour and embracing a multi-faceted approach.
Our primary players are all-purpose flour and cornstarch. Flour provides the bulk and forms a foundational crust, while cornstarch is the true secret to that extra-crispy, almost shatter-like texture. Cornstarch, when heated, creates a crispier, lighter coating than flour alone. It helps absorb moisture and prevents the coating from becoming gummy. The ratio is important here, usually around a 2:1 ratio of flour to cornstarch.
But we're not stopping there. For an extra layer of flavor and adhesion, we're incorporating a touch of baking powder. Baking powder, when it reacts with moisture and heat, creates tiny air bubbles, which contribute to a lighter, more airy, and ultimately crispier texture. Think of it as giving your coating a little internal lift.
Finally, the seasoning. This is your chance to infuse your chicken with incredible flavor. Don't be afraid to be generous. We love a blend of garlic powder, onion powder, paprika (smoked paprika adds a wonderful depth), a pinch of cayenne for a subtle kick, salt, and freshly ground black pepper. Feel free to experiment with your favorite spice blends, perhaps a touch of dried oregano or thyme, or even a hint of cumin for an unexpected twist. The key is to season the coating generously, as this is where much of the chicken's external flavor will come from.
The Wet Stage: A Brief But Important Detour
While some crispy chicken recipes rely solely on a dry dredge, we've found that a quick dip in a liquid mixture significantly enhances the coating's adhesion and overall crispiness. We're not talking about a full egg wash here, which can sometimes lead to a thicker, less delicate crust. Instead, we opt for a lighter, more subtle approach.
A simple mixture of milk (any kind works, dairy or non-dairy) and a touch of hot sauce or Dijon mustard provides just enough moisture for the dry coating to cling to. The acidity in the hot sauce or mustard also helps tenderize the chicken slightly and adds another layer of subtle flavor. This brief dunk ensures that our flavorful dry coating adheres beautifully, creating a uniform, crisp shell. Think of it as the glue that holds our crispy dreams together.
The Coating Technique: Precision for Perfection
Once your chicken pieces are patted dry, dipped in the wet mixture, and ready for their crispy transformation, the coating technique becomes crucial. We recommend using a large, shallow dish or a Ziploc bag for this step. If using a dish, dredge each piece of chicken, pressing firmly to ensure the coating adheres all over. If using a bag, add a few pieces of chicken at a time, seal the bag, and shake vigorously until each piece is fully coated.
The goal is an even, generous layer of the seasoned flour mixture. Don't be shy; you want every nook and cranny covered. A well-coated piece of chicken is a happy, crispy piece of chicken. After coating, gently shake off any excess flour. We're aiming for a substantial coating, not a clumpy one. Place the coated chicken on a wire rack set over a baking sheet. This allows for air circulation around the entire piece, which is vital for even crisping.
The Pre-Bake Chill: An Unsung Hero
This step might seem counterintuitive, but trust us, it's a game-changer. After coating your chicken, allow it to rest, uncovered, in the refrigerator for at least 30 minutes, or even up to a few hours. This seemingly simple act achieves two important things. First, it allows the coating to hydrate and adhere more firmly to the chicken, reducing the chances of it flaking off during cooking. Second, and perhaps more importantly, it allows the surface of the coating to dry out slightly. Remember our earlier discussion about moisture being the enemy of crisp? This chill time actively works to remove surface moisture, setting the stage for an incredibly crisp exterior. Think of it as pre-drying your chicken before it even hits the heat.
The Cooking Method: Oven or Air Fryer, Your Choice
Now for the moment of truth: the cooking. Both the oven and the air fryer can deliver spectacular results with this method, each offering slightly different advantages.
Oven Method: The Classic Approach
For oven-baked crispy chicken, preheat your oven to a high temperature, typically around 400°F (200°C). A high initial temperature is key to kickstarting the crisping process. While the oven preheats, lightly spray your coated chicken with cooking spray or drizzle with a very thin layer of neutral oil, like avocado or grapeseed oil. This small amount of fat helps conduct heat, promotes browning, and contributes to the overall crispness.
Place the chicken on a wire rack set over a baking sheet, ensuring there's space between each piece for air circulation. Bake for 20-30 minutes, or until the chicken is cooked through and golden brown and crispy. The exact timing will depend on the thickness of your chicken pieces. Flip the chicken halfway through to ensure even browning and crisping on all sides. For an extra boost of crispness in the last few minutes, you can increase the oven temperature to 425°F (220°C) or even use the broiler for a minute or two, but watch it very closely to prevent burning.
Air Fryer Method: The Speedy Solution
The air fryer is a fantastic tool for achieving crispy results with minimal oil. Its convection technology circulates hot air rapidly, mimicking the effect of deep-frying. Preheat your air fryer to 375°F (190°C). Again, lightly spray or brush your coated chicken with a thin layer of oil.
Place the chicken in a single layer in the air fryer basket, being careful not to overcrowd it. Cook for 15-20 minutes, flipping halfway through, until the chicken is golden brown, crispy, and cooked through. Depending on your air fryer's size and power, you might need to cook in batches. Overcrowding will lead to steaming, not crisping, so resist the urge to cram too much in.
Regardless of the method you choose, always use an instant-read thermometer to ensure the chicken reaches an internal temperature of 165°F (74°C) for food safety.
Troubleshooting: Common Pitfalls and How to Avoid Them
Even with the best intentions, sometimes things don't go exactly as planned. Here are some common issues and our expert advice:
- • Soggy Coating: The most common culprit here is moisture. Ensure your chicken is thoroughly patted dry before coating, and don't skip the pre-bake chill. Overcrowding the oven or air fryer can also lead to steaming, so give your chicken some breathing room.
- • Coating Falling Off: This usually happens if the coating hasn't adhered properly. Make sure you press the coating firmly onto the chicken and allow it to rest in the fridge before cooking.
- • Uneven Browning: Flipping the chicken halfway through cooking is essential for even browning. In the oven, ensure your baking sheet is not too close to the heating elements. In an air fryer, make sure pieces aren't overlapping.
- • Dry Chicken: While thighs are more forgiving, overcooking can still lead to dry chicken. Use a meat thermometer and remove the chicken as soon as it reaches 165°F (74°C). The high heat of this method is designed for crisping the exterior quickly, so monitoring internal temperature is key.
Serving Suggestions: Completing Your Takeout-Style Feast
Once your crispy chicken emerges, golden and glorious, from the oven or air fryer, let it rest for a few minutes before serving. This allows the juices to redistribute, ensuring every bite is tender and succulent.
This versatile crispy chicken is fantastic on its own, perhaps with a squeeze of fresh lemon. But to truly recreate that takeout experience, consider pairing it with some classic sides. We love it with a creamy coleslaw, a tangy potato salad, or a simple green salad with a bright vinaigrette. For a more indulgent meal, serve it alongside some fluffy mashed potatoes and gravy (if you're feeling ambitious, make a gravy from the drippings on the baking sheet, though it will be minimal). Or, for a quick weeknight dinner, simply serve it with some steamed green beans or roasted broccoli. The possibilities are endless, and your kitchen will smell absolutely divine.
In a Nutshell: The Path to Crispy Chicken Nirvana
So there you have it, our definitive guide to achieving crispy, flavorful chicken that rivals your favorite takeout, all without the fuss and mess of deep-frying. This isn't just a recipe; it's a methodology, a culmination of careful techniques and a deep understanding of what makes food truly irresistible. From meticulously drying the chicken to crafting the perfect coating and employing strategic cooking methods, every step plays a vital role in delivering that satisfying crunch and juicy interior.
We encourage you to embrace the process, experiment with your favorite seasonings, and perhaps most importantly, enjoy the journey of transforming humble chicken into a culinary masterpiece. No longer will you have to choose between convenience and incredible flavor, or between health and indulgence. With this recipe in your arsenal, you can have it all: crispy, delicious chicken, made right in your own kitchen, exactly how you like it. Get ready to impress your family, delight your taste buds, and forever change your perception of what "fried" chicken can be. Happy cooking, and may your chicken always be crispy.