The Best Way to Cook Steak at Home for a Perfectly Browned Crust
The quest for the perfect steak, that elusive culinary masterpiece with a deeply browned, shatteringly crisp crust and a tender, juicy interior, is a journey many home cooks embark upon. We've all been there: staring longingly at restaurant steaks, wondering how they achieve such a magnificent char, only to replicate the experience at home with results that are, shall we say, less than stellar. Perhaps a pale, anemic exterior or, worse yet, a burnt offering that belies the promise of a delicious meal. Fear not, fellow food enthusiasts, for today we unravel the mysteries behind achieving that coveted crust, transforming your home kitchen into a veritable steakhouse. This isn't about complex techniques or obscure ingredients; it's about understanding the science, mastering the fundamentals, and embracing a few clever tricks that will elevate your steak game to unprecedented heights.
The Maillard Reaction: Our Culinary North Star
Before we delve into the practicalities, let's briefly discuss the star of our show: the Maillard reaction. This isn't just some fancy culinary term; it's the very essence of flavor and browning in so many of our favorite foods, from roasted coffee beans to freshly baked bread. In essence, it's a complex series of chemical reactions between amino acids and reducing sugars that occurs when food is heated above a certain temperature, typically around 285°F (140°C). It's distinct from caramelization, which involves only sugars. The Maillard reaction is responsible for hundreds of new flavor compounds, creating that rich, savory, and undeniably delicious taste we associate with a perfectly seared steak. Without it, our steak would be bland and unappealing. Our primary goal in achieving that perfect crust is to maximize this reaction on the surface of our steak.
Choosing Your Canvas: The Right Cut Matters
While the techniques we'll discuss can improve any steak, starting with the right cut certainly gives us a head start. Not all steaks are created equal, and some are inherently better suited for searing than others.
Consider these factors when selecting your steak:
Thickness: Aim for steaks that are at least 1 to 1.5 inches thick. Thicker cuts allow us to develop a beautiful crust without overcooking the interior. Thin steaks tend to cook through too quickly, making it challenging to achieve a deep sear.
Marbling: Look for good marbling, which refers to the flecks of intramuscular fat distributed throughout the meat. This fat renders during cooking, contributing to juiciness, tenderness, and a rich flavor. Ribeye, New York strip, and Porterhouse are excellent choices due to their inherent marbling. Filet mignon, while incredibly tender, is leaner and might require a bit more attention to prevent drying out.
Bone-in vs. Boneless: Bone-in cuts, like a bone-in ribeye or T-bone, often offer superior flavor due to the bone's contribution during cooking. However, boneless cuts are easier to handle and cook more evenly. The choice often comes down to personal preference and what's available.
Quality: Invest in the best quality steak you can reasonably afford. Grass-fed, prime, or choice grades will generally yield more flavorful and tender results. Think of it as an investment in a delicious meal.
The Foundation of Flavor: Preparing Your Steak
Proper preparation is paramount. Skipping these crucial steps is like trying to build a magnificent house on a shaky foundation.
Pat it Dry: This is perhaps the most critical step for achieving a proper sear. Moisture on the surface of the steak actively works against the Maillard reaction. When you place a wet steak in a hot pan, the energy from the pan first goes into evaporating the surface moisture before any browning can begin. This lowers the surface temperature and extends cooking time, resulting in a steamed rather than seared exterior. Use paper towels to thoroughly pat both sides of your steak dry. We're talking bone-dry here, like a desert landscape.
Season Generously: Salt is our best friend here. A generous sprinkle of coarse salt, like kosher salt or sea salt, on both sides of the steak is essential. Salt not only enhances flavor but also helps to draw out moisture from the surface, further aiding in browning. Some chefs advocate salting well in advance (an hour or two, or even overnight) to allow the salt to penetrate the meat and then re-absorb some of the surface moisture, a process known as dry brining. If you're short on time, salting just before cooking is perfectly acceptable, but make sure to pat it dry again after salting if any moisture has surfaced. Freshly cracked black pepper is also a must, adding a wonderful aromatic complexity. Other seasonings can be added, but salt and pepper are the non-negotiables.
Bring to Room Temperature: While not strictly necessary for food safety, letting your steak sit out at room temperature for 30 to 60 minutes before cooking allows it to cook more evenly. A cold steak hitting a hot pan creates a larger temperature gradient, meaning the outside will cook significantly faster than the inside. A slightly warmer steak will cook more uniformly from edge to center. This doesn't mean leaving it out for hours and risking spoilage; a brief rest is sufficient.
The Heat Equation: Your Pan and Its Temperature
The right pan and the correct temperature are non-negotiable for a superior crust.
The Pan: Cast iron is king. A heavy-bottomed cast iron skillet is our weapon of choice for searing steaks. Its exceptional heat retention and even heat distribution are unmatched. Stainless steel can work, but it doesn't hold heat as well, and non-stick pans are generally a poor choice for high-heat searing, as their coatings can degrade at the temperatures required. If you don't have cast iron, a heavy-gauge stainless steel pan is the next best option.
The Temperature: We need high heat, but not ridiculously high heat that burns the exterior before the interior has a chance to warm. We're aiming for a medium-high to high heat. How do you know when it's ready? Place your pan on the burner and let it preheat for several minutes. When a few drops of water dance and evaporate instantly, your pan is hot enough. If the water sizzles sluggishly, it needs more time. If it immediately turns to steam and disappears, it might be too hot, and you'll want to lower the heat slightly.
The Fat: A high smoke point oil is essential. Olive oil, particularly extra virgin, has a relatively low smoke point and will burn and impart bitter flavors at the temperatures needed for searing. Reach for oils like grapeseed oil, canola oil, avocado oil, or refined sunflower oil. A thin, even layer is all you need. You can also use a small amount of clarified butter, which has a higher smoke point than regular butter, or a combination of oil and clarified butter.
The Searing Dance: Technique for the Perfect Crust
Now for the main event, the actual searing process. This is where patience and attention to detail pay off handsomely.
Initial Sear: Place your thoroughly dried, seasoned, and room-temperature steak gently into the preheated, lightly oiled pan. You should hear a satisfying sizzle immediately. Do not move the steak for the first 2-3 minutes. Resist the urge to peek or prod. This initial undisturbed contact with the hot pan is crucial for forming that deep, dark crust. The steak is literally gluing itself to the pan, and trying to move it too soon will tear the developing crust.
The Flip: After 2-3 minutes, carefully lift one edge of the steak to check the color. If it's a beautiful, deep golden brown to dark mahogany, it's time to flip. If it's still pale, give it another minute or so. Once you flip, sear the second side for another 2-3 minutes, again, without moving it.
Frequent Flipping (Optional, but highly recommended): Here's a technique that many professional chefs swear by: frequent flipping. After the initial sear on both sides, continue flipping the steak every 30-60 seconds. This seemingly counterintuitive method actually promotes more even cooking and a more uniform crust. By constantly exposing new surface areas to the heat, you prevent any one spot from getting too hot and burning, while still allowing the Maillard reaction to progress beautifully across the entire surface. This method also helps to cook the interior more evenly.
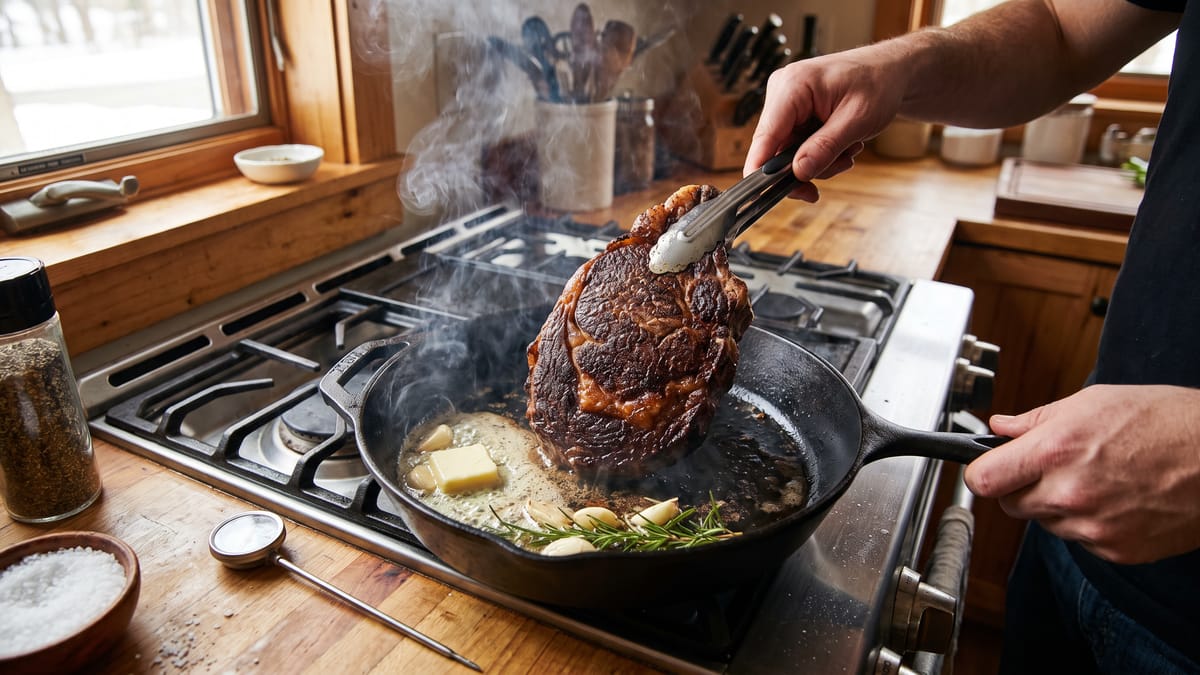
Basting with Aromatics: As the steak approaches your desired doneness, this is where we introduce flavor enhancers. Add a knob of butter (regular butter is fine now, as it's not the primary searing fat), a few sprigs of fresh rosemary or thyme, and a smashed clove of garlic to the pan. Tilt the pan slightly and, using a spoon, continuously baste the melting butter and aromatic juices over the top of the steak. This infuses the steak with incredible flavor and helps to create an even more luxurious crust. The milk solids in the butter will brown and contribute to the rich color.
Temperature is Key: Knowing When It's Done
Eyeballing doneness is a skill that comes with experience, but for consistent results, a good instant-read thermometer is your best friend. Always remember that the steak's internal temperature will rise by a few degrees even after it's removed from the heat, a phenomenon known as carryover cooking.
Here's a general guide for desired doneness, keeping carryover cooking in mind:
Rare: 120-125°F (49-52°C) remove from heat at 115-120°F (46-49°C)
Medium-Rare: 130-135°F (54-57°C) remove from heat at 125-130°F (52-54°C)
Medium: 135-140°F (57-60°C) remove from heat at 130-135°F (54-57°C)
Medium-Well: 140-145°F (60-63°C) remove from heat at 135-140°F (57-60°C)
Well-Done: 150°F+ (66°C+) remove from heat at 145-150°F (63-66°C)
Insert the thermometer into the thickest part of the steak, avoiding any bone.
The Crucial Rest: Patience is a Virtue
Once your steak reaches your desired temperature, immediately remove it from the pan and place it on a cutting board or a plate. This is not the time to slice into it. The most important step after cooking a steak is to let it rest. During cooking, the muscle fibers contract, pushing the juices to the center of the steak. If you cut into it immediately, those precious juices will gush out onto your board, leaving you with a dry, less flavorful steak.
Resting allows the muscle fibers to relax and reabsorb those juices, resulting in a much more tender and succulent eating experience. For a steak of 1 to 1.5 inches thick, a rest of 5-10 minutes is usually sufficient. For thicker cuts, you might need a bit longer. Tent it loosely with foil to keep it warm, but don't seal it tightly, as this can steam the crust we worked so hard to achieve.
The Grand Finale: Slicing and Serving
After its well-deserved rest, it's time to slice and serve your masterpiece. Always slice steak against the grain. The grain refers to the direction of the muscle fibers. Slicing against the grain shortens these fibers, making each bite more tender and easier to chew. If you slice with the grain, the fibers remain long, resulting in a tougher, chewier steak.
Serve your perfectly crusted, juicy steak immediately, perhaps with a sprinkle of flaky sea salt for an extra textural pop, and a drizzle of any pan juices.
Troubleshooting Common Steak Searing Issues
Even with the best intentions, things can sometimes go awry. Here are a few common issues and how to address them:
Pale Crust: This almost always points to insufficient surface dryness or not enough heat. Ensure your steak is thoroughly patted dry, and your pan is screaming hot before adding the meat. Don't crowd the pan, as this lowers the temperature.
Burnt Exterior, Raw Interior: Too high heat for too long, or the steak was too cold when it went into the pan. Reduce the heat slightly, or ensure the steak has come closer to room temperature before cooking. Frequent flipping can also help prevent burning while allowing the interior to cook.
Tough Steak: Overcooking is a common culprit, as is slicing with the grain. Use a thermometer and always slice against the grain.
Steak Sticks to the Pan: This usually happens if the pan isn't hot enough, or if you're trying to move the steak too soon before a crust has properly formed. Let the Maillard reaction do its work; once a good crust forms, the steak will naturally release from the pan.
Putting it all together
Achieving that perfect, deeply browned, and utterly delicious crust on your homemade steak isn't some mystical art reserved for professional chefs. It's a combination of understanding a few key scientific principles, employing practical techniques, and paying attention to detail. From selecting the right cut and meticulously preparing it, to mastering the heat of your cast iron, and finally, allowing that crucial resting period, each step plays an integral role. Embrace the process, be patient, and don't be afraid to experiment a little. With these guidelines in your culinary arsenal, you're now equipped to consistently produce steaks that rival your favorite steakhouse, transforming ordinary evenings into extraordinary dining experiences. Happy searing, and may your crusts always be golden and your steaks perfectly juicy!