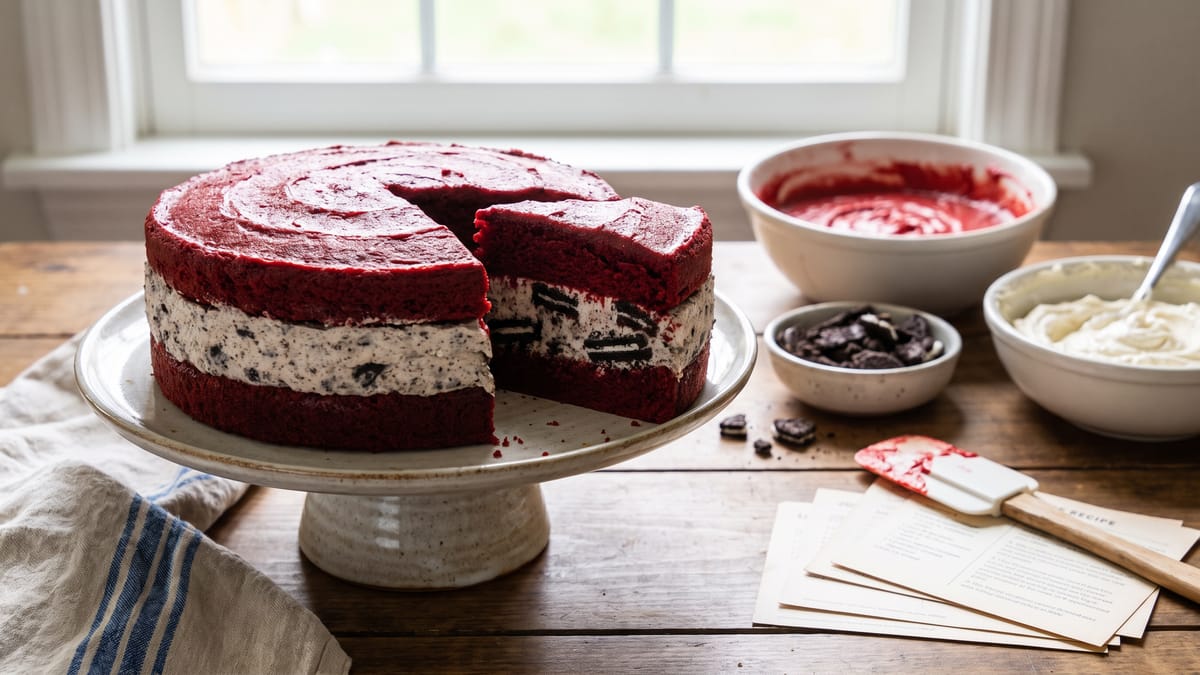
Red Velvet Cake with Cookies-and-Cream Filling: A Layer-by-Layer Guide
There are some desserts that transcend mere sweetness, becoming an experience, a statement, an indulgence. Red velvet cake holds a distinguished place in this pantheon, with its striking crimson hue, delicate crumb, and signature tangy cream cheese frosting. But what if we told you we could elevate this classic to an even grander affair? Imagine the rich, subtle cocoa notes of red velvet, perfectly complemented by a luscious, cookies-and-cream filling, all enveloped in a sleek, sophisticated chocolate coating. This isn't just a cake; it's a masterpiece, a symphony of textures and flavors designed to dazzle and delight.
Today, we're embarking on a culinary journey to create this show-stopping dessert, a Red Velvet Cake with Cookies-and-Cream Filling and a sleek Chocolate Coating. We'll delve deep into the science behind that iconic red velvet crumb, demystify the art of a stable, flavorful cream cheese filling, and guide you through the techniques for a flawless assembly. This isn't a recipe for the faint of heart, but with our detailed, layer-by-layer guide, you'll gain the confidence and knowledge to bake a cake that will leave everyone clamoring for another slice. So, tie on your apron, gather your ingredients, and prepare to transform your kitchen into a haven of delectable creation.
The Heart of the Matter: Crafting the Red Velvet Cake
The magic of red velvet cake lies in a delicate balance of ingredients that work in harmony to produce its distinctive flavor, color, and texture. It's more than just a chocolate cake dyed red; it's a unique culinary creation with a fascinating history rooted in pantry staples.
The Unsung Hero: Cocoa Powder's Role
While many might associate red velvet primarily with its vibrant color, the subtle chocolate flavor is absolutely crucial. This flavor comes from natural cocoa powder, and its acidity is key to the cake's chemistry. Natural cocoa powder, unlike Dutch-processed, has a higher acidity. This acidity is what reacts with the baking soda and buttermilk to properly leaven the cake, creating those lovely air pockets that contribute to a tender, velvety crumb. Without this reaction, the cake would be dense and lack that characteristic lightness. We're not aiming for a robust, dark chocolate flavor here; rather, a gentle cocoa whisper that complements the tang of the buttermilk and the sweetness of the frosting.
The Acidic Allies: Buttermilk and Vinegar
Buttermilk is another cornerstone of red velvet cake, contributing both to its texture and flavor. Its mild tanginess is instantly recognizable and provides a beautiful counterpoint to the sweetness. Beyond taste, buttermilk is an acidic ingredient, and when combined with baking soda, it triggers a chemical reaction that produces carbon dioxide. This gas expands during baking, giving the cake its rise and contributing to that wonderfully tender, velvety crumb. To further boost this crucial reaction, we add a touch of white vinegar or apple cider vinegar. These vinegars can be used interchangeably, both providing the necessary acidity to ensure our baking soda performs its leavening duties effectively. This synergy of ingredients is what transforms a simple batter into the iconic red velvet we know and love.
Achieving the Signature Hue: Color and Cocoa
The visual appeal of red velvet is undeniable, and achieving that deep, rich crimson is paramount. Historically, the reaction between natural cocoa powder and acidic ingredients would produce a reddish-brown hue. However, modern red velvet cakes rely heavily on food coloring to achieve their vibrant intensity. We recommend using high-quality gel food coloring for the best results. Gel colors are concentrated, meaning you'll need less to achieve a vivid shade, and they won't thin out your batter like liquid food coloring can.
To enhance the depth of color and prevent the cake from looking too bright or artificial, some bakers incorporate a small amount of black cocoa powder. Black cocoa, with its intense, almost black color, can deepen the red and add a subtle, sophisticated undertone to the chocolate flavor without overpowering it. It's a nuanced touch that elevates the visual appeal of the cake. When adding your gel coloring, start with a smaller amount and gradually add more until you reach your desired shade of crimson. Remember, the color will deepen slightly during baking.
The Dry and Wet Dance: Mixing the Batter
Proper mixing technique is vital for a tender cake. We start by sifting together our dry ingredients: flour, salt, and baking soda. Sifting ensures that these components are uniformly distributed and that there are no visible clumps of leavener, which could lead to an uneven rise. In a separate bowl, we'll cream together the butter and sugar until light and fluffy. This process incorporates air, contributing to the cake's light texture. Then, we'll beat in the eggs one at a time, followed by the vanilla extract and our vibrant red gel coloring.
Now comes the delicate dance of adding the dry and wet ingredients alternately. We begin by adding a third of the sifted flour mixture to the wet ingredients, mixing until just combined. Then, we add half of the buttermilk, mixing gently. We repeat this process, adding another third of the flour, then the remaining buttermilk, and finally, the last third of the flour. The key is to begin and end with flour. This method helps to keep the batter smooth and prevents overmixing, which can develop the gluten in the flour too much, resulting in a tough cake. Always mix until just combined; overmixing is the enemy of a tender crumb. We mix the white vinegar into the buttermilk before adding it to the batter; this acidic mixture will react with the baking soda in the dry ingredients to create a light, airy texture.
Baking to Perfection: Oven and Timing
Once the batter is ready, we divide it evenly among our prepared cake pans. We'll bake our red velvet cake layers at 350°F for 25–30 minutes. The exact baking time can vary depending on your oven and the size of your pans, so it's always best to keep a close eye on them. You'll know the cakes are done when a toothpick inserted into the center comes out clean or with just a few moist crumbs clinging to it. Overbaking can lead to a dry cake, so err on the side of caution.
Once baked, let the cakes cool in their pans for 10–15 minutes, then transfer them to a wire rack to cool completely. This step is non-negotiable. Cake layers must cool completely on a wire rack before you even think about filling and frosting them. Attempting to frost warm cakes will result in melted frosting and a sliding, messy disaster. Patience truly is a virtue in cake baking.
The Irresistible Core: Cookies-and-Cream Filling
While traditional red velvet often features a simple cream cheese frosting, we're taking things up a notch with a decadent cookies-and-cream filling. This adds an exciting textural contrast and a playful flavor profile that perfectly complements the subtle cocoa of the cake.
The Foundation: Cream Cheese and Butter
The success of any cream cheese frosting, or in this case, filling, hinges on using the right ingredients and proper technique. We start with full-fat block cream cheese, not the spreadable kind in a tub. Full-fat block cream cheese yields a thicker, creamier frosting that holds its shape beautifully and whips up perfectly. We'll also use unsalted butter, softened to room temperature. Both the cream cheese and butter must be at room temperature for optimal mixing; cold ingredients will result in a lumpy, unappealing filling.
The first step is to beat the softened cream cheese and butter together until they are smooth and creamy. This is crucial for a lump-free frosting. Don't rush this step; let your mixer work its magic until the mixture is uniform and airy.
Sweetening and Flavoring: Powdered Sugar and Vanilla
Once the cream cheese and butter are perfectly combined, we'll gradually add powdered sugar. Powdered sugar, also known as confectioners' sugar, is finely milled and contains a small amount of cornstarch, which helps stabilize the frosting. Add it slowly, in batches, to prevent a sugary cloud from engulfing your kitchen. Beat until smooth and fluffy, then stir in a generous amount of pure vanilla extract. Vanilla enhances all the other flavors and adds a beautiful aromatic quality to the filling.
The Star of the Show: Crushed Chocolate Cookies
Now for the "cookies-and-cream" part! We'll gently fold in finely crushed chocolate sandwich cookies. You can crush them by hand in a zip-top bag with a rolling pin or pulse them briefly in a food processor. The goal is to have a mix of fine crumbs and some slightly larger pieces for textural interest. Don't over-process them into a powder; we want those delightful little chunks of cookie throughout the filling. The chocolate from the cookies will provide another layer of cocoa flavor, contrasting beautifully with the red velvet.
The Sleek Finish: Chocolate Coating
To elevate our red velvet cake to a truly show-stopping dessert, we're giving it a sophisticated chocolate coating. This isn't your average ganache; we're aiming for a sleek, almost mirror-like finish that adds another dimension of flavor and visual appeal.
Crafting the Coating: Chocolate and Cream
Our chocolate coating will be a rich, pourable ganache. We'll use high-quality dark chocolate, finely chopped, for the best flavor and smooth melting. The better the chocolate, the better your coating will taste. In a saucepan, we'll heat heavy cream until it just begins to simmer around the edges. Remove it from the heat immediately and pour it over the chopped chocolate in a heatproof bowl. Let it sit undisturbed for a few minutes to allow the hot cream to melt the chocolate.
After a few minutes, gently whisk the mixture from the center outwards until it's completely smooth and glossy. If you still have a few stubborn unmelted pieces of chocolate, you can place the bowl over a saucepan of simmering water (creating a double boiler) and stir gently until smooth. Be careful not to overheat it, as this can cause the chocolate to seize.
Achieving the Perfect Pourable Consistency
The consistency of your chocolate coating is crucial for a smooth, even finish. We want it to be pourable but not so thin that it runs off the cake too quickly. If your ganache is too thick, you can add a tiny bit more warm cream, a teaspoon at a time, whisking until it reaches the desired consistency. If it's too thin, let it cool slightly at room temperature, stirring occasionally, until it thickens up. It should be warm enough to pour easily but cool enough to cling to the cake without running entirely off.
The Grand Finale: Assembling Your Masterpiece
This is where all our hard work comes together, layer by beautiful layer. Patience and precision are your best friends during the assembly process.
Leveling and Stacking the Layers
Before we begin, ensure your cake layers are completely cooled. If they have domed tops, use a serrated knife to carefully level them, creating flat surfaces for even stacking. This will prevent your cake from looking lopsided. Place your first cake layer on your serving plate or cake stand. A small dollop of frosting on the plate before placing the first layer can help secure it and prevent it from sliding.
The Cookies-and-Cream Core
Spread a generous, even layer of your cookies-and-cream filling over the first cake layer. Make sure to spread it all the way to the edges, creating a beautiful, uniform filling. Place the second cake layer on top, gently pressing down to secure it. Repeat with another layer of filling, and then top with the final cake layer.
The Essential Crumb Coat
Now for a critical step: the crumb coat. A crumb coat is a thin layer of frosting applied to the entire cake. Its purpose is twofold: to trap any loose crumbs, preventing them from mixing into your final frosting layer, and to create a smooth, even surface for the final application. Apply a thin layer of your cream cheese frosting (you'll want to reserve some for this purpose if you're not using the chocolate coating for the crumb coat) over the top and sides of the stacked cake. Don't worry about perfection here; just aim for a thin, even coverage.
Once the crumb coat is applied, place the cake in the refrigerator for at least 30 minutes. This chilling time is essential. It allows the crumb coat to firm up, effectively locking in those pesky crumbs and creating a stable foundation for the next steps.
The Final Frosting or Coating
After the crumb coat has chilled and firmed up, you have a choice. If you're going for a fully frosted look, apply your remaining cream cheese frosting evenly over the top and sides of the cake, smoothing it with an offset spatula or bench scraper for a polished finish.
However, for our magnificent creation, we're going for that sleek chocolate coating. Once your crumb-coated cake is chilled, place it on a wire rack set over a baking sheet (to catch drips). Carefully pour your prepared chocolate coating over the top of the cake, allowing it to drip down the sides. Use an offset spatula to gently guide the coating if needed, ensuring even coverage. Work quickly but carefully.
Once coated, let the cake sit at room temperature for a few minutes to allow any excess ganache to drip off. Then, carefully transfer the cake to a clean serving plate. We recommend chilling the cake again for at least an hour to allow the chocolate coating to set completely. This will ensure clean slices and a truly stunning presentation.
A Few Words on Presentation and Storage
Once your cake is assembled and chilled, you can add any final decorative touches. A few extra crushed chocolate cookies sprinkled on top, or some chocolate curls, would be a lovely addition. Remember, this cake is a showstopper, so take pride in its presentation.
Storing your red velvet cake with cookies-and-cream filling is straightforward. Because of the cream cheese filling, it's best to store the cake in an airtight container in the refrigerator. It will keep beautifully for 3-4 days, though we doubt it will last that long! Allow slices to come to room temperature for about 15-20 minutes before serving for the best flavor and texture.
Putting It All Together
Crafting a Red Velvet Cake with Cookies-and-Cream Filling and a Chocolate Coating is a rewarding culinary endeavor that showcases both skill and patience. We've walked through the intricate chemistry of the red velvet batter, highlighting the crucial roles of natural cocoa, buttermilk, and vinegar in creating that tender, velvety crumb and distinctive flavor. We've also explored the art of a stable, luscious cookies-and-cream filling, emphasizing the importance of full-fat block cream cheese and proper mixing. Finally, we've covered the technique for a sophisticated chocolate coating and the essential steps for clean, professional-looking cake assembly, including the indispensable crumb coat.
The authoritative sources confirm the core red velvet cake science: natural cocoa powder's acidity reacts with buttermilk and baking soda for leavening and tender crumb, while vinegar boosts this reaction. Cream cheese frosting requires full-fat block cream cheese and butter for stability. While the specific cookies-and-cream filling and chocolate coating variation isn't directly tested in authoritative sources, the component techniques are well-established. Assembly requires completely cooled layers, a crumb coat, and chilling for clean slices.
This cake is more than just a dessert; it's an experience, a testament to the joy of baking and the delight of sharing something truly special. So, embrace the process, trust in the techniques we've shared, and prepare to present a cake that will undoubtedly become a treasured memory for all who taste it. Happy baking!