The Maillard Reaction: The Science of Why Browned Food Tastes So Good
Browning isn’t just color—it’s chemistry. Learn how the Maillard reaction transforms proteins and sugars into deep, craveable flavor, and how to control it for steak, chicken, vegetables, bread, and more.
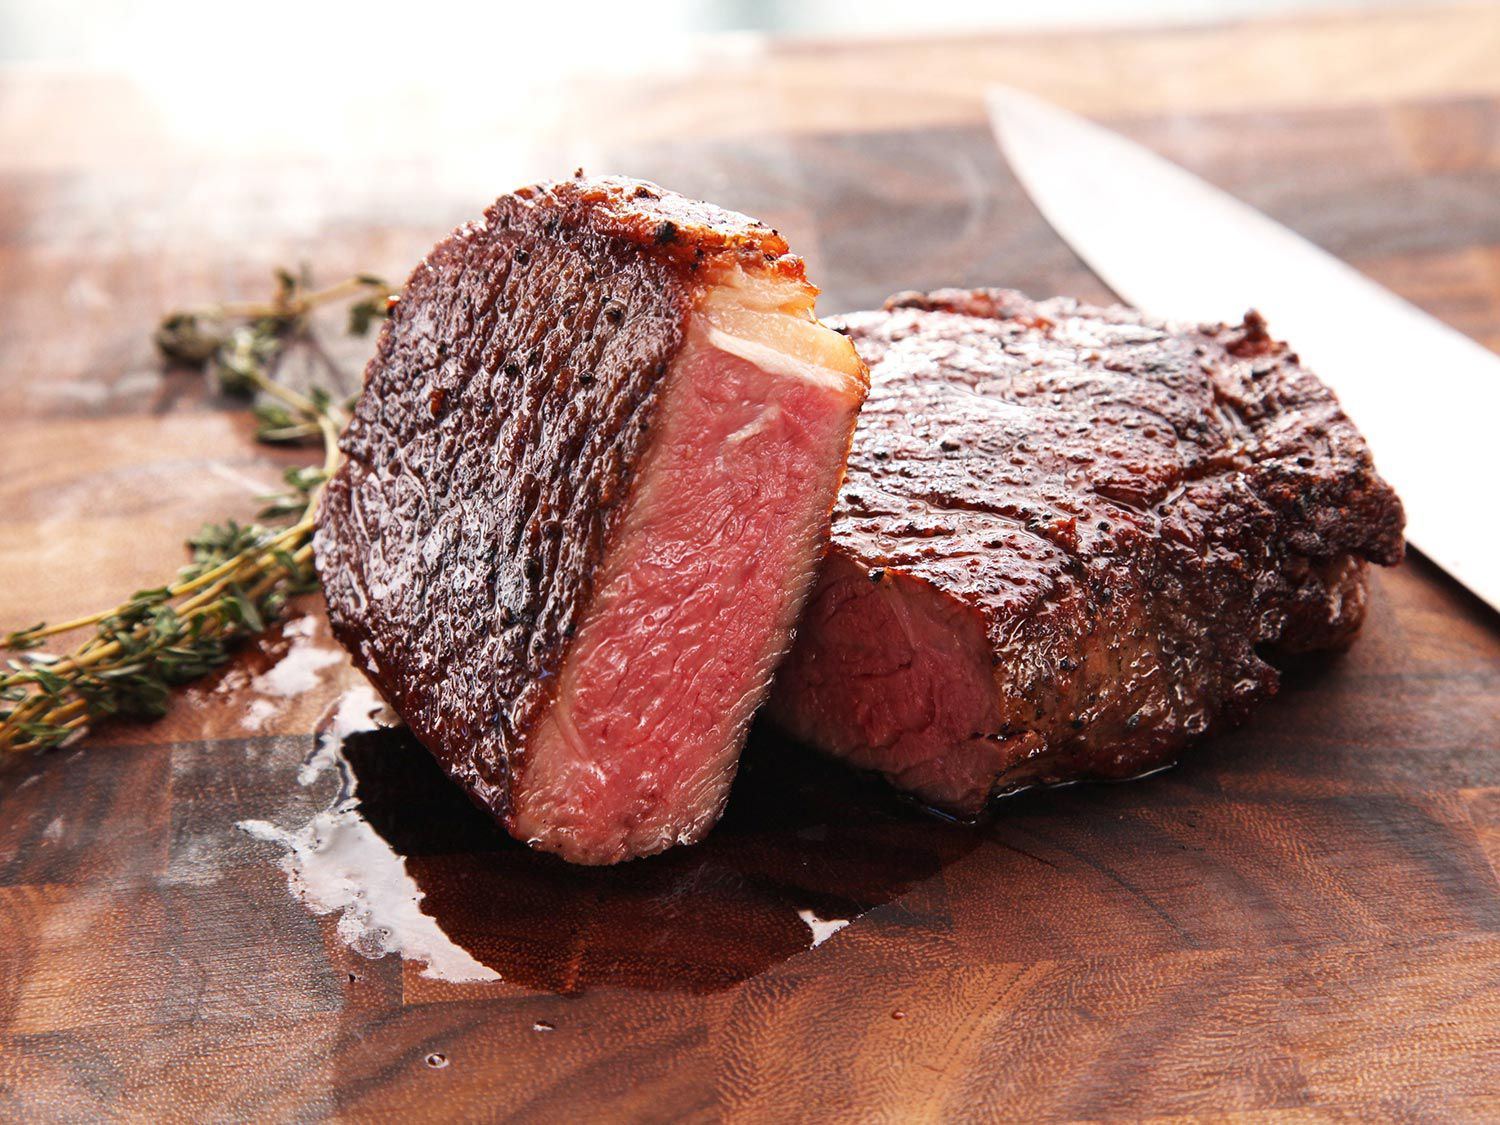
Introduction That irresistible golden crust on a steak. The toasty edge of fresh bread. The nutty aroma of roasted vegetables. All of these share a common engine of flavor: the Maillard reaction—a complex series of chemical reactions between amino acids and reducing sugars that happens when food meets heat. Mastering Maillard means mastering flavor—whether you’re searing, roasting, baking, grilling, or air‑frying.
In this guide, we’ll demystify the science and translate it into practical kitchen moves: temperatures that matter, how moisture and pH influence browning, the right oils to use, and specific techniques for meats, vegetables, and baked goods. We’ll also clear up myths (no, searing doesn’t “seal in juices”), give troubleshooting tips, and share rapid experiments to train your eye, ear, and nose for perfect browning.
1) What Is the Maillard Reaction?
At its core, the Maillard reaction is a set of reactions between amino acids (from proteins) and reducing sugars (like glucose, fructose, lactose, and some breakdown products of starch). It kicks off noticeably around the temperature where surface water stops dominating—typically when surfaces pass roughly 140–165°C (285–330°F). The result? Hundreds of flavorful compounds (pyrazines, aldehydes, furans, sulfur aromatics) and brown pigments called melanoidins that create depth, complexity, and that mouth‑watering “cooked” taste.
Key characteristics:
- • Needs heat and low surface moisture (steam stalls browning).
- • Accelerates with higher temperature, lower water activity, and certain pH shifts.
- • Depends on substrate: more proteins and sugars = more potential browning.
2) Maillard vs. Caramelization (They’re Different)
It’s common to conflate the two, but they’re distinct:
- • Maillard reaction: Amino acids + reducing sugars. Occurs widely in meats, bread crusts, roasted coffee/cocoa, and many cooked foods. Often begins in the 285–330°F range on the surface once dry enough.
- • Caramelization: Thermal decomposition of sugars alone (no amino acids required). Usually requires higher temperatures (around 320°F / 160°C and up). Think of the deep amber on flan or caramelized sugar syrup.
3) The Levers That Control Browning
To make better decisions at the stove or oven, focus on these variables:
A. Surface Moisture
- • Water must evaporate before browning accelerates. A wet surface stalls at ~212°F (100°C) until it dries.
- • Pat food dry with paper towels; drain marinades well. Rest proteins uncovered in the fridge (30–60 min, or overnight for chicken skin) to dry the exterior.
- • Avoid overcrowding pans; steam accumulates, lowering surface temperature and suppressing browning.
B. Temperature & Heat Flux
- • Preheat pans thoroughly; the goal is quick recovery when food drops in.
- • In the oven, higher temps (425–475°F / 220–245°C) promote faster surface drying and browning for vegetables and some cuts.
- • For thick proteins, combine high‑heat sear + moderate cook (or reverse sear) to balance crust and interior doneness.
C. Time & Contact
- • Leave food undisturbed so the crust can form; moving too early tears the surface.
- • Flip for even color once the first side releases naturally. For thicker cuts, frequent flipping (every 30–45 seconds) can even out browning without overcooking.
D. pH (Acidity/Alkalinity)
- • Slight alkalinity speeds Maillard. A tiny pinch of baking soda can accelerate browning on onions or mushrooms—but use sparingly to avoid soapy flavors.
- • Acidic marinades (lemon, vinegar) tenderize and brighten but can slow browning; pat dry before cooking and add acid late for flavor.
E. Sugar & Protein Availability
- • Brushing with a faintly sweet glaze (e.g., honey‑soy) boosts browning on vegetables and meats—but monitor closely to prevent burning.
- • Milk proteins (e.g., dairy in a dough) brown readily; egg washes also enhance color on baked goods.
F. Fat Type & Smoke Point
- • Use high‑smoke‑point oils (avocado, refined peanut, grapeseed, canola) for initial sears; finish with butter for flavor.
- • Butter alone burns quickly; add near the end to baste and deepen flavor.
4) Technique by Food Category
A. Steaks and Red Meat
- • Pat dry and season. For max crust, dry‑brine (salt) for 1–24 hours uncovered in the fridge.
- • Preheat a heavy pan (cast iron/carbon steel) until water droplets “dance.” Add a thin sheen of high‑heat oil.
- • Lay steak away from you. Don’t move it until it releases naturally.
- • Flip once or flip frequently—both can work. Manage heat to avoid burning.
- • Optional butter baste near the end with garlic and herbs.
- • For thicker cuts, finish in a 375–425°F oven or use reverse sear (low oven first, hot sear last).
- • Rest 5–10 minutes; slice against the grain.
B. Chicken and Poultry (Crispy Skin)
- • Air‑dry the skin: salt and leave uncovered in the fridge several hours to overnight.
- • Rub with a little baking powder + salt mix for extra crispness (raises pH and changes surface texture); use sparingly to avoid aftertaste.
- • Roast hot (e.g., start 450°F then reduce to 375°F) or grill with two‑zone heat to render fat and brown the skin.
- • Elevate on a rack for airflow; soggy undersides mean steam—not browning.
C. Fish
- • Pat dry thoroughly; thin fillets brown fast.
- • Sear in a very hot, lightly oiled pan, skin‑side down for skin‑on fish. Press gently for 10–15 seconds to prevent curling.
- • Flip gently once the crust forms; finish quickly to avoid overcooking the delicate interior.
D. Vegetables & Mushrooms
- • Cut for surface area (flat sides on Brussels sprouts; wedges for squash).
- • Toss with enough oil to coat lightly; oil helps heat transfer and surface dehydration.
- • Preheat sheet pan at 450°F; add veg to hot pan for instant sizzle. Use convection if available.
- • Give space—no steaming crowds. Stir once halfway for even color.
- • Mushrooms: high heat + ample space; they release lots of water. Salt partway through so they don’t purge too early.
E. Potatoes (Crispier Roasts & Fries)
- • Roast potatoes: parboil cut potatoes in salted water until just tender; drain and rough up edges in the pot; toss with oil; roast hot (450°F) on a preheated pan. The gelatinized starch + rough edges = superior browning.
- • Fries: double‑cook. First low‑temp fry or par‑bake to gelatinize; cool; then high‑temp fry/air‑fry to brown and crisp.
F. Bread, Baked Goods, and Pizza
- • Crust color comes from Maillard on proteins and residual sugars; steam early (Dutch oven or added pan of water) to delay crust setting for max oven spring. Vent steam late for crispness.
- • Egg wash or milk on pastry enhances browning; a tiny bit of sugar in dough aids color.
- • Baking stone/steel stores heat for rapid surface browning on pizza crusts and loaves.
5) Myths to Retire
- • “Searing seals in juices.” False. Searing doesn’t waterproof meat. It drives off surface moisture and develops flavor; resting helps redistribute internal juices.
- • “Only flip once.” Not a law. Multiple flips can promote even browning and reduce overcooking of edges—especially on thick cuts.
- • “Darker is always better.” Char is not the same as Maillard. Deep golden‑brown is the sweet spot; blackened/burnt can taste bitter and create undesirable compounds.
6) Managing Health & Safety Concerns
- • Avoid heavy char. Excessive charring can create off‑flavors and unwanted byproducts. Aim for deep brown, not black.
- • For starchy foods (potatoes, bread), soaking/rinsing surface starch and controlling time/temperature helps limit acrylamide formation.
- • Keep good ventilation when searing; hot oil and browned bits can smoke.
- • Use thermometers to avoid undercooked interiors (food safety) while still getting great browning outside.
7) Troubleshooting: Why Isn’t It Browning?
| Symptom | Likely Cause | Fix |
|---|---|---|
| Pale, soggy surface | Too much moisture; pan overcrowding | Pat dry; cook in batches; preheat pan; raise oven temp |
| Sticks to the pan | Moved too soon; weak crust | Wait for natural release; hotter pan; dry surface |
| Burns before brown | Heat too high; sugar‑heavy glaze too early | Start a bit cooler; glaze late; stir/flip more often |
| Uneven browning | Hot spots; inconsistent contact | Rotate pan; flip more frequently; use heavier cookware |
| Bitter taste | Burnt residues; old oil | Wipe pan between batches; use fresh high‑smoke‑point oil |
8) Quick Field Guide: Choosing Method by Goal
- • Want a steakhouse crust? Heavy pan + blazing heat + dry‑brined steak + late butter baste.
- • Want crispy chicken skin? Dry in fridge overnight, roast hot, and elevate on a rack.
- • Want deeply browned vegetables? High heat, convection, preheated sheet pan, don’t crowd.
- • Want better bread crust? Steam early for lift, vent for color, bake to a rich mahogany.
- • Want fries that really crunch? Par‑cook, cool, then finish hot to drive Maillard.
9) Mini Experiments to Train Your Senses
These 10‑minute drills sharpen intuition faster than reading:
- 1. Onion Test: Split sliced onions into two pans. Add a tiny pinch of baking soda to one. Cook both at the same heat and compare speed and flavor.
- 2. Crowding Test: Roast two identical trays of mushrooms—one crowded, one spaced. Note moisture pooling vs. browning.
- 3. Dry vs. Wet Steak: Pat one steak dry; leave another damp. Sear side by side; observe crust difference.
- 4. Pan Preheat: Sear chicken in a fully preheated skillet vs. an under‑preheated one. Listen for sizzle and watch color.
- 5. Sugar Glaze Timing: Brush honey‑soy on carrots at the start vs. near the end; compare flavor and scorch risk.
10) Appliance‑Specific Tips
Stovetop (Skillet/Griddle)
- • Heaviest pan you own; preheat 3–5 minutes.
- • Shimmering oil, not smoking violently (a whiff of smoke is normal at high heat).
- • Press gently for full contact (smash burgers on a griddle = maximal browning).
Oven
- • Convection on for vegetables and sheet‑pan proteins; it accelerates drying and even color.
- • Preheat longer than you think; use an oven thermometer to verify real temperature.
- • Use wire racks to keep undersides from steaming.
Grill
- • Zones: bank coals or turn off one gas burner to create hot/medium zones.
- • Dry rubs brown beautifully; sugary sauces go on in the last 5–10 minutes.
- • Clean grates + preheat until very hot to minimize sticking.
Air Fryer
- • Essentially a small convection oven: great for quick browning of small items.
- • Pat dry and avoid overcrowding; shake the basket for even color.
11) Practical Playbook by Dish
Perfect Pan‑Seared Steak (Summary)
- 1. Dry‑brine 1–24 hours.
- 2. Preheat heavy pan high; add thin film of high‑heat oil.
- 3. Sear 1st side until release; flip; baste with butter + garlic + thyme near the end.
- 4. Rest 5–10 minutes; slice.
Crispy Roasted Vegetables
- 1. Preheat oven to 450°F with sheet pan inside.
- 2. Toss veg with oil, salt; place cut side down on hot pan.
- 3. Roast 15–30 minutes depending on veg; flip once for even browning.
- 4. Finish with acid (lemon, vinegar) and herbs.
Golden‑Brown Chicken Thighs
- 1. Pat skin dry; salt and air‑dry in fridge.
- 2. Sear skin‑side down on stovetop until deep golden.
- 3. Finish in 375–400°F oven to render and cook through.
- 4. Rest; spoon pan juices over top.
Better Bread Crust
- 1. For artisan loaves, bake in a preheated Dutch oven for steam.
- 2. Remove lid midway to brown deeply; target a rich mahogany color.
- 3. Cool fully so the crumb sets (flavor continues to develop).
12) Beyond Taste: Texture, Aroma, and Color
Maillard doesn’t only change flavor. It changes how food feels and looks:
- • Texture: Crispy exteriors contrast with tender interiors (steak crust, roasted potato edges).
- • Aroma: Roasty, nutty, toffee‑like notes signal “savory” deliciousness; your nose detects readiness before your eyes.
- • Color: Golden to deep brown correlates with compound complexity—but stop before black.
13) Frequently Asked Questions
- • “Can I get Maillard reaction in a slow cooker?” Not really—liquid + low heat prevent it. Brown meats first in a pan, then transfer.
- • “Why does restaurant meat look more browned?” Hotter equipment, drier surfaces (pro cooks obsess over this), and liberal use of high‑heat fats.
- • “Is browning the same on gas vs. electric?” Gas can heat pans faster and add some radiant heat around edges, but either works if you preheat and manage moisture.
- • “Do marinades hurt browning?” Wet surfaces do; pat dry. Sugars can help browning if applied judiciously near the end.
14) Quick Reference Cheat Sheet
- • Dry surface + hot pan/oven = faster browning.
- • Space food out; steam is the enemy of crust.
- • Use high‑smoke‑point oil to start, butter to finish.
- • Slight alkalinity speeds browning (tiny baking soda on veg), acid glazes go on late.
- • Deep golden‑brown, not black, is the target.
Conclusion
Browning is more than looks—it’s chemistry that unlocks layers of flavor we instinctively love. When you understand the Maillard reaction, you can produce better food with the tools you already have. Dry surfaces thoroughly, preheat confidently, manage heat and spacing, and finish with intention. With a few reps, you’ll hear the right sizzle, smell the moment flavor blooms, and pull pans at peak color—turning simple ingredients into deeply satisfying meals.
Happy browning!