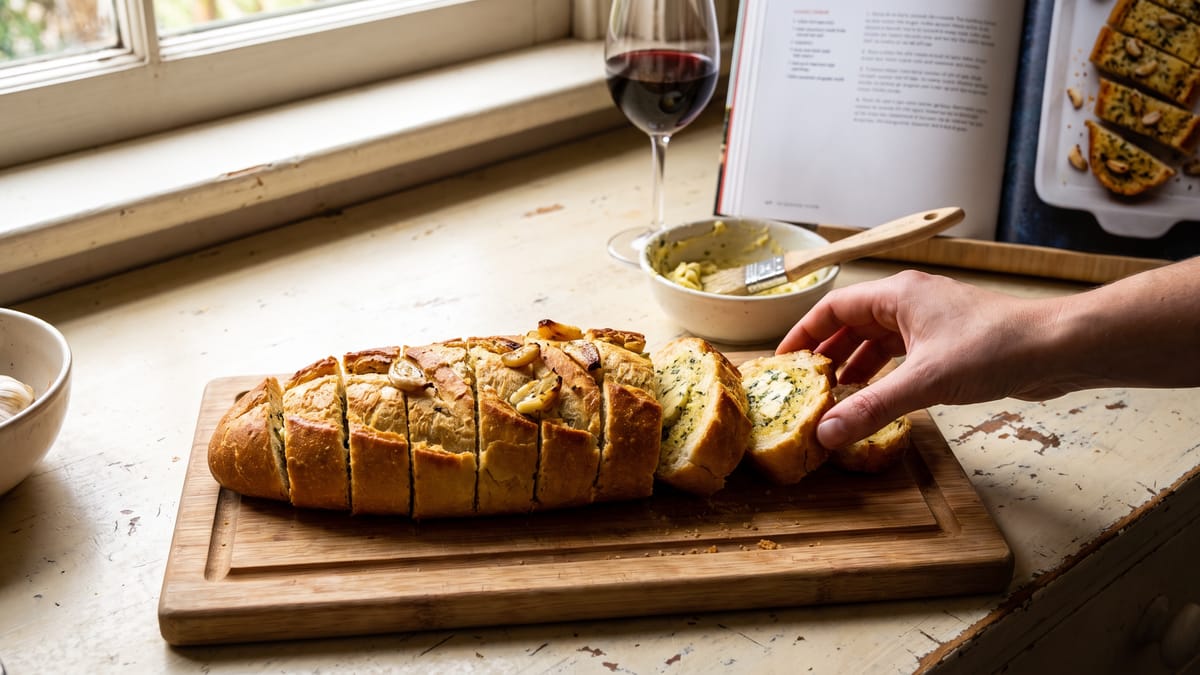
I Tried Making Restaurant-Style Garlic Bread at Home and It Was Surprisingly Easy
We've all been there. Sitting in a dimly lit Italian restaurant, the aroma of garlic and herbs wafting through the air, and then, the moment of truth: the arrival of the garlic bread. That perfectly golden, impossibly crisp crust yielding to a soft, pillowy interior, drenched in a fragrant, savory butter. It's a culinary masterpiece, often dismissed as a simple side, yet capable of stealing the show. For years, we yearned to replicate that magic in our own kitchens, convinced it was some closely guarded secret, a technique reserved for professional chefs with industrial ovens and mystical ingredients. We were wrong. So delightfully, wonderfully wrong.
The Myth of Complexity: Why We Feared Restaurant Garlic Bread
For too long, we allowed the mystique of restaurant cooking to intimidate us. We imagined elaborate steps, exotic ingredients, and specialized equipment. When it came to garlic bread, our home attempts often fell short. They were either too soggy, too dry, or lacked that quintessential "zing" that makes restaurant versions so addictive. We’d slather butter on a baguette, sprinkle some garlic powder, and call it a day, only to be met with disappointment. The crust wouldn't crisp, the flavor felt flat, and the texture was, well, just bread with butter. It was a serviceable accompaniment, perhaps, but certainly not the star we craved. This persistent underperformance led us to believe that the restaurant version was an unattainable pinnacle, a culinary Everest we weren't equipped to climb.
The Revelation: It's All About the Details
Our journey to restaurant-quality garlic bread began with a simple curiosity, a nagging question: what exactly makes theirs so much better? We started researching, poring over recipes, watching countless cooking videos, and even, dare we say, dissecting restaurant garlic bread with a scientific eye. What we discovered was not a single secret ingredient or a complex technique, but rather a symphony of seemingly minor details, each playing a crucial role in the final, glorious outcome. It wasn't about doing something drastically different, but about doing the right things, and doing them well. The revelation was that the magic wasn't in some arcane knowledge, but in a meticulous approach to readily available ingredients and straightforward methods.
The Foundation: Choosing the Right Bread
The journey to exceptional garlic bread unequivocally begins with the bread itself. This is not a place to cut corners or settle for anything less than stellar. Think of the bread as the canvas upon which we'll paint our masterpiece. A flimsy, pre-sliced loaf from the supermarket simply won't do. We need something with character, a good crumb, and a sturdy structure that can withstand the generous application of butter and the heat of the oven without collapsing into a soggy mess.
Our preferred choice is a good quality French baguette or an Italian bread loaf. Look for one with a slightly crusty exterior and a soft, airy interior. A day-old loaf is often ideal because it has lost a little moisture, which helps it crisp up beautifully in the oven without becoming overly dry. If you can find an artisan loaf from a local bakery, even better. The subtle nuances of flavor and texture in a well-made bread will elevate your garlic bread to new heights. Avoid anything too dense, as it might absorb too much butter and become heavy. Conversely, steer clear of anything too light and airy, as it might disintegrate under the weight of the toppings. The perfect loaf strikes a balance, offering both structural integrity and a delightful chew.
The Garlic Conundrum: Fresh is Non-Negotiable
This might seem obvious, but it bears repeating with fervent emphasis: use fresh garlic. We've all been tempted by the convenience of pre-minced garlic in a jar, or even garlic powder. While these have their place in certain culinary applications, making restaurant-style garlic bread is not one of them. The difference in flavor is profound, almost incomparable. Jarred garlic often has a slightly metallic, sometimes acrid taste, and lacks the vibrant, pungent aroma of freshly crushed cloves. Garlic powder, while offering a hint of garlic, falls flat in terms of depth and complexity.
For our garlic bread, we want that robust, aromatic punch that only fresh garlic can deliver. We advocate for finely mincing or even grating the garlic. The finer the chop, the more surface area is exposed, allowing the garlic’s essential oils to infuse the butter more effectively. We typically use about 4-6 cloves for a standard baguette, but this is a matter of personal preference. Don't be shy; this is garlic bread, after all. If you're a true garlic aficionado, feel free to add a couple more. The key is to get that fresh, zesty flavor permeating every bite.
The Butter Base: Quality and Technique Matter
The butter is the heart and soul of our garlic bread. It carries the garlic and herb flavors, provides richness, and contributes to that coveted golden crust. Just like the bread and garlic, quality here is paramount. We opt for unsalted butter, as it gives us complete control over the sodium content. European-style butters, with their higher fat content, often yield a richer flavor and a more luxurious texture, but any good quality unsalted butter will work beautifully.
The technique for preparing the butter mixture is crucial. We start by melting the butter gently. We don't want to brown it, just get it to a liquid state. Then, we add our finely minced fresh garlic. This is where many home cooks make a crucial mistake: they add the garlic to very hot butter or cook it for too long, causing it to burn and turn bitter. We want to infuse the butter with garlic flavor, not cook the garlic itself. Therefore, once the butter is melted, we remove it from the heat and stir in the garlic. This allows the residual heat to gently warm the garlic, releasing its aromatic compounds without browning or burning.
The Herbacious Symphony: Adding Depth and Aroma
While garlic is the undeniable star, a supporting cast of fresh herbs elevates the flavor profile from merely good to truly spectacular. Our go-to combination includes fresh parsley and a hint of dried oregano. Fresh parsley adds a bright, verdant note and a touch of freshness that balances the richness of the butter and the pungency of the garlic. We finely chop a generous handful of fresh flat-leaf parsley and stir it into our garlic butter mixture.
For the dried oregano, a small amount goes a long way. It provides a subtle earthiness and a classic Italian flavor that ties everything together. We often crush the dried oregano between our palms before adding it to the butter, which helps to release its oils and intensify its aroma. Other herbs that can work wonderfully, depending on your preference, include fresh chives, a touch of dried basil, or even a tiny pinch of red pepper flakes for a subtle kick. The key is to ensure the herbs are well-distributed throughout the butter mixture so every bite is imbued with their delightful essence.
The Art of Application: Spreading the Love
Now comes the fun part: applying our glorious garlic butter to the bread. We cut our baguette or Italian loaf lengthwise, creating two halves. Some prefer to slice the bread into individual portions before applying the butter, but we find that keeping it in halves allows for a more even distribution and helps maintain moisture during baking.
We use a pastry brush or the back of a spoon to generously slather the garlic butter mixture onto the cut sides of the bread. Don't be shy here; the goal is to fully coat the surface, ensuring every nook and cranny is saturated with that flavorful goodness. This is not the time for restraint. The butter will melt and seep into the bread during baking, creating that irresistible moist interior and crispy exterior. We ensure the edges are particularly well-coated, as these tend to crisp up beautifully. A common pitfall is to apply too little butter, resulting in dry, flavorless garlic bread. Remember, we are aiming for decadence, not austerity.
The Cheese Factor: A Golden Opportunity
While purists might argue against it, we find that a sprinkle of cheese takes our restaurant-style garlic bread from excellent to extraordinary. Our cheese of choice is freshly grated Parmesan or Pecorino Romano. The salty, nutty notes of these hard Italian cheeses complement the garlic and herbs beautifully, and they melt into a glorious, golden crust when baked.
We sprinkle the grated cheese generously over the buttered bread halves. The cheese acts as a natural barrier, helping to protect the bread from drying out while simultaneously contributing to a wonderfully savory, crispy top. We've also experimented with a blend of mozzarella and Parmesan for a gooier, stretchier texture, which is equally delicious, though perhaps less traditional. The key is to use freshly grated cheese, as pre-shredded varieties often contain anti-caking agents that can hinder proper melting and browning.
The Baking Blueprint: Achieving Perfection
The baking process is where all our careful preparation comes to fruition. This is where we transform simple ingredients into a golden, aromatic masterpiece.
First, preheat your oven to a relatively high temperature, typically around 400°F (200°C). A hot oven is crucial for achieving that coveted crisp exterior without drying out the interior.
We place the buttered and cheesed bread halves cut-side up on a baking sheet. For the initial bake, we want to maximize crispiness, so we expose the buttered surface directly to the heat. We bake for about 10-15 minutes, or until the edges are golden brown and the cheese is melted and bubbly. Keep a close eye on it, as oven temperatures can vary, and we want to avoid burning the garlic.
Once the bread is beautifully golden and the cheese is caramelized, we have a choice. If you prefer a softer, slightly chewier garlic bread, you can serve it at this stage. However, for that ultimate restaurant-style experience, we take it one step further. We very briefly broil the garlic bread for 1-2 minutes, keeping an eagle eye on it the entire time. The broiler provides intense top-down heat, creating those desirable crispy, slightly charred edges and a perfectly golden-brown cheese crust. This step is optional but highly recommended for that extra layer of texture and flavor. Just remember, the broiler can turn delicious to disaster in mere seconds, so never walk away!
The Finishing Flourish: A Sprinkle of Freshness
Just before serving, we like to add a final flourish: a light sprinkle of freshly chopped parsley. This not only adds a beautiful pop of vibrant green, enhancing the visual appeal, but also provides a fresh, herbaceous aroma that awakens the senses. It’s a small detail, but it makes a significant difference, adding a touch of elegance and a burst of fresh flavor to each warm, garlicky bite.
Serving Suggestions: Beyond the Plate
While garlic bread is a quintessential accompaniment to pasta dishes, its versatility extends far beyond. We often serve it alongside hearty soups, vibrant salads, or even as a standalone appetizer with a marinara dipping sauce. It's fantastic with chili, a perfect mop for rich stews, and an absolute crowd-pleaser at any gathering. We've even been known to enjoy it for a decadent breakfast, paired with scrambled eggs. The possibilities are truly endless, limited only by your culinary imagination.
Troubleshooting: Common Pitfalls and Solutions
Even with the best intentions, things can sometimes go awry. Here are a few common issues and how to troubleshoot them:
If your garlic bread is soggy: This usually means too much butter or not enough baking time/temperature. Ensure your oven is preheated adequately and bake until truly golden and crispy. Using a slightly older loaf of bread can also help, as it has less moisture.
If your garlic bread is dry: This might be due to not enough butter, overbaking, or using a bread that was too stale to begin with. Be generous with the butter and keep an eye on the oven to avoid over-drying.
If your garlic is bitter: This is almost always a sign that the garlic was overcooked or burned. Remember to add the minced garlic to melted but off-heat butter to gently infuse, rather than cook, the garlic.
If your cheese doesn't melt properly: Ensure you're using freshly grated cheese, as pre-shredded varieties often contain anti-caking agents that prevent smooth melting.
In a Nutshell: The Simple Truth
Our journey to mastering restaurant-style garlic bread at home was a revelation. It wasn't about complex techniques or exotic ingredients. It was about respecting each component, understanding its role, and executing simple steps with careful attention to detail. From selecting the right bread to using fresh garlic, from infusing the butter properly to baking at the correct temperature, each element contributes to the symphony of flavors and textures that defines truly exceptional garlic bread.
What we initially perceived as an insurmountable culinary challenge turned out to be surprisingly easy, once we unlocked the secrets of thoughtful preparation and precise execution. So, we encourage you, dear home cooks, to shed any apprehension and embark on your own garlic bread adventure. The satisfaction of pulling a perfectly golden, aromatic loaf from your own oven, knowing you've created restaurant-quality magic with your own hands, is an unparalleled joy. It's a testament to the fact that often, the most impressive culinary feats are born not from complexity, but from a deep appreciation for the fundamentals and a willingness to pay attention to the delightful details. Happy baking, and may your kitchens always be filled with the intoxicating aroma of freshly made garlic bread!