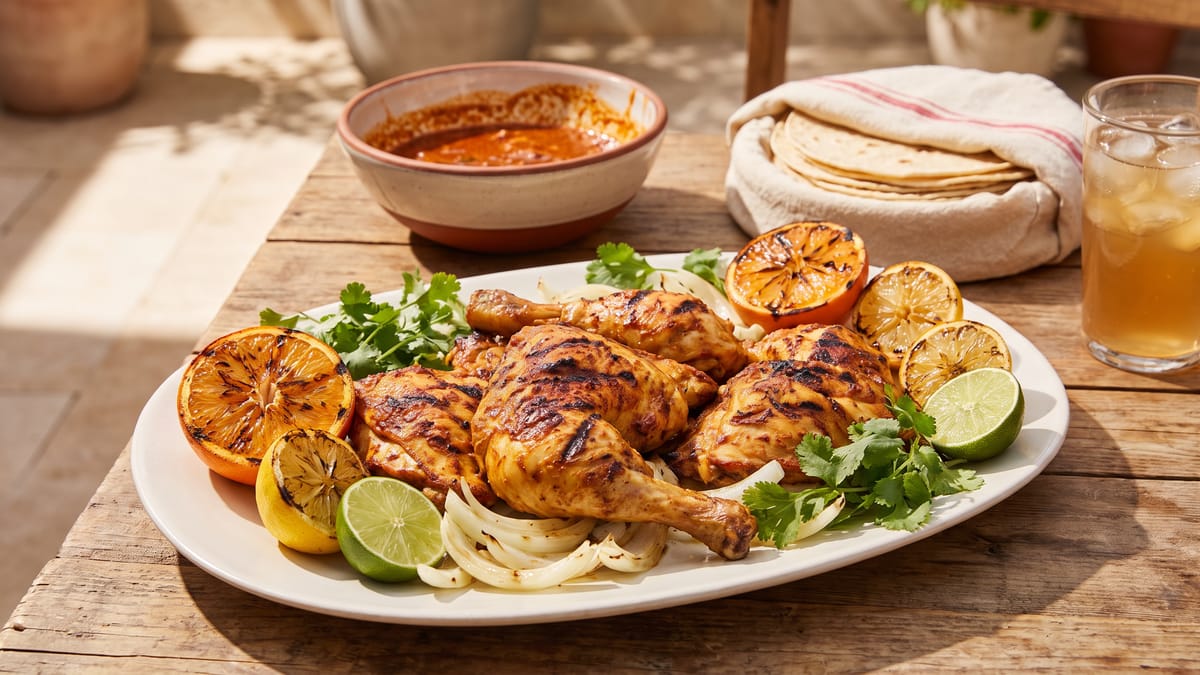
How to Make Authentic Pollo Asado With Charred Citrus Marinade
The air crackles with anticipation, a symphony of sizzling chicken skin and the intoxicating aroma of charred citrus and earthy spices. This, my friends, is the essence of Pollo Asado, a dish that transcends mere sustenance to become a celebration of vibrant Mexican flavors. Forget the bland, pale imitations you might have encountered; today, we embark on a culinary journey to craft truly authentic pollo asado, a masterpiece of juicy, tender chicken enveloped in a deeply flavorful, brick-red marinade and kissed by the fervent embrace of high heat. We're talking about that irresistible combination of tender interior and gloriously crisp, slightly blackened exterior, a testament to proper technique and a passion for flavor.
The Soul of Pollo Asado: Achiote and Citrus
At the heart of any exceptional pollo asado lies its marinade, a vibrant concoction that not only infuses the chicken with unparalleled flavor but also bestows upon it that iconic, fiery hue. The star of this show, without a doubt, is achiote.
Achiote, also known as annatto, is a culinary marvel derived from the seeds of the annatto tree. It's responsible for the beautiful, almost sunset-orange to brick-red color that defines authentic pollo asado. Beyond its visual appeal, achiote offers a subtle, earthy, slightly peppery, and nutty flavor profile that provides a crucial backbone to our marinade. You'll typically find it sold as a paste, which is incredibly convenient, or as whole annatto seeds. If you're using seeds, you'll want to gently toast them in a dry pan for a few minutes until fragrant, then soak them in a little warm water or citrus juice to soften before blending. The paste, however, is a fantastic shortcut without sacrificing authenticity.
Complementing the achiote are the bright, zesty notes of citrus. We're talking about the dynamic duo of fresh orange juice and lime juice. The orange juice brings a touch of sweetness and a mellow acidity, while the lime juice delivers that sharp, invigorating tang that cuts through the richness and tenderizes the chicken ever so slightly. This citrus bath is not merely for flavor; it also acts as a natural tenderizer, although we must be mindful of its power.
Crafting the Charred Citrus Marinade: A Symphony of Flavors
Building our marinade is a ritual, a layering of aromatic ingredients that will ultimately transform humble chicken into a culinary superstar. Beyond the achiote and citrus, we introduce a robust supporting cast of garlic, cumin, oregano, and chiles.
We begin by unlocking the deeper flavors of some of our aromatics through a gentle charring. Imagine placing whole garlic cloves, a quartered onion, and perhaps a few dried or fresh chiles (like guajillo or ancho for depth, or a jalapeño for a touch of heat) directly over an open flame or in a dry, hot pan until they soften and develop beautiful, smoky char marks. This simple step elevates their inherent sweetness and complexity, adding an extra dimension to the marinade that raw ingredients simply cannot achieve. Once charred and slightly cooled, these aromatics are ready to join the party.
Next, into our blender or food processor go the charred aromatics, a generous amount of achiote paste, the freshly squeezed orange and lime juices, a healthy dose of minced garlic (in addition to any charred garlic), ground cumin, dried oregano (Mexican oregano, if you can find it, offers a more pungent, earthy flavor), and a pinch of salt and black pepper. Some recipes might call for a splash of vinegar or a touch of honey, but for true authenticity, the focus remains squarely on the achiote, citrus, and spices. Blend everything until it forms a smooth, vibrant paste. The color should be a deep, inviting brick-red, a promise of the deliciousness to come.
The Art of Marinating: Time and Tenderness
Now comes the crucial step of introducing our chicken to this magnificent marinade. While a whole chicken cut into pieces is traditional, you can certainly use bone-in, skin-on chicken thighs, drumsticks, or even a spatchcocked whole chicken for more even cooking. We find that bone-in pieces impart more flavor and tend to stay juicier.
Place your chosen chicken pieces in a large, non-reactive bowl or a sturdy zip-top bag. Pour the entire marinade over the chicken, ensuring every piece is thoroughly coated. Massage the marinade into the chicken, making sure it reaches every nook and cranny. This hands-on approach ensures maximum flavor penetration.
Now, for the waiting game. Marinating time is critical. We aim for a minimum of 3–4 hours, allowing the flavors to truly meld and the citrus to work its magic. However, we must exercise caution; while citrus is a tenderizer, prolonged exposure, exceeding 12–24 hours, can have the opposite effect, breaking down the meat fibers too aggressively and resulting in a mealy texture. So, aim for that sweet spot, ideally overnight or for at least 8 hours, but no more than 12. This window ensures maximum flavor and optimal tenderness without compromising the chicken's integrity.
A quick but important tip: If you plan to use some of the marinade as a finishing sauce or for basting during cooking, be sure to reserve a portion of it before it comes into contact with the raw chicken. This prevents any cross-contamination and allows you to safely enjoy the full flavor of your marinade.
The Thrill of the Grill: Mastering Two-Zone Cooking
The grill is where our pollo asado truly comes to life, where the intense heat transforms the marinated chicken into a succulent, charred masterpiece. The key to achieving that perfect balance of cooked-through tenderness and beautifully charred exterior lies in mastering the art of two-zone grilling.
Before we place our chicken on the grates, it's essential to prepare the chicken. Gently wipe or shake off any excess marinade from the chicken pieces. While the marinade is packed with flavor, too much liquid on the surface will prevent proper searing and can cause burning or undesirable flare-ups. A light coating is all we need.
Setting Up Your Grill for Success
Charcoal Grill: This is our preferred method for that unbeatable smoky flavor. Arrange your hot coals to create two distinct zones: one side with a concentrated pile of coals for direct, high heat, and the other side with fewer or no coals for indirect, medium heat. The overall grill temperature should hover around 400–450 °F (204–232 °C).
Gas Grill: Achieving two-zone cooking on a gas grill is straightforward. Preheat all burners on high for about 10–15 minutes to get the grates scorching hot. Then, turn off one or two burners on one side to create your indirect heat zone, while keeping the remaining burners on medium to medium-high for direct heat. Aim for that same 400–450 °F (204–232 °C) range.
Oven Broiler (Adaptation): While not truly "asado" (grilled), an oven broiler can mimic some of the charring effects. Preheat your broiler to high. Position an oven rack about 6-8 inches from the heating element. This method cooks primarily with direct radiant heat.
Stovetop Grill Pan (Adaptation): For those without outdoor grilling options, a heavy-duty cast iron grill pan can still deliver delicious results. Heat the grill pan over medium-high heat until it's smoking lightly. This will provide intense direct heat.
Grilling Technique: Patience and Precision
Once your grill is properly set up and preheated, it's time to cook.
Start by placing the chicken pieces skin-side down on the cooler, indirect heat side of the grill. This allows the chicken to cook through gently without burning the marinade or skin. Close the lid and let it cook, turning occasionally, until the chicken is mostly cooked through. This initial stage is about achieving an internal temperature without over-charring the exterior.
Once the chicken is nearly cooked, with an internal temperature nearing 160 °F (71 °C), it's time to move it to the direct, high-heat side of the grill. Here, we'll achieve that glorious char and crisp skin. Keep a close eye on it, as the direct heat works quickly. Flip the chicken frequently to ensure even charring and to prevent burning. We're looking for beautiful, dark grill marks and a slightly blackened, crisp skin.
The ultimate goal, regardless of your cooking method, is to reach an internal temperature of 165 °F (74 °C) in the thickest part of the chicken, as recommended by FoodSafety.gov. A reliable instant-read thermometer is your best friend here.
For the oven broiler, place the chicken on a broiler-safe pan. Broil for 5-7 minutes per side, watching very closely to prevent burning, until the internal temperature reaches 165 °F (74 °C) and the skin is nicely charred. You may need to adjust the rack height or broiler time depending on your oven.
With a stovetop grill pan, cook the chicken for approximately 5-6 minutes per side over medium-high heat, pressing down gently to ensure good contact with the pan for those coveted grill marks. You might need to finish it in a preheated oven (around 375 °F or 190 °C) to ensure it cooks through completely without burning the exterior, again aiming for that 165 °F (74 °C) internal temperature.
The Indispensable Rest: Juiciness Guaranteed
The moment your pollo asado reaches that perfect internal temperature and boasts a stunning char, resist the urge to immediately carve into it. This is perhaps one of the most overlooked, yet vital, steps in grilling.
Carefully transfer the cooked chicken to a clean cutting board or serving platter. Loosely tent it with aluminum foil and let it rest for 5–10 minutes. This resting period is not merely a suggestion; it's a non-negotiable step for truly juicy chicken. During cooking, the muscle fibers contract, pushing the juices to the center of the meat. If you cut into it immediately, those precious juices will spill out onto your board, leaving you with dry chicken. Resting allows the muscle fibers to relax and reabsorb those juices, ensuring every bite is succulent and flavorful.
Serving Suggestions: Completing the Feast
Once rested, your authentic pollo asado is ready to be devoured. Carve it into serving pieces, if desired, or serve the pieces whole. The vibrant color and intoxicating aroma will already be a feast for the senses.
Traditional accompaniments are simple yet perfect. Think warm corn tortillas for making tacos, a refreshing salsa (salsa verde or pico de gallo are excellent choices), a sprinkle of fresh cilantro, and perhaps some pickled red onions or a squeeze of extra lime juice. A side of Mexican rice and refried beans would complete the classic experience. The beauty of pollo asado is its versatility; it shines equally well as the centerpiece of a meal or as the star ingredient in tacos, burritos, or even salads.
To Wrap Things Up: A Culinary Journey Rewarded
Making authentic pollo asado is more than just following a recipe; it's an embrace of tradition, a celebration of bold flavors, and a testament to the transformative power of heat and thoughtful preparation. From the earthy depth of achiote to the bright tang of citrus, each ingredient plays a vital role in creating a dish that is both complex and profoundly satisfying.
By meticulously crafting the marinade, understanding the nuances of marinating time, and mastering the art of two-zone grilling (or adapting with care), you're not just cooking chicken; you're creating an experience. The patience involved in marinating, the attentiveness required at the grill, and the discipline to allow for that crucial resting period all culminate in a culinary reward that is truly exceptional. So, fire up your grill, gather your ingredients, and prepare to be transported to the heart of Mexican cuisine with every succulent, charred bite of your homemade Pollo Asado. We promise, the effort is immeasurably worth it.