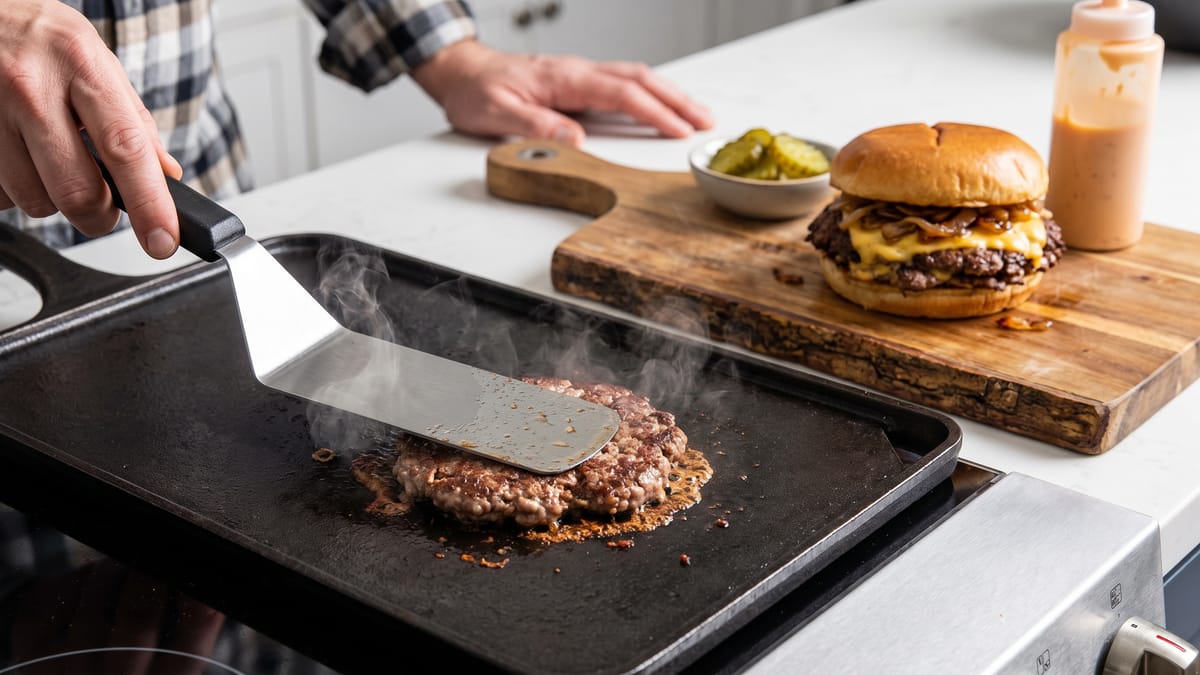
How to Make a Smashburger at Home With Crispy Edges and a Juicy Center
Imagine a burger so utterly perfect, it whispers promises of culinary bliss with every bite. We're talking about the smashburger, a seemingly simple creation that, when executed with precision, transcends the ordinary. It's not just a burger; it's an experience, a symphony of textures and flavors. The hallmark of a truly great smashburger lies in its glorious dichotomy: edges that shatter with an almost chip-like crispness, giving way to a profoundly juicy, savory interior. This isn't some mythical beast found only in high-end diners; it's a masterpiece you can craft in your own kitchen. We're here to demystify the process, to guide you through each crucial step, ensuring your homemade smashburger rivals, and perhaps even surpasses, your favorite restaurant rendition. Prepare yourselves, because we're about to unlock the secrets to smashburger perfection.
The Philosophy of the Smash: Why It Works
Before we dive into the "how," let's understand the "why." The smashburger technique isn't just a gimmick; it's a scientific marvel in the world of culinary physics. When a loose ball of ground beef meets a screaming-hot surface with significant force, something magical happens. The entire surface area of the patty, not just its edges, makes immediate and intimate contact with the searing metal. This instant, pervasive contact is the crucible for what chefs call the Maillard reaction.
The Maillard reaction is a complex chemical process that occurs when amino acids and reducing sugars in food react under heat, creating hundreds of new flavor compounds and a beautiful browning. Think of the crust on a perfectly roasted chicken, the golden hue of toasted bread, or the rich aroma of seared scallops; these are all testaments to the Maillard reaction. In a smashburger, this reaction is supercharged across the entire flat surface of the patty. The immense pressure spreads the meat thinly, maximizing the contact points and creating an incredibly broad canvas for that coveted, deeply browned crust. This crust isn't just for texture; it's an explosion of umami, a depth of flavor that a thicker, less-smashed patty simply cannot achieve.
Furthermore, the rapid searing develops a flavorful crust while the interior remains incredibly moist and tender. While the exterior develops that magnificent crust, the interior cooks quickly but remains incredibly moist and tender. It’s a delicate balance, a race against time, where the intense heat works its magic to create contrast: crisp outside, succulent inside. This is the essence of smashburger supremacy, and it’s entirely within your grasp.
Choosing Your Canvas: The Right Beef for the Job
The foundation of any great burger is, naturally, the beef. For a smashburger, we're not just looking for any ground beef; we need the right kind, specifically 80/20 ground chuck. This ratio, meaning 80% lean meat and 20% fat, is non-negotiable for smashburger success.
Why 80/20? The fat content is crucial for several reasons. Firstly, it provides flavor and moisture. As the fat renders during cooking, it bastes the patty from within, contributing to that desirable juiciness. Secondly, and perhaps more importantly for the smashburger technique, the fat helps create that glorious, lacy, crispy edge. As the thin patty cooks, the fat renders and sizzles, essentially frying the very thin edges of the meat, transforming them into delicate, brittle shards of flavor. Leaner beef, like 90/10, simply won't have enough fat to achieve this distinctive texture and flavor profile. It will dry out, and you'll miss out on those coveted crispy bits.
When you're at the butcher counter or grocery store, look for ground chuck labeled 80/20. If you can, ask your butcher to grind it fresh for you; freshly ground beef often has a superior texture and flavor. Avoid pre-formed patties or overly lean ground beef. We want that perfect balance of meat and fat to build our smashburger masterpiece.
The Art of the Ball: Preparing Your Patties
Once you have your 80/20 ground beef, the preparation is surprisingly simple, yet critical. The key here is to keep things loose. We are not making dense, compact meatballs.
Gently portion your ground beef into loose balls, each weighing approximately 3 to 4 ounces, which is about 85 to 115 grams. Resist the urge to press or pack the meat tightly. The looser the ball, the more surface area will be exposed when smashed, which directly translates to more of those delightful crispy, lacy edges. Think of it like a loosely formed snowball, not a tightly packed one. Overworking the meat will make your patties tough and dense, hindering the development of that signature lacy crust.
We want the beef to be cold when it hits the pan, so once you've formed your loose balls, you can place them on a plate and keep them in the refrigerator until you're ready to cook. This also helps them hold their shape just enough until they meet the hot surface. No need for fancy binders or seasonings at this stage; pure, unadulterated ground beef balls are what we're after. The seasoning comes later, at the opportune moment.
The Inferno: Achieving the Perfect Surface Temperature
This is perhaps the most critical component of smashburger success: a screaming-hot cooking surface. Forget medium-high; we're aiming for molten lava levels of heat. A cast-iron skillet or a heavy-bottomed stainless-steel pan is your best friend here. These materials excel at retaining and distributing intense heat, mimicking the conditions of a commercial griddle.
Place your chosen pan over high heat and let it preheat for a good 5 to 10 minutes, or even longer, until it is unequivocally, undeniably hot. How hot, exactly? We're looking for a surface temperature between 450 and 525°F. You can test this by flicking a few drops of water onto the surface; if they immediately skitter across the pan and vanish in a puff of steam, you're in the zone. If they just sit there and boil, it's not hot enough. Patience is paramount here. Do not rush this step. An insufficiently hot pan will lead to a steamed burger, not a smashed one with a glorious crust.
Crucially, do not add oil to the bare cast-iron or stainless-steel surface before smashing. The fat from the 80/20 ground beef will render out and provide all the lubrication needed for the patty to release cleanly. Adding oil at this stage can interfere with the direct metal-to-meat contact that is so vital for crust development.
The Moment of Truth: The Smash Itself
With your pan radiating intense heat and your loose beef balls at the ready, it's time for the signature move. This is where the "smash" in smashburger truly comes to life.
Carefully place one or two beef balls onto the screaming-hot, dry pan, ensuring you don't overcrowd the surface. Immediately, and we mean immediately, upon contact, place a piece of parchment paper over the beef ball. This prevents sticking to your smashing tool. Now, with a sturdy, flat spatula or a bacon press, apply firm, even pressure to flatten the beef ball down to about 1/8 to 1/4 inch thick. Hold that pressure for about 10 seconds. This initial, decisive smash is the only one you'll perform. Do not press again. The goal is maximum metal-to-meat contact across the entire patty, creating that expansive surface for the Maillard reaction.
Once smashed, remove your pressing tool and the parchment paper. Now, and only now, season the exposed side liberally with salt and freshly ground black pepper. Salting the raw beef earlier can draw out moisture and densify the patty, which we want to avoid. Seasoning after smashing ensures the salt and pepper adhere to the fresh surface and contribute to the crust's flavor.
The Cook: First Side Perfection
Now, let the heat do its work. Resist the urge to peek, poke, or move the patty. This first side is where the magic truly happens, where that incredible crust develops. Cook the first side undisturbed for 1 to 2 minutes.
How do you know it's ready? Look for tell-tale signs. The edges of the patty will become deeply browned and lacy, almost delicate. You'll also start to see juices beading up on the top surface of the patty. This indicates that the bottom has developed its magnificent crust and is ready for the flip. The aroma will be intoxicating, a rich, savory fragrance filling your kitchen. Trust your senses.
The Flip: Preserving the Crust
The flip is a critical maneuver that requires confidence and the right tool. Forget your flimsy plastic spatulas; you need a sturdy metal spatula or, even better, a bench scraper. The goal is to get under that precious crust without tearing it.
With a firm, decisive motion, slide your spatula or bench scraper firmly under the entire patty, getting as much of the crust as possible. Then, with a quick, confident flick of the wrist, flip the patty over. You should see a beautifully browned, deeply caramelized, and gloriously crispy surface. This is the hallmark of a perfectly executed smash.
The Finish: Cheese, Melty Goodness, and Internal Temperature
Immediately after flipping, place a slice of your favorite cheese on top of the sizzling patty. American cheese is a classic for its unparalleled melt, but cheddar or Monterey Jack also work wonderfully. The residual heat from the patty and the pan will quickly melt the cheese, allowing it to cascade over the edges and meld beautifully with the crust. Cook the second side for a mere 30 to 60 seconds, just long enough for the cheese to melt into a gooey, delicious blanket.
While the visual cues are important, food safety is paramount. For ground beef, it must reach an internal temperature of 160°F (71°C) to kill harmful bacteria, according to USDA and FoodSafety.gov guidelines. Since these patties are thin and cook quickly, they typically reach this temperature easily, but if you have any doubts, a quick check with an instant-read thermometer inserted into the center of the patty will give you peace of mind.
Once the cheese is perfectly melted and the internal temperature is safe, carefully remove the patty from the pan and set it aside.
The Perfect Vessel: Toasting Your Buns
A magnificent smashburger deserves an equally magnificent bun. Potato buns are the gold standard for their soft texture, slight sweetness, and ability to hold up to the juicy patty without becoming soggy. Brioche buns are another excellent choice for similar reasons.
After you've cooked your patties, don't clean the pan. Those rendered beef fats and browned bits of flavor are culinary gold. Slice your potato or brioche buns in half and place them cut-side down directly into the same hot pan. Toast them for about 30 seconds to a minute, until they are beautifully golden brown and have soaked up some of that delicious beefy essence. This step adds another layer of flavor and texture, creating a delightful contrast with the crispy patty.
The Symphony of Flavors: Building Your Burger
Now for the grand finale, the assembly. A smashburger is best enjoyed immediately, as that incredible crust will soften over time. Speed and efficiency are key.
Start with the bottom half of your toasted bun. Spread a generous layer of your favorite sauce. Classic options include a tangy "special sauce" (a mix of mayo, ketchup, mustard, and relish), a simple ketchup and mustard combo, or even a spicy aioli. Carefully place your patty, with its perfectly melted cheese, on top of the sauce. Next, add your fresh toppings. Thinly sliced red onion provides a crisp bite and pungent flavor. Dill pickle slices offer a crucial acidic counterpoint that cuts through the richness of the beef and cheese. You might also consider a slice of ripe tomato or some crisp lettuce, though many smashburger purists prefer to keep it simple to let the beef shine. Finally, crown your masterpiece with the top half of the toasted bun.
Serve immediately, and prepare for an explosion of flavor and texture.
Putting It All Together
Making a smashburger at home is a culinary endeavor that rewards precision, patience, and a healthy dose of heat. We've journeyed through the crucial steps: selecting the right 80/20 ground beef, forming loose, uncompressed balls, preheating your cast-iron or stainless-steel pan to a blistering 450-525°F, and executing that decisive, single smash within seconds of the meat hitting the surface. We've emphasized the importance of seasoning after the smash, cooking the first side undisturbed until those lacy edges emerge, and flipping with confidence to preserve that hard-won crust. The quick melt of cheese, the safe internal temperature of 160°F, and the purposeful toasting of a potato bun in the beef drippings all contribute to the final, irresistible creation.
This isn't just about cooking a burger; it's about understanding the science and artistry behind creating a truly exceptional eating experience. The Maillard reaction, the crispy edges, the juicy center, the perfect meld of cheese and bun, all come together in a symphony of flavor and texture that is uniquely smashburger. With these techniques in your arsenal, you're not just making a meal; you're crafting a memory, a moment of pure, unadulterated burger bliss. So gather your ingredients, fire up that pan, and prepare to elevate your home cooking to new, deliciously crispy heights. Enjoy the smash.
Sources
- • Smash Burgers Recipe - NYT Cooking
- • Four Tested Moves to Perfect Smash Burgers at Home
- • How Do You Cook A Smashburger? | Crispy Edges At Home
- • The Sear & Smash Technique for Better Smash Burgers | Blog
- • How to Make Perfect Smash Burgers for Your Summer Cookout
- • Smashburgers: Crispy Edges and Juicy Center - Smokin' and ...