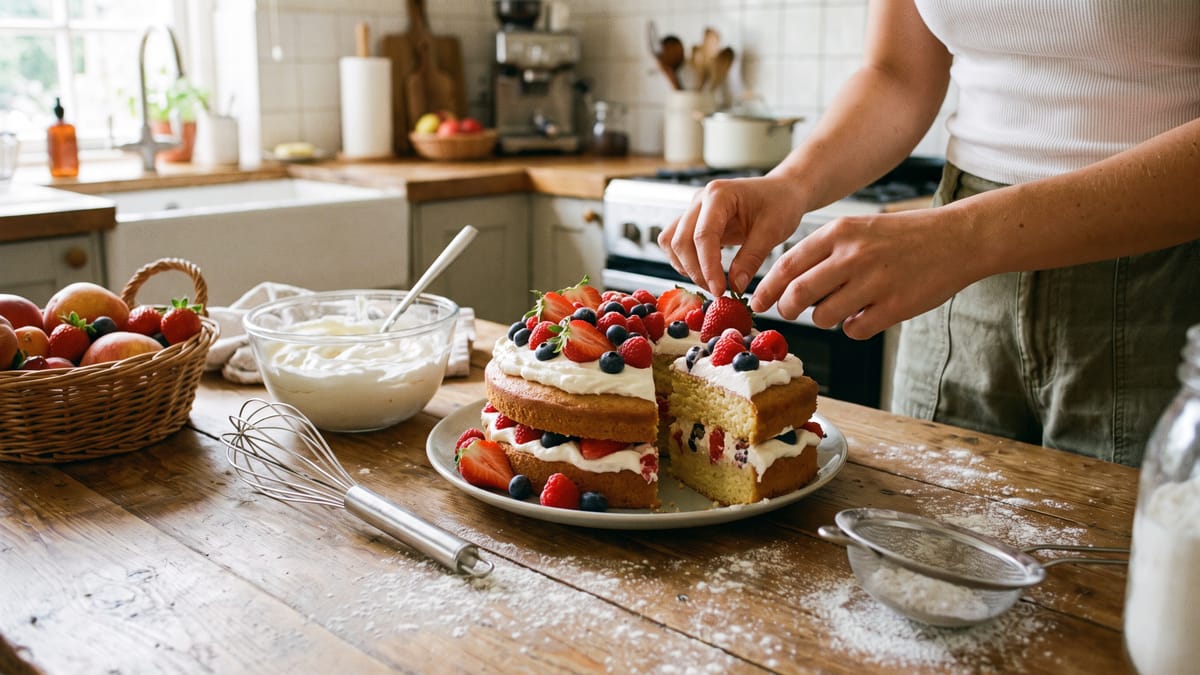
How to Make a Simple Fruit and Cream Cake at Home
There's something undeniably magical about a simple fruit and cream cake. It evokes memories of sun-drenched picnics, festive gatherings, and the sheer joy of a perfectly balanced bite. Unlike its more elaborate counterparts, this cake champions understated elegance, allowing the pure flavors of fresh fruit and velvety cream to sing alongside a tender, airy sponge. It's a dessert that feels both celebratory and comforting, a true testament to the beauty of well-executed fundamentals. Today, we're embarking on a delightful journey to master this classic, breaking down each essential component so you can confidently create a show-stopping cake right in your own kitchen. We’ll delve into the secrets of a perfect sponge, the art of stabilizing whipped cream, the wisdom behind choosing the right fruit, and the finesse required for impeccable assembly. Prepare to elevate your home baking to new, delicious heights.
The Foundation: Crafting Your Perfect Sponge Cake
The heart of any great fruit and cream cake is a light, tender sponge. This isn't a dense, heavy cake; it's designed to be airy, almost ethereal, providing a delicate counterpoint to the richness of the cream and the freshness of the fruit. There are a couple of classic methods to achieve this, each with its own charm and subtle differences in texture. We'll explore the creaming method and the whisking method, giving you the tools to choose your preferred path to sponge cake perfection.
The Creaming Method: A Classic for Tender Crumb
The creaming method is a time-honored technique that yields a wonderfully tender and slightly more robust sponge. It's often the go-to for many home bakers, and for good reason. The process begins with softened butter and sugar, which are beaten together until they transform into a pale, fluffy, and voluminous mixture. This aeration is crucial, as it traps air, contributing to the cake's lift and delicate crumb. We want to ensure our butter is truly softened, not melted, so it can properly emulsify with the sugar.
Once the butter and sugar are beautifully creamed, the eggs are introduced, one at a time. This gradual addition is key; it allows each egg to fully incorporate into the mixture without curdling. Room-temperature eggs are absolutely essential here. If your eggs are cold, they can cause the butter mixture to seize, leading to a less uniform batter and a denser cake. The warmth helps them emulsify seamlessly, contributing to maximum volume and a stable foam. After each egg is added, we beat until it's fully combined and the mixture looks light and fluffy again.
Finally, self-raising flour is gently folded into the butter and egg mixture. The "gently" part cannot be stressed enough. Overmixing at this stage develops the gluten in the flour, which can lead to a tough cake. We want to preserve all that precious air we've worked so hard to incorporate. We fold until just combined, ensuring no streaks of flour remain. The batter at this point should have a 'dropping consistency,' meaning it falls off the spoon in a soft dollop. If it seems a little too thick, a tiny splash of milk can be stirred in to achieve the ideal texture.
Once your batter is ready, it's divided evenly between prepared 18 cm tins. We bake these beauties at 180°C (160°C fan/Gas 4) for approximately 20–25 minutes. The true test of doneness is when an inserted skewer comes out clean. This indicates the cake is cooked through and ready to emerge from the oven. Immediately upon removing them, we carefully invert the baked cakes onto an elevated wire rack. This simple step is a game-changer; it prevents the cake from sinking as it cools, maintaining its lovely, even structure. We allow them to cool completely on the rack before we even think about assembling our cake. Patience is a virtue in baking, and a fully cooled sponge prevents the cream from melting prematurely.
The Whisking Method: For an Airier, Lighter Sponge
For those who prefer an even lighter, more delicate crumb, the whisking method, sometimes called a genoise or hot milk sponge, is an excellent choice. This method relies heavily on the aeration of eggs and sugar, often without the addition of butter directly into the main batter.
In the classic whisked sponge, eggs and sugar are whisked together over a bain-marie, or simmering water bath, until they become thick, pale, and significantly increased in volume. The gentle heat helps the sugar dissolve and allows the eggs to achieve a remarkably stable and voluminous foam. This foam is the primary source of leavening, giving the cake its characteristic lightness. Once the egg mixture reaches the desired ribbon stage, where it falls in a thick ribbon from the whisk, it's removed from the heat.
Then, the flour, typically plain flour, is carefully folded into the aerated egg mixture. Again, the emphasis is on gentle folding to retain as much air as possible. Sometimes, a small amount of melted butter is folded in at the very end to add richness and moisture, but this is done with extreme care to avoid deflating the batter.
A variation that offers a wonderfully moist and fine-crumbed texture is the hot milk sponge. In this method, milk and butter are heated together until the butter melts. A portion of the main batter, which has been made by whisking eggs and sugar, is then whisked into this warm milk and butter mixture. This tempered mixture is then gently folded back into the remaining egg batter. This technique helps to distribute the fats evenly and create a more tender, moist result without sacrificing the delicate structure.
Regardless of the whisking method chosen, the baking temperature and doneness test remain similar to the creaming method. The goal is always a golden-brown, springy cake that tests clean with a skewer. And just like with the creaming method, cooling completely on a wire rack is non-negotiable before proceeding to the next steps.
The Cloud-Like Filling: Stabilizing Whipped Cream
What's a fruit and cream cake without truly magnificent whipped cream? It's the luscious, cool counterpoint to the sponge and the perfect bed for fresh fruit. However, plain whipped cream can sometimes be a bit temperamental, prone to weeping or deflating, especially when it's going to be holding up fruit and cake layers. The secret to a robust, yet still light and airy, whipped cream lies in stabilization. This ensures our cake remains pristine, even after a few hours in the refrigerator.
The Gelatin Method: For Ultimate Stability
One of the most reliable ways to stabilize whipped cream is by using gelatin. It provides an invisible structure that keeps the cream lofty and prevents it from becoming watery. The process is straightforward, but precision is key.
First, we dissolve a small amount of gelatin in a little cold water. This is called "blooming" the gelatin; it allows the granules to hydrate and soften. Once bloomed, we gently melt the gelatin. This can be done by placing the small bowl over a pot of simmering water, or by giving it a very brief zap in the microwave, being careful not to overheat it. We want it fully liquid and clear.
Next, we take a small portion of our cold heavy cream and whisk it into the melted gelatin. This step is crucial for tempering; it helps to cool down the gelatin mixture without shocking it, preventing it from seizing into solid strands. We ensure this gelatin-cream mixture is completely cooled, ideally to room temperature or slightly cooler, but not set. If it sets, it will create lumps in our final whipped cream.
While the gelatin mixture cools, we can prepare our main batch of whipped cream. For the best results, we start with very cold heavy cream, ideally straight from the refrigerator. Even better, we can chill our mixing bowl and whisk attachment in the freezer for 15–20 minutes before whipping. The cold environment significantly aids in achieving stiff peaks quickly and efficiently. We whip the cream, often with a touch of sugar and vanilla, until it forms firm peaks.
Once our main cream is whipped and the gelatin mixture is cool, we gently fold the cooled gelatin-cream mixture into the whipped cream. We do this carefully to avoid deflating the air we've incorporated. The result is a beautifully stable, yet still light and pillowy, whipped cream that will hold its shape beautifully in our cake. This method is particularly excellent for cakes that need to sit out for a little while or for those requiring more structural integrity.
Chilling Equipment: A Simple Boost
Even without gelatin, we can significantly improve the stability of our whipped cream by simply chilling our equipment. As mentioned, placing the mixing bowl and whisk in the freezer for 15–20 minutes before whipping makes a remarkable difference. The cold metal helps the fat globules in the cream solidify faster and more efficiently, allowing them to trap air more effectively and create a firmer, more stable foam. Always start with very cold heavy cream, straight from the fridge, for the best results. While this method won't offer the same long-term stability as gelatin, it’s often sufficient for a cake that will be served within a few hours and kept refrigerated.
The Jewels: Choosing Fruit That Won't Make Your Cake Soggy
The fruit is the vibrant, fresh element that truly elevates a simple cream cake. However, not all fruits are created equal when it comes to cake fillings. Some fruits release a significant amount of moisture, which can quickly turn a delicate sponge and luscious cream into a soggy mess. The key is to select fruits that are relatively low in moisture and hold their shape well, or to prepare them in a way that minimizes their liquid contribution.
Berries: The Unsung Heroes
For a classic fruit and cream cake, fresh berries are often the ideal choice. Raspberries and strawberries, in particular, are excellent candidates. They offer a delightful balance of sweetness and tartness, and their relatively firm structure means they won't release excessive liquid into the cake layers.
When using fresh raspberries or strawberries, we simply wash them gently and pat them thoroughly dry. Any excess moisture on the surface can contribute to sogginess. We can then mix them directly into our stabilized whipped cream before spreading it onto the cold sponge layers. This ensures an even distribution of fruit throughout the filling and allows the cream to cushion and protect the sponge from any minor moisture release.
Other berries like blueberries or blackberries can also work well, especially if they are firm and ripe. We might consider slicing larger strawberries or halving smaller ones to ensure a pleasant texture in each bite.
Fruits to Approach with Caution (or Preparation)
Some fruits, while delicious, require a bit more consideration or preparation to prevent a soggy cake.
- • Stone Fruits (peaches, plums, nectarines): These can be quite juicy. If using them, we would slice them thinly and perhaps pat them dry with paper towels. A light dusting of cornstarch or a quick sauté to evaporate some moisture could also be options, although this adds a step.
- • Melons: Generally, melons are too watery for a direct cake filling. Their high water content would almost certainly lead to a very soggy cake.
- • Citrus Segments: While bright and flavorful, citrus fruits can release juice. We would need to carefully segment them, removing all pith and membrane, and pat them very dry.
- • Canned Fruits: These are often packed in syrup, which is a definite no-go for a sponge cake. If we were to use canned fruit, we would drain it meticulously, rinse it, and pat it extremely dry. However, fresh is always preferred for flavor and texture.
The Grand Finale: Assembling for Good Texture and Presentation
With our perfectly baked sponge layers, exquisitely stable whipped cream, and carefully chosen fresh fruit, we're ready for the most satisfying part, assembling our masterpiece. This stage is where all our diligent work comes together, creating a cake that is not only delicious but also visually appealing and structurally sound.
Cooling is Paramount
Before we even think about spreading cream or layering fruit, we must reiterate a crucial point: our sponge cake layers must be cooled completely on a wire rack. This isn't just a suggestion; it's a fundamental rule. If the cake layers are even slightly warm, they will melt the whipped cream on contact, leading to a runny, unstable filling and a very disappointing result. Patience at this stage truly pays off.
The Art of Layering
Once our sponge layers are thoroughly chilled, we can begin. We start by placing the first cake layer on our serving plate or cake stand. If we have a particularly flat bottom layer, we might choose that as our base.
Next, we apply a generous, even layer of our stabilized whipped cream. If we're incorporating fruit directly into the cream, as with raspberries or strawberries, we would have already mixed them in. We spread the cream right to the edges, creating a uniform layer. The thickness of the cream layer is a matter of preference, but we aim for a balance that complements the cake and fruit without overwhelming it.
Then, we gently place the second cake layer on top, aligning it carefully. We press down very lightly to ensure it's settled. We repeat the process with another layer of cream and fruit, and then finally, the top cake layer.
For the exterior, we can opt for a rustic, "naked" cake look, allowing glimpses of the sponge and filling, or apply a final, smooth layer of whipped cream all around the sides and top. If we're aiming for a perfectly smooth finish, an offset spatula is our best friend, allowing us to spread and smooth the cream with ease. We can then decorate the top with additional fresh fruit, perhaps a few whole berries or fanned slices, for a beautiful presentation.
The Chilling Period: Non-Negotiable Setting Time
Once our cake is fully assembled and adorned, the final, yet arguably most important, step is chilling. The assembled cake absolutely must be chilled for at least 6 hours, or even better, overnight. This extended chilling period allows the whipped cream filling to fully set and firm up, thanks to the stabilizer we've used. It also gives the flavors a chance to meld and harmonize, ensuring that when we slice into it, we are met with clean, distinct layers and a perfectly stable structure. Trying to slice the cake too soon will likely result in a messy, collapsed slice. A patient chill is the secret to a beautifully presented and structurally sound fruit and cream cake.
To Sum Things Up
Crafting a simple fruit and cream cake at home is a wonderfully rewarding endeavor that showcases the beauty of foundational baking techniques. We've explored the nuances of creating a tender sponge, whether through the time-honored creaming method or the lighter whisking method, emphasizing the critical role of room-temperature eggs and gentle folding. We've demystified the art of stabilizing whipped cream, highlighting the effectiveness of gelatin for unwavering structure and the simple power of chilled equipment. Our journey also included the crucial aspect of fruit selection, guiding us toward low-moisture champions like berries that promise vibrant flavor without the risk of sogginess. Finally, we've walked through the meticulous steps of assembly, stressing the paramount importance of completely cooled cake layers and a generous chilling period to ensure a cake that is not only delicious but also beautifully presented and wonderfully stable. Armed with these insights and techniques, you are now ready to bake a fruit and cream cake that will undoubtedly impress and delight, a testament to the fact that sometimes, the simplest pleasures are truly the most exquisite. Happy baking.