How to Conduct a "Pantry Audit" to Save Money and Waste Less
In today's world, where the cost of living continues to rise and sustainability is at the forefront of our minds, conducting a pantry audit is an invaluable practice for any home cook. This simple yet...
How to Conduct a "Pantry Audit" to Save Money and Waste Less
Introduction
In today's world, where the cost of living continues to rise and sustainability is at the forefront of our minds, conducting a pantry audit is an invaluable practice for any home cook. This simple yet effective process allows you to assess what you have, use what you buy wisely, and ultimately save money while reducing food waste. In this guide, we'll walk you through the steps of performing a pantry audit, share practical tips for organizing your kitchen, and provide actionable strategies to make the most of your ingredients.
Understanding the Importance of a Pantry Audit
Before diving into the "how," let's discuss why a pantry audit is essential:
- • Save Money: Knowing what you have prevents unnecessary purchases. You’ll avoid buying duplicates of items you already own.
- • Reduce Waste: By utilizing ingredients before they expire, you minimize food waste and contribute to a healthier planet.
- • Enhance Creativity: A well-organized pantry encourages creativity in the kitchen. You’ll be inspired to whip up new dishes based on what you already have.
- • Meal Planning: A clear view of your inventory makes meal planning easier and more efficient.
Step 1: Gather Your Supplies
Before you begin the audit, gather the following supplies:
- • Notepad and Pen: For taking notes on what needs to be used up or what you might need to buy.
- • Containers or Bags: To group items, especially if you plan to donate or discard anything.
- • Labels: Useful for newly organized items, especially for bulk goods.
- • Cleaning Supplies: A cloth and some cleaning spray to wipe down shelves.
Step 2: Empty Your Pantry
Clear Everything Out
The first step in your pantry audit is to empty it completely. This allows you to see everything you have and gives you the chance to clean the shelves. As you remove items, group them into categories such as:
- • Grains (rice, pasta, oats)
- • Canned Goods (vegetables, beans, soups)
- • Spices and Condiments (oils, vinegars, sauces)
- • Snacks and Sweets (chips, candies, cookies)
- • Baking Essentials (flour, sugar, baking powder)
Step 3: Check Expiration Dates
Assessing Shelf Life
Once everything is out, it’s time to inspect each item for expiration dates. Here’s how to handle them:
- • Expired Items: Discard any expired products. If they’re still usable but nearing expiration, consider using them in your upcoming meals.
- • Short-Dated Items: Prioritize these in your meal planning.
- • Long-Dated Items: These can be organized for future use.
Step 4: Clean Your Pantry
Wipe Down Shelves
With everything out, take the opportunity to clean your pantry. Use a gentle cleaning spray and a cloth to wipe down the shelves. This helps eliminate dust and spills that may have accumulated over time.
Step 5: Organize Your Pantry
Sort and Store
As you put items back, consider the following organization methods:
- • By Category: Group similar items together (grains, canned goods, etc.).
- • By Frequency of Use: Place items you use often at eye level and those you use less frequently on higher or lower shelves.
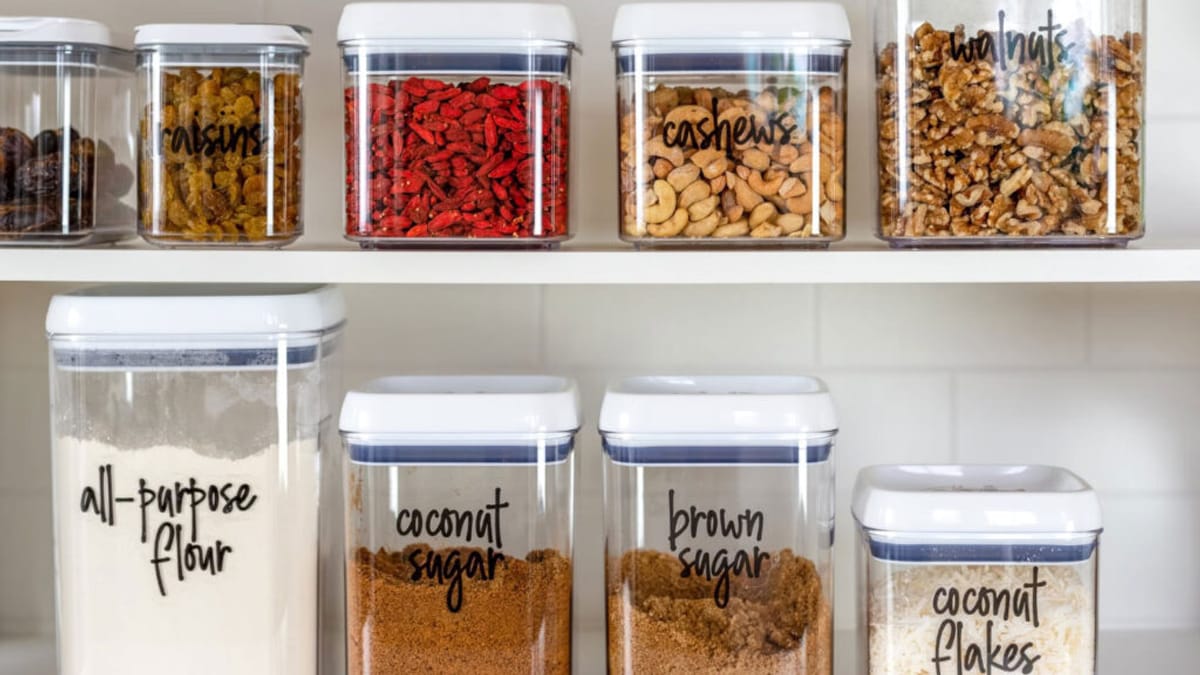
- • Use Clear Containers: For bulk items, clear containers can help you see what you have at a glance.
Simple Storage Solutions
| Category | Storage Ideas |
|---|---|
| Grains | Glass jars or clear bins |
| Canned Goods | Stackable can organizers |
| Spices | Magnetic spice jars or racks |
| Baking Essentials | Airtight containers for flour and sugar |
Step 6: Create a Pantry Inventory
Document What You Have
After reorganizing, create a pantry inventory. This can be a simple list or a spreadsheet that includes:
- • Item Name
- • Quantity
- • Expiration Date
| Item | Quantity | Expiration Date |
|---|---|---|
| Brown Rice | 2 lbs | 12/2023 |
| Canned Tomatoes | 5 cans | 06/2025 |
| Olive Oil | 1 bottle | 11/2024 |
Step 7: Plan Your Meals
Utilize Your Inventory
With your pantry inventory in hand, start planning your meals around the items you need to use up. Here are some strategies:
- • Weekly Meal Plan: Choose recipes that utilize multiple items from your pantry.
- • Theme Nights: Create themed nights (like Taco Tuesday) that incorporate pantry staples.
- • Leftover Nights: Designate a night for using up remaining ingredients.
Step 8: Make a Shopping List
Fill in the Gaps
After planning meals, make a shopping list for the items you need to restock. To avoid impulse purchases, stick to this list when shopping.
Step 9: Regular Maintenance
Schedule Future Audits
To keep your pantry in tip-top shape, schedule regular audits—ideally every 3-6 months. This will help you stay aware of what you have, what you need, and how much you’re spending over time.
Bonus Tips for Reducing Food Waste
- 1. Creative Cooking: Use up odds and ends in stir-fries, soups, or casseroles.
- 2. Preserve: If you have excess produce, consider canning or freezing it for later use.
- 3. Compost: Scraps and expired items can often be composted instead of thrown away.
Conclusion
Conducting a pantry audit is a smart, practical way to save money and reduce food waste while enhancing your cooking experience. By following these steps—clearing out your pantry, checking expiration dates, organizing your ingredients, and planning meals—you can create a more efficient kitchen environment. Remember, the goal is not just to tidy up but to cultivate habits that promote sustainability and creativity in cooking. So roll up your sleeves, take a deep breath, and enjoy the process of transforming your pantry into a well-organized haven for culinary inspiration! Happy cooking!